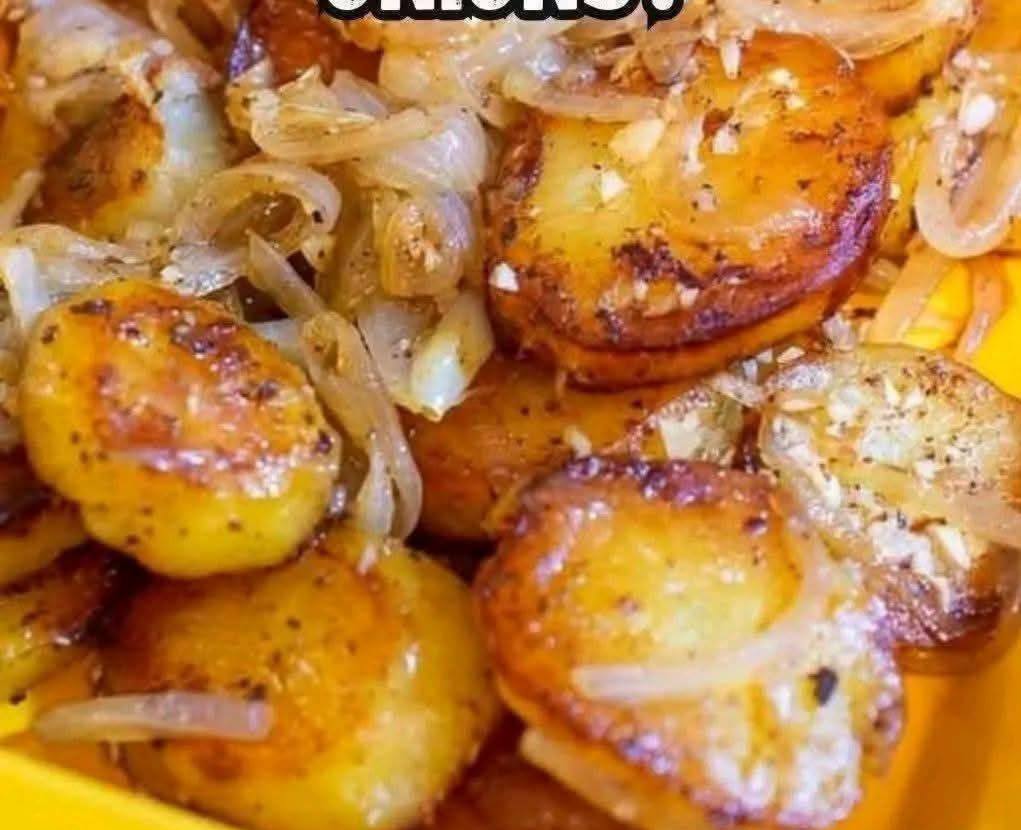
Few side dishes carry the same universal appeal as a piping hot skillet of crispy fried potatoes and onions. If you’ve ever walked into a kitchen filled with the aroma of onions caramelizing alongside gold-crusted potatoes, you know it is the ultimate comfort food. It’s a staple that bridges the gap between a hearty countryside breakfast and a rustic steakhouse dinner.
Yet, achieving that perfect balance—potatoes with a shatteringly crisp exterior and a fluffy, creamy interior, tossed with sweet, tender onions that aren’t burnt to a crisp—can be surprisingly elusive. Too often, home cooks end up with a greasy, mushy stir-fry or potatoes that are burnt on the outside while remaining stubbornly raw in the middle.
The secret to mastering this classic diner-style dish doesn’t require culinary acrobatics. Instead, it comes down to controlling starch, choosing the right fat, and timing the introduction of your onions perfectly. With a few foundational techniques, you can transform these humble root vegetables into a legendary side dish.
The Secret to the Perfect Crunch
My early attempts at frying potatoes were, frankly, a soggy disappointment. I used to chop them up, throw them straight into a hot pan with oil and raw onions, and hope for the best. The result was inevitably a starchy mess where the onions burned before the potatoes even fully cooked.
Through years of refining my technique as an experienced home cook, I discovered two non-negotiable rules for skillet success: par-cooking and starch removal. By lightly boiling the potato cubes first, you gelatinize the exterior starches. When those starches hit the hot fat later, they fry up into an incredibly crisp, durable crust while keeping the inside pillowy soft.
Furthermore, timing is everything. Onions contain far more natural sugar and moisture than potatoes, meaning they cook at a much faster rate. If you throw them into the skillet at the beginning, they will turn into bitter, black charcoal by the time your potatoes achieve a golden hue. By cooking them separately or introducing them in the final stage of frying, you get beautifully caramelized, sweet onions that complement the savory crunch of the potatoes perfectly.
Recipe Overview
- Prep Time: 15 minutes
- Cook Time: 25 minutes
- Total Time: 40 minutes
- Yield: 4–6 servings
- Difficulty: Easy
Ingredients You’ll Need
- Russet or Yukon Gold Potatoes: 2 lbs (about 4 large potatoes), peeled and cut into $\frac{3}{4}$-inch cubes
- Yellow Onion: 1 large, halved and sliced into $\frac{1}{4}$-inch thick half-moons
- High-Smoke Point Oil: 3 tablespoons (such as canola, vegetable, or avocado oil)
- Unsalted Butter: 2 tablespoons (for rich flavor and browning)
- Garlic Powder: 1 teaspoon
- Smoked Paprika: $\frac{1}{2}$ teaspoon (optional, for a subtle smoky depth)
- Fine Sea Salt and Freshly Cracked Black Pepper: To taste
- Fresh Chives or Parsley: Finely chopped, for garnish
Step-by-Step Instructions
Step 1: Remove Excess Starch
Place your cubed potatoes into a large bowl and rinse them under cold running water until the water runs completely clear. This washes away the excess surface starch that causes the potatoes to stick together and become gummy in the pan.
Step 2: The Par-Cook Method
Transfer the rinsed potatoes to a large pot and cover them with cold water by about an inch. Add a generous tablespoon of kosher salt to the water. Bring the pot to a boil over high heat. As soon as the water reaches a rolling boil, set a timer for exactly 3 minutes.
Why this matters: Par-boiling cooks the potato from the outside in just enough to soften the exterior layers. This ensures that the center of the potato gets perfectly tender during frying without requiring you to leave them in the frying pan so long that the outsides burn.
Step 3: Drain and Dry Completely
Drain the potatoes thoroughly in a colander. Spread them out onto a clean baking sheet lined with paper towels or a clean kitchen towel. Let them air-dry for 5 to 10 minutes.
Pro Tip: Moisture is the absolute enemy of crispiness. If you put wet potatoes into hot oil, they will steam instead of fry, ruining your chances of getting a glorious golden crust.
Step 4: Caramelize the Onions
While the potatoes dry, heat 1 tablespoon of the oil and 1 tablespoon of the butter in a large, heavy-bottomed skillet (cast iron is highly recommended) over medium heat. Add the sliced onions along with a pinch of salt. Cook, stirring occasionally, for 8 to 10 minutes until the onions are soft, translucent, and sporting beautiful golden-brown edges. Remove the onions from the skillet and set them aside on a plate.
Step 5: Fry the Potatoes
Wipe the skillet out lightly if needed. Turn the heat up to medium-high and add the remaining 2 tablespoons of oil and 1 tablespoon of butter. Once the butter is melted and foaming, add the dried potatoes in a single, even layer. If your skillet isn’t large enough to hold them all in one layer without crowding, fry them in two separate batches.
Step 6: Don’t Touch Them!
Let the potatoes fry undisturbed for 4 to 5 minutes before flipping or tossing.
Micro-Explanation: Resisting the urge to constantly stir is crucial. The potatoes need uninterrupted contact with the hot, oiled metal surface to build up that sought-after, deep golden-brown crust. If you stir too early, you break up the delicate edges and prevent the crust from forming.
Step 7: Flip and Season
Using a wide, flat spatula, carefully flip the potatoes to crisp up the other sides. Lower the heat to medium. Sprinkle the garlic powder, smoked paprika, sea salt, and black pepper evenly over the potatoes. Continue cooking for another 8 to 10 minutes, turning occasionally, until all sides are crispy and the centers are completely tender when poked with a fork.
Step 8: The Reunion
Return the cooked caramelized onions back into the skillet with the crispy potatoes. Toss everything together gently for 1 to 2 minutes so the flavors can marry and the onions can warm back through. Taste and add extra salt or pepper if desired. Garnish with fresh chives or parsley and serve immediately.
Common Mistakes & How to Avoid Them
- Crowding the Skillet: If you pile the potatoes three layers deep in a small pan, the moisture escaping from the bottom layers will trap steam, resulting in mushy, boiled potatoes. Always use a large 12-inch skillet or cook in batches.
- Using Only Butter: While butter provides incredible flavor, its milk solids burn quickly at the medium-high heat required to crisp potatoes. Combining butter with a high-smoke-point oil raises the overall burning threshold, giving you the best of both worlds.
- Frying Raw Potatoes Completely from Scratch: Skipping the par-boil means your potatoes will take twice as long to cook through, dramatically increasing the risk of uneven cooking and excessive oil absorption.
Ingredient Substitutions & Variations
- The Bacon Luxury: Swap out the vegetable oil entirely for leftover bacon grease. Fry up a few strips of bacon first, remove them, and use the rendered fat to cook your onions and potatoes. Crumble the crispy bacon back in at the very end.
- Peppers and Onions (Diner Style): Dice up a green or red bell pepper and sauté it right along with the onions in Step 4 for a classic “Potatoes O’Brien” flair.
- Herby Upgrade: Toss in a tablespoon of fresh, finely minced rosemary or thyme during the last 3 minutes of frying for a deeply aromatic, earthy profile.
Pro Tips for Skillet Success
- Go for Cast Iron: A well-seasoned cast iron skillet distributes and retains heat vastly better than thin non-stick pans, providing the intense, steady heat needed for a restaurant-grade sear.
- The Fluffy Interior Trick: If you find your potatoes are browning too fast on the outside but aren’t quite tender in the middle, cover the skillet with a lid for just 2 minutes during the middle of the frying process to trap a bit of heat, then remove it to finish crisping.
Frequently Asked Questions
Can I use red potatoes instead?
Absolutely. Red potatoes hold their shape incredibly well because they are waxy. However, because they have less starch than Russets or Yukon Golds, they won’t get quite as shatteringly crisp on the exterior.
Can I prep this dish the night before?
Yes. You can wash, cube, and par-boil the potatoes the night before. Once they are drained and cooled, store them in an airtight container in the fridge. They will be perfectly dried and primed for frying the next morning.
Why are my potatoes sticking to the pan?
If you are using cast iron or stainless steel, sticking usually happens for two reasons: the pan wasn’t hot enough when you added the potatoes, or you are trying to flip them before the crust has naturally formed and released itself from the pan.