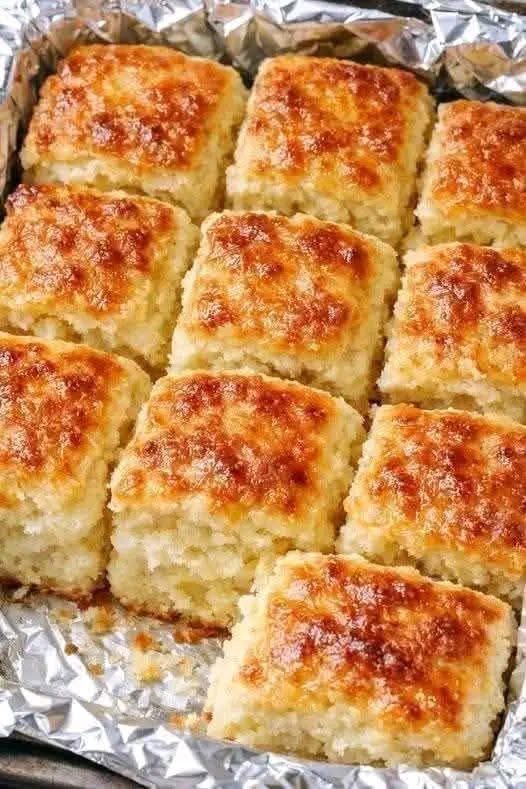
Why You’ll Love This Recipe
- No rolling or biscuit cutters required
- Crispy buttery crust with a soft interior
- Ready in under an hour
- Perfect for beginners
- Made with simple pantry ingredients
- Great for breakfast, lunch, or dinner
- Freezer-friendly
- Easy to customize with cheese, herbs, or spices
Ingredients
Biscuit Dough
- 2½ cups (315 g) all-purpose flour
- 1 tablespoon baking powder
- 1 tablespoon granulated sugar
- 1 teaspoon salt
- 1¾ cups (420 ml) buttermilk (room temperature)
Butter Layer
- ½ cup (113 g) unsalted butter, melted
Optional Add-Ins
- 1 cup shredded cheddar cheese
- 1 tablespoon chopped chives
- 1 teaspoon garlic powder
- ½ teaspoon onion powder
- Fresh parsley
- Black pepper
- Crumbled cooked bacon
- Jalapeños
Equipment
- 8×8-inch (20×20 cm) baking dish
- Large mixing bowl
- Whisk
- Rubber spatula
- Sharp knife
- Pastry brush (optional)
Step 1: Preheat the Oven
Preheat your oven to 450°F (230°C).
Place the baking dish in the oven for a minute or two if you’d like the butter to begin sizzling as soon as the dough is added, but this step is optional.
Step 2: Melt the Butter
Melt the butter in a saucepan or microwave.
Pour the melted butter evenly into the bottom of the baking dish.
Do not stir.
The butter will create the signature crispy edges as the biscuits bake.
Step 3: Mix the Dry Ingredients
In a large bowl, whisk together:
- Flour
- Baking powder
- Sugar
- Salt
Mix until evenly combined.
Step 4: Add the Buttermilk
Pour the buttermilk into the dry ingredients.
Using a rubber spatula or wooden spoon, stir just until no dry flour remains.
The dough will be thick, sticky, and somewhat lumpy. Avoid overmixing, as this can make the biscuits dense.
Step 5: Spread the Dough
Carefully spoon the dough into the baking dish over the melted butter.
Spread it evenly to the edges using a spatula. The butter will naturally rise around the sides of the dough—this is exactly what you want.
Step 6: Score the Dough
Using a sharp knife, lightly score the dough into 9 or 12 squares before baking.
Do not cut all the way through; simply create shallow lines to guide where the biscuits will separate after baking.
Step 7: Bake
Bake for 25–30 minutes, or until:
- The tops are deep golden brown.
- The edges are crisp.
- A toothpick inserted into the center comes out clean.
- The internal temperature reaches about 200°F (93°C).
If you’d like an even darker top, switch the oven to broil for the final 1–2 minutes, watching carefully to prevent burning.
Step 8: Cool Slightly
Allow the biscuits to cool in the pan for 5–10 minutes.
Run a knife along the scored lines and gently separate the biscuits.
Serve warm while the butter is still soaking into the bread.
Serving Suggestions
These biscuits are delicious with:
- Honey
- Butter
- Strawberry jam
- Peach preserves
- Sausage gravy
- Fried chicken
- Beef stew
- Chili
- Tomato soup
- Scrambled eggs
- Bacon
- Ham
- Barbecue
- Pulled pork
They also make excellent breakfast sandwiches.
Delicious Variations
Cheddar Garlic Biscuits
Mix into the dough:
- 1 cup shredded cheddar
- 1 teaspoon garlic powder
Brush with garlic butter after baking.
Bacon Cheddar
Fold in:
- Cooked crumbled bacon
- Sharp cheddar cheese
Perfect for brunch.
Herb Biscuits
Add:
- Chopped parsley
- Chives
- Thyme
- Rosemary
These pair beautifully with roast chicken or turkey.
Jalapeño Cheddar
Mix in:
- Diced jalapeños
- Pepper Jack cheese
A spicy twist that’s great with chili or barbecue.
Sweet Honey Biscuits
Increase the sugar to 2 tablespoons and drizzle the baked biscuits with warm honey and melted butter.
Storage
Store cooled biscuits in an airtight container at room temperature for 2 days, or refrigerate for up to 5 days.
Reheating
Wrap the biscuits in foil and warm in a 325°F (165°C) oven for 8–10 minutes, or microwave individual biscuits for 15–20 seconds.
Brush with melted butter before serving to refresh their flavor.
Freezing
Freeze baked biscuits in a freezer-safe bag for up to 3 months.
Thaw overnight in the refrigerator and reheat before serving.
Tips for Success
- Use fresh baking powder for maximum rise.
- Don’t overmix the dough.
- Room-temperature buttermilk blends more evenly.
- Pour the butter into the pan first—don’t mix it into the dough.
- Score the biscuits before baking for easy portioning.
- Bake until deeply golden for the best flavor.
- Let the biscuits rest for a few minutes before cutting.
Nutritional Information (Approximate)
Per biscuit (based on 9 servings):
- Calories: 280
- Protein: 5 g
- Carbohydrates: 28 g
- Fat: 17 g
- Saturated Fat: 10 g
- Cholesterol: 45 mg
- Sodium: 420 mg
- Fiber: 1 g
- Sugar: 3 g
Frequently Asked Questions
Can I use regular milk instead of buttermilk?
Yes, but for the best texture and flavor, make a quick substitute by adding 1 tablespoon of lemon juice or white vinegar to 1¾ cups of milk. Let it sit for 5–10 minutes before using.
Why are they called Butter Swim Biscuits?
The dough “swims” in melted butter while baking. This technique creates crispy, buttery edges and keeps the interior incredibly moist and tender.
Can I make them ahead of time?
Yes. Bake them a day in advance and reheat in the oven before serving. They also freeze well for longer storage.
Can I use self-rising flour?
Yes. If using self-rising flour, omit the baking powder and reduce the salt to about ½ teaspoon.
Final Thoughts
Southern Butter Swim Biscuits are a wonderful example of how a handful of everyday ingredients can produce something truly special. Their golden, buttery tops, crisp edges, and fluffy interiors make them a standout addition to any meal, whether you’re enjoying them with breakfast, serving them alongside a hearty dinner, or simply spreading them with butter and honey for an afternoon treat.
Unlike traditional biscuits that require rolling and cutting, this recipe is refreshingly simple, making it perfect for both beginner and experienced bakers. The melted butter not only prevents sticking but also creates the signature crispy crust that has made Butter Swim Biscuits a favorite across generations. With endless possibilities for adding cheese, herbs, bacon, or sweet toppings, this versatile recipe is one you’ll find yourself baking again and again. Once you’ve tasted a warm biscuit fresh from the oven, you’ll understand why this comforting Southern classic has earned a permanent place in so many family recipe collections.