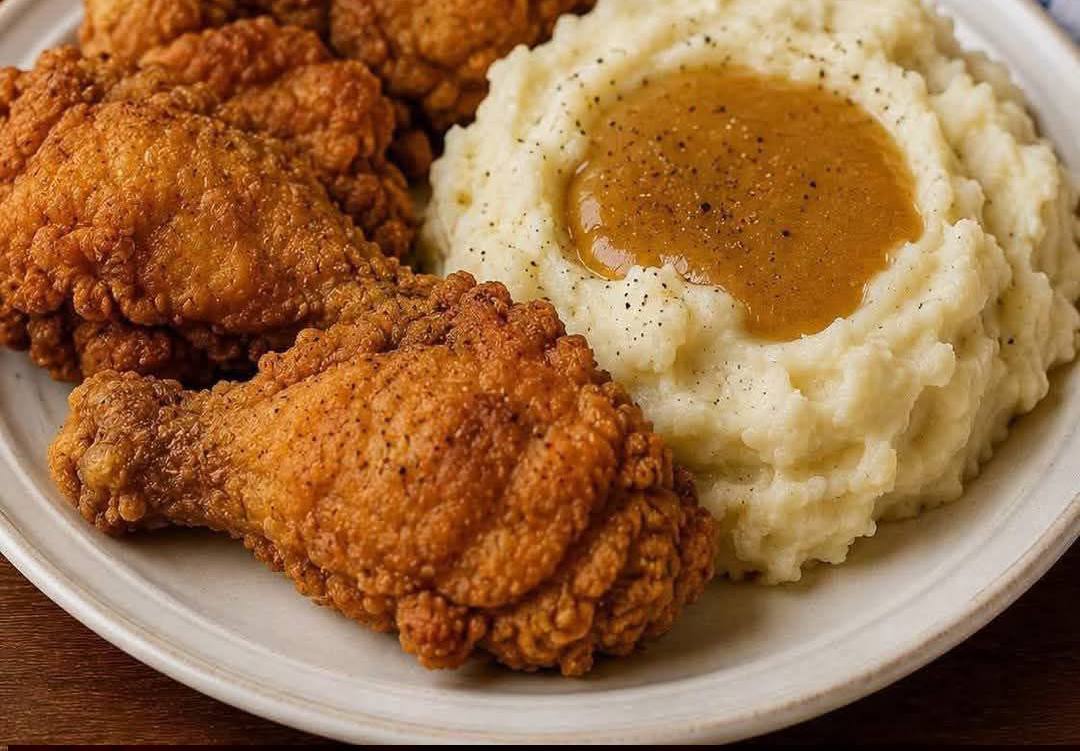
Few dishes evoke the pure, sensory bliss of a plate of golden, crispy fried chicken nestled next to a mountain of creamy mashed potatoes and rich gravy. It is the undisputed crown jewel of Sunday suppers, summer picnics, and comforting family feasts. When executed flawlessly, it offers a dramatic textural symphony: a shatteringly crisp, deeply seasoned crust that gives way to unbelievably juicy, tender meat underneath.
Yet, for many home cooks, perfecting classic fried chicken feels like a high-stakes gamble. The common pitfalls are legendary: a beautiful crust that detaches cleanly from the meat on the first bite, a coating that burns to a bitter brown before the chicken cooks near the bone, or meat that turns out shockingly dry and bland inside.
Achieving restaurant-grade, heirloom-quality fried chicken isn’t a matter of luck; it is a direct result of food science. By understanding protein hydration through brining, mastering the starch dynamics of the dredge, and controlling oil temperature with precision, you can eliminate the guesswork entirely and turn out an undeniably perfect batch every time.
The Secret Chemistry of the Batter and Brine
As a seasoned culinary content strategist and home cook, I spent a long time chasing the ghost of the perfect crust. I tried egg washes, cornstarch hacks, and double dipping, but the results were inconsistent. The breakthrough came when I looked closely at how moisture behaves during the frying process.
The secret to ultra-tender chicken with a crust that clings like an outer skin comes down to two steps: a buttermilk marinade and adding liquid to your dry flour. A 24-hour soak in acidic buttermilk breaks down tight protein fibers while deeply salting the meat from the inside out.
When it comes time to dredge, the ultimate trick is splashing a few tablespoons of that buttermilk marinade directly into your dry, seasoned flour mixture before tossing the chicken. This creates tiny, shaggy clumps of dough that latch onto the chicken pieces. When these clumps hit the hot frying oil, the moisture inside them instantly vaporizes, puffing them up into those jagged, ultra-crispy ridges and nooks that define legendary fried chicken.
Recipe Overview
- Prep Time: 30 minutes (plus 12–24 hours marinating)
- Cook Time: 20–25 minutes
- Total Time: 55 minutes (active)
- Yield: 4–6 servings (8 pieces of chicken)
- Difficulty: Intermediate
Ingredients You’ll Need
For the Buttermilk Brine
- Whole Chicken: 1 (approx. 4 lbs), cut into 8 pieces (breasts halved, wings, drums, thighs)
- Full-Fat Buttermilk: 4 cups
- Kosher Salt: 2 tablespoons
- Hot Sauce: 2 tablespoons (adds depth and flavor, not heat)
- Garlic Powder and Onion Powder: 1 tablespoon each
For the Seasoned Flour Dredge
- All-Purpose Flour: 3 cups
- Cornstarch: $\frac{1}{2}$ cup (for a lighter, crunchier texture)
- Garlic Powder: 2 teaspoons
- Onion Powder: 2 teaspoons
- Smoked Paprika: 2 teaspoons
- Cayenne Pepper: $\frac{1}{2}$ teaspoon (optional, for subtle warmth)
- Fine Sea Salt and Freshly Black Pepper: 1.5 teaspoons each
For Frying
- High-Smoke Point Fat: Peanut oil, vegetable oil, or lard (enough to fill a large skillet halfway)
Step-by-Step Instructions
Step 1: The Flavor Bath
In a large bowl, whisk together the buttermilk, kosher salt, hot sauce, garlic powder, and onion powder. Submerge your chicken pieces fully into the liquid. Cover tightly and refrigerate for at least 12 hours, preferably a full 24 hours.
Why this matters: A long soak gives the salt and acid time to travel all the way to the bone, ensuring the white meat doesn’t turn out bland and dry. It also helps the chicken retain its natural moisture during the hot frying process.
Step 2: Prep the Flour and Create the “Flakes”
In a wide, shallow baking dish, whisk together the all-purpose flour, cornstarch, garlic powder, onion powder, smoked paprika, cayenne, salt, and black pepper. Take 3 to 4 tablespoons of the buttermilk marinade from your chicken bowl and drizzle it directly into the flour. Use a fork to work the liquid into the flour until small, shaggy crumbles form throughout.
Step 3: The Double-Coat Dredge
Remove a piece of chicken from the buttermilk, letting the excess drip off lightly. Press it firmly into the seasoned flour mixture, ensuring every crease and fold is fully coated. Shake off the excess flour, dip it back into the buttermilk very briefly, and press it into the flour a second time. Place the coated chicken onto a wire rack set over a baking sheet and repeat with the remaining pieces.
Pro Tip: Let the dredged chicken sit on the wire rack for 10 to 15 minutes before frying. This allows the flour to hydrate and paste with the buttermilk, creating a structural glue that prevents the crust from slipping off in the frying pan.
Step 4: Temper the Frying Fat
Pour your oil into a large, deep cast iron skillet or Dutch oven until it reaches halfway up the sides. Heat the oil over medium-high heat until it reaches a steady 350°F (175°C). Use a clip-on digital thermometer to monitor this accurately.
Step 5: Frying with Patience
Working in batches to avoid crowding the pan, carefully lower the chicken pieces into the hot oil skin-side down. The oil temperature will drop; adjust your stove heat to maintain it between 300°F and 325°F (149°C to 163°C). Fry the dark meat (thighs and drums) for about 12 to 14 minutes, and white meat (breasts and wings) for 10 to 12 minutes, turning once halfway through, until the crust is a rich, golden amber color.
Step 6: Verify and Rest
Using a slotted metal spoon or tongs, remove the chicken from the oil. Check the internal temperature near the bone using a digital thermometer—it should read 165°F (74°C) for white meat and 175°F (79°C) for dark meat. Rest the chicken on a clean wire rack over a baking sheet for 10 minutes before serving. Avoid draining them on paper towels, which traps steam underneath and softens the crisp bottom crust.
Common Mistakes & How to Avoid Them
- Crowding the Frying Pan: Dropping too many cold pieces of chicken into the oil at once causes the temperature to plummet. Low temperature means the chicken will absorb oil rather than sear, resulting in a greasy, soggy crust. Fry in batches.
- Frying Straight from the Fridge: Cold chicken chills the oil too quickly and cooks unevenly. Let your marinated chicken sit on the counter for 20 to 30 minutes to take the chill off before dredging and frying.
- Gauging Doneness by Crust Color Alone: Because of the spices in the dredge, the crust can look beautifully cooked before the interior meat near the bone is safe to eat. Always rely on an internal digital thermometer for accuracy.
Ingredient Substitutions & Variations
- Gluten-Free Alternative: Replace the all-purpose flour with a high-quality 1:1 gluten-free baking blend, and increase the cornstarch to a full cup for an exceptionally crisp finish.
- Nashville Hot Kick: Whisk a half-cup of the hot frying oil with a tablespoon of cayenne pepper, a teaspoon of brown sugar, and a dash of garlic powder, then brush this spicy glaze over the chicken immediately after frying.
- Air-Fryer Adaptation: Spritz the dredged chicken generously with cooking spray so no dry flour remains, and air-fry at 370°F (188°C) for 20 to 25 minutes, flipping halfway through.
Pro Tips for Perfect Crunch
- Stick to Cast Iron: A heavy cast iron skillet holds onto heat far better than stainless steel or non-stick pans, providing a steady fry that crisps the coating evenly.
- The Cornstarch Secret: Blending cornstarch into your all-purpose flour weakens the gluten structure, preventing the coating from becoming tough or chewy and creating a lighter crunch.
Frequently Asked Questions
Can I reuse the frying oil?
Yes. Once the oil cools completely, strain it through a fine-mesh sieve lined with cheesecloth or a coffee filter into a clean jar. You can reuse it for frying 2 to 3 more times if stored in a cool, dark place.
Why did my crust fall off the chicken?
This usually happens if the chicken skin was too wet before dredging, if the flour didn’t have time to rest and set on the meat, or if you turned the chicken too frequently and aggressively in the pan.
How do I keep the first batch warm while finishing the rest?
Set your oven to 200°F (93°C). Place your finished chicken on a wire rack over a baking sheet and keep it in the warm oven. The dry air will keep the crust exceptionally crisp while you finish frying the remaining pieces.