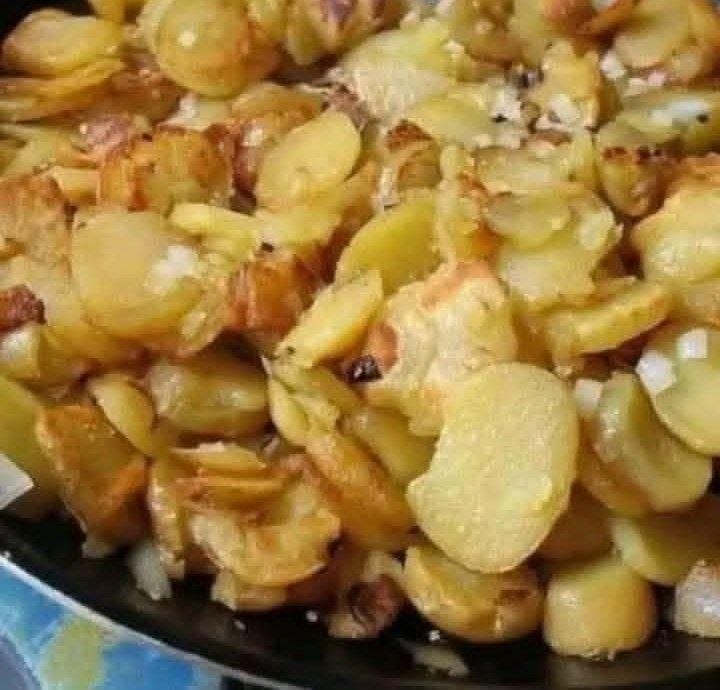
We have all been there: it is a beautiful weekend morning or a busy weeknight, and you are craving a comforting, golden side dish to anchor your meal. It is incredibly easy to resort to frozen, bagged hash browns or soggy, microwave-warmed potatoes that leave you feeling completely uninspired. The real challenge is achieving that legendary, diner-style contrast—a shatteringly crisp, golden-brown exterior on the potatoes paired with tender, sweet caramelized onions that do not turn into a mushy, greasy mess in the pan.
The perfect solution relies on proper heat management and a few simple cast-iron techniques. This classic dish of fried potatoes and onions is the definitive answer to side-dish fatigue. By par-cooking the potatoes just enough to release their starches and frying them alongside sweet onions in a hot, seasoned skillet, you unlock a spectacular blend of textures and deeply savory flavors that will immediately elevate any breakfast platter or dinner table.
The Culinary Science of the Perfect Skillet Fry
The secret to a flawless skillet fry comes down to starch control and moisture management. If you cut raw potatoes and throw them straight into a pan with oil, their high moisture content will cause them to steam rather than fry, resulting in a soggy texture. Additionally, onions cook much faster than raw potatoes; adding them to the pan at the exact same time guarantees the onions will burn to a crisp long before the potatoes are tender-crisp.
To overcome this, the magic lies in two steps: a brief par-boil or a thorough rinsing and drying session to remove excess surface starch, followed by a staggered cooking process. Cooking the potatoes first allows them to build a beautiful, resilient crust. Adding the onions during the final third of the cooking window ensures they soften and caramelize beautifully in the rendered fats without burning, enveloping the crispy potatoes in a sweet, aromatic sweetness.
Structured Recipe Overview
Before you heat up your skillet, here is a quick look at what it takes to execute this comforting, golden classic perfectly.
- Prep Time: 15 minutes
- Cook Time: 25 minutes
- Total Time: 40 minutes
- Yield: 4 to 6 servings
- Cost Per Serving: Under $0.75
- Primary Equipment: 12-inch heavy cast-iron skillet, sharp chef’s knife, clean kitchen towel
The Savory Ingredient List
Every ingredient in this recipe is chosen to build a clean, rustic flavor profile with a satisfying, crunchy finish.
- 3 pounds Russet or Yukon Gold Potatoes: Scrubbed and cut into uniform ½-inch thick rounds or cubes.
- 1 large Yellow Onion: Sliced into thick ribbons or chopped rústically.
- 3 tablespoons Vegetable Oil, Lard, or Bacon Grease: High-smoke-point fats work best for building a crisp crust.
- 2 tablespoons Unsalted Butter: Added at the end for a rich, velvety finish.
- 1 teaspoon Garlic Powder: For a subtle layer of background warmth.
- 1 teaspoon Smoked Paprika: Adds a gorgeous golden hue and a hint of woodfired aroma.
- Salt and Freshly Cracked Black Pepper: To taste.
- Fresh Parsley or Green Onions: Chopped, for a bright pop of color right before serving.
Step-by-Step Instructions
Follow these steps carefully to ensure your potatoes turn out beautifully golden and full of flavor.
Step 1: Prep and Dry the Potatoes
Slice your potatoes into uniform pieces so they cook at the exact same rate. Place the cut potatoes into a large bowl of cold water and swish them around to wash away excess starch. Drain the water and transfer the potatoes to a clean kitchen towel or paper towels. Pat them completely dry; removing surface moisture is the absolute key to achieving a crispy texture.
Step 2: Heat the Skillet
Add the vegetable oil, lard, or bacon grease to your heavy cast-iron skillet and place it over medium-high heat. Let the pan heat up for 2 to 3 minutes until the oil is shimmering but not smoking.
Step 3: The Initial Potato Sear
Carefully add the dried potatoes to the hot skillet, spreading them out into an even layer. Let them cook completely undisturbed for 5 to 6 minutes. Resisting the urge to stir early allows the potatoes to form a deep, golden crust against the hot metal.
Step 4: Flip and Add the Onions
Using a sturdy spatula, carefully flip the potatoes in sections to expose the un-cooked sides. Turn the heat down to medium, then scatter the sliced onions evenly over the top of the potatoes. Cook for another 10 to 12 minutes, stirring gently every few minutes, until the onions soften, sweeten, and turn a beautiful amber brown, and the potatoes are fork-tender.
Step 5: Season and Crisp
Add the butter, garlic powder, smoked paprika, salt, and plenty of freshly cracked black pepper to the pan. Toss gently to coat the potatoes and onions thoroughly in the seasoned butter. Let everything fry for a final 3 to 4 minutes until the edges are beautifully blistered and shatteringly crisp. Garnish with fresh parsley or green onions and serve hot straight from the skillet.
Common Mistakes & How to Avoid Them
- Overcrowding the Pan: If you pile three layers of potatoes into a small skillet, the steam escaping from the bottom layers will trap moisture, turning the entire batch soggy. Use a wide, 12-inch skillet or work in batches so the potatoes can sit in a relatively single layer.
- Stirring Constantly: If you flip and stir the potatoes every thirty seconds, you will break down their edges and prevent them from building that essential crisp, caramelized crust. Put the spatula down and let the heat do its job!
- Adding Onions Too Early: Onions contain a high amount of natural sugars that burn rapidly. Always wait until the potatoes have a head start before introducing the onions to the pan.
Ingredient Substitutions & Variations
- The Cheesy Upgrade: Toss a cup of shredded sharp cheddar or Monterey Jack cheese over the skillet during the last 2 minutes of cooking. Cover the pan with a lid for 60 seconds to let the cheese melt into a molten, bubbly blanket.
- The Bell Pepper Twist: Add a diced green or red bell pepper alongside the onions to transform this dish into a classic, vibrant “Home Fries” style platter perfect for a weekend brunch.
- The Herb Infusion: Swap out the garlic powder and paprika for fresh chopped rosemary or thyme leaves tossed in during the last 5 minutes of cooking for a deeply aromatic, earthy variation.
Pro Tips for Home Cooks
- Use Bacon Grease: For the absolute best, old-school diner flavor, use saved bacon drippings as your primary frying fat. It infuses the potatoes with a rich, smoky depth that vegetable oil simply cannot replicate.
- Cast Iron is King: A heavy cast-iron skillet retains heat exceptionally well, ensuring that the surface temperature stays consistently hot even when you drop a large batch of cool potatoes into the pan.
Frequently Asked Questions
What is the best potato to use for frying? Russet potatoes are fantastic if you want a super crispy exterior and a fluffy, starchier inside. Yukon Gold potatoes are also an excellent choice; they hold their shape beautifully and offer a naturally buttery flavor and creamy texture.
Can I use left-over boiled potatoes? Absolutely! In fact, using leftover, chilled boiled potatoes cuts your frying time in half. Since they are already cooked through, you simply need to dice them up and fry them over medium-high heat with the onions until they turn golden and crisp.
How do I keep the potatoes from sticking to the skillet? The secret to a stick-free skillet fry is ensuring your pan and oil are completely hot before you add the potatoes, and making sure the potatoes are thoroughly dried. If the potato is wet or the pan is cold, the starches will bond directly to the metal surface.
Conclusion
Frying up a batch of crispy potatoes and onions is the ultimate proof that humble, everyday pantry staples can be transformed into a show-stopping comfort classic with just a bit of patience and proper technique. With its perfect balance of a golden, crunchy crust and sweet, tender onions, it is a foolproof crowd-pleaser that forms the heart of any great breakfast or dinner spread. Fire up your skillet this weekend, and leave a comment below sharing your favorite family side dishes!