Why You’ll Love This Recipe
- No cooking required (except thawing peas)
- Ready in minutes
- Perfect for meal prep
- Great for picnics and barbecues
- Creamy, crunchy, and refreshing
- Easy to customize
Ingredients
For the Salad
- 4 cups frozen peas, thawed
- 1½ cups cheddar cheese, cubed
- ½ cup red onion, finely diced
- ½ cup celery, finely chopped (optional)
- 4 slices cooked bacon, crumbled (optional)
For the Dressing
- ¾ cup mayonnaise
- ¼ cup sour cream
- 1 tablespoon apple cider vinegar
- 1 tablespoon sugar
- ½ teaspoon salt
- ¼ teaspoon black pepper
Garnish
- Fresh parsley
- Extra cheese cubes
- Cracked black pepper
Understanding This Classic Salad
Pea salad has been a staple in American kitchens for generations. Unlike leafy green salads, this dish relies on peas as the primary ingredient, creating a naturally sweet base that pairs beautifully with creamy dressing.
The cheese provides richness while the onions add a pleasant crunch and sharpness.
Step 1: Prepare the Peas
Remove the peas from the freezer.
Allow them to thaw completely.
Once thawed, pat them dry with paper towels.
Removing excess moisture helps the dressing cling properly to the salad.
Step 2: Cube the Cheese
Cut the cheddar cheese into small bite-sized cubes.
Aim for pieces about ½ inch in size.
Using a block of cheese rather than pre-shredded cheese gives the best texture and flavor.
Step 3: Chop the Vegetables
Finely dice the red onion.
If using celery, chop it into small pieces.
Small pieces distribute flavor evenly throughout the salad.
Step 4: Make the Dressing
In a medium bowl combine:
- Mayonnaise
- Sour cream
- Apple cider vinegar
- Sugar
- Salt
- Black pepper
Whisk until smooth and creamy.
Taste and adjust seasoning if needed.
Step 5: Assemble the Salad
In a large bowl combine:
- Thawed peas
- Cheese cubes
- Red onion
- Celery
- Bacon (if using)
Gently toss to distribute ingredients evenly.
Step 6: Add the Dressing
Pour the dressing over the salad.
Using a large spoon or spatula, gently fold everything together.
Avoid stirring too aggressively to keep the peas intact.
Step 7: Chill
Cover the bowl and refrigerate for at least:
- 1 hour minimum
- 3–4 hours preferred
Chilling allows the flavors to blend beautifully.
Step 8: Serve
Transfer to a serving bowl.
Garnish with:
- Extra cheese cubes
- Fresh parsley
- Freshly cracked pepper
Serve cold.
Flavor Profile
This salad offers a wonderful combination of:
Sweetness
The peas provide natural sweetness.
Creaminess
The dressing coats every ingredient.
Sharpness
Red onion adds a pleasant bite.
Richness
Cheddar cheese balances the vegetables.
Freshness
The chilled texture makes it refreshing and satisfying.
Tips for Perfect Pea Salad
Use Fully Thawed Peas
Frozen peas can water down the dressing.
Allow them to thaw completely.
Dry the Peas
Excess moisture prevents a creamy consistency.
Use Quality Cheese
Sharp cheddar creates the best flavor contrast.
Chill Before Serving
The salad tastes much better after resting.
Delicious Variations
Ranch Pea Salad
Replace part of the dressing with ranch dressing.
Adds extra herb flavor.
Bacon Cheddar Version
Add:
- 8 slices crispy bacon
- Extra cheddar cheese
Perfect for barbecues.
Ham and Pea Salad
Mix in diced ham.
Transforms the salad into a more filling dish.
Dill Pea Salad
Add:
- Fresh dill
- Lemon juice
Creates a lighter flavor profile.
Make It Healthier
You can lighten the dressing by using:
- Greek yogurt
- Light mayonnaise
- Reduced-fat sour cream
The salad remains creamy while reducing calories.
Perfect Pairings
This salad goes wonderfully with:
Grilled Chicken
The cool salad balances smoky flavors.
Burgers
A classic summer combination.
Barbecue Ribs
The sweetness complements barbecue sauces.
Fried Chicken
Creamy pea salad makes a refreshing side.
Sandwiches
Perfect for picnics and lunches.
Make-Ahead Friendly
This is one of the best make-ahead side dishes.
Prepare it:
- The night before
- Several hours ahead
The flavor improves as it sits.
Storage Instructions
Store in an airtight container.
Refrigerate for up to 3 days.
Stir gently before serving.
Avoid Freezing
The creamy dressing can separate after thawing.
Fresh preparation is best.
Nutritional Benefits
Peas are surprisingly nutritious.
They contain:
- Fiber
- Protein
- Vitamin C
- Vitamin K
- Folate
- Antioxidants
This makes the salad both delicious and nourishing.
Common Mistakes to Avoid
Using Warm Ingredients
Warm ingredients can make the dressing thin.
Everything should be cool.
Overmixing
Too much stirring can crush the peas.
Skipping Chill Time
The flavor develops significantly during refrigeration.
Too Much Dressing
Add gradually if you prefer a lighter coating.
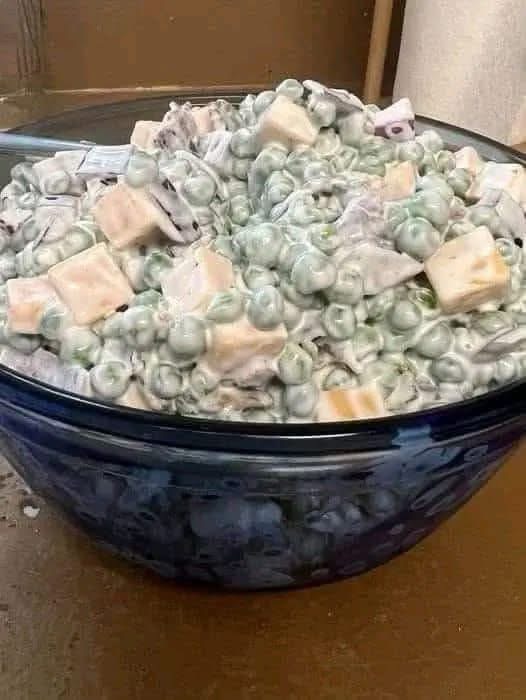
Serving Ideas
For parties and gatherings:
- Serve in a large glass bowl
- Garnish with fresh herbs
- Top with extra cheese cubes
- Add crispy bacon crumbles
The bright green peas create a beautiful presentation.
Why This Recipe Works
This recipe succeeds because it balances:
- Sweet peas
- Sharp cheese
- Tangy dressing
- Crisp onions
Every bite offers multiple textures and flavors, making it difficult to stop at just one serving.
Final Thoughts
This Creamy Pea, Cheese & Red Onion Salad is a timeless recipe that continues to be popular for good reason. It’s simple, affordable, colorful, and packed with flavor. Whether you’re preparing a summer barbecue, holiday meal, potluck gathering, or weeknight dinner, this refreshing salad fits perfectly on the table.