We’ve all been there: it’s the end of the week, the grocery budget is down to the wire, and the dread of answering “what’s for dinner?” is looming heavy. It is incredibly easy to fall back on expensive takeout or boxed meals that leave everyone feeling less than satisfied. The challenge isn’t just finding something cheap; it is finding a meal that genuinely satisfies the soul, provides comforting warmth, and feeds a whole family without requiring a trip to the store.
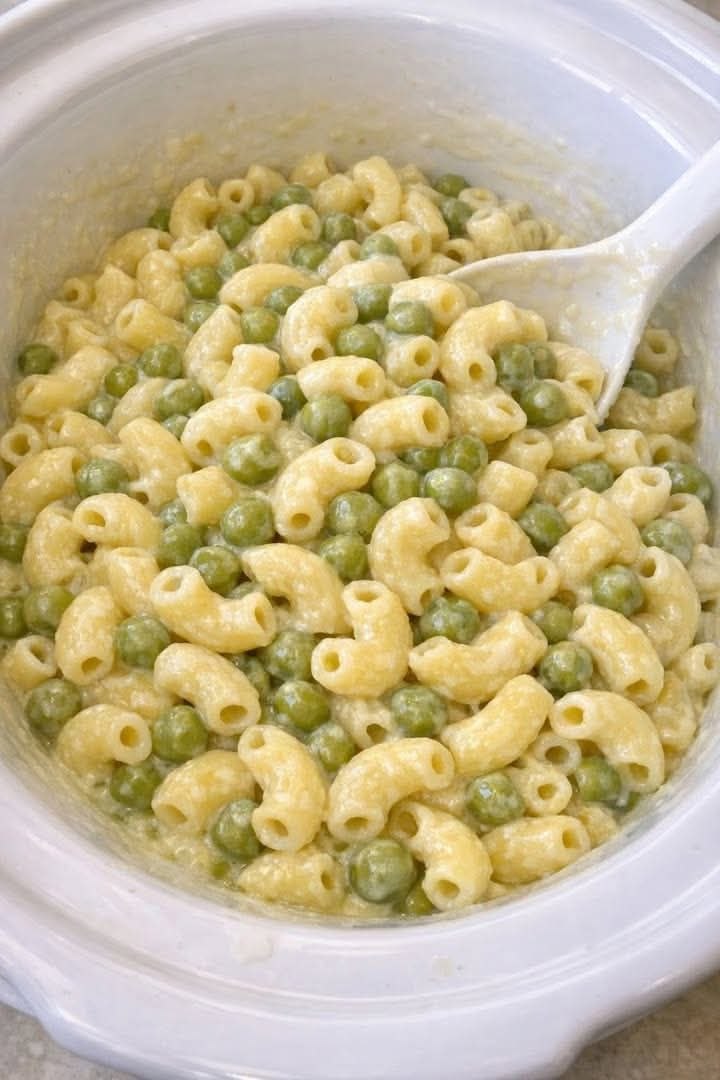
The perfect solution relies on vintage kitchen wisdom. Long before modern convenience apps, home cooks relied on smart pantry staples to create rich, velvety, and deeply filling dinners for pennies. This creamy macaroni and peas recipe is the definitive answer to low-budget dinner fatigue. By utilizing a simple, one-pot method to build a rich sauce right alongside the pasta, this dish transforms basic elbow macaroni and frozen sweet peas into a luxurious, nostalgic masterpiece.
The Magic of One-Pot Starch Emulsion
The secret to this method lies entirely in the starch release. When pasta is boiled in a massive pot of water and drained, most of its natural starches are washed down the sink. But when cooked directly in a controlled environment with milk and broth, the elbow macaroni releases its starches directly into the liquid.
This natural starch acts as a built-in thickener, binding the fats and liquids together to create an ultra-velvety, emulsified cream sauce without needing a complex, easily scorched stovetop roux. It’s foolproof, fast, and saves you from washing extra dishes.
Structured Recipe Overview
Before you jump into the kitchen, here is a quick breakdown of what to expect from this ultra-comforting vintage dish.
- Prep Time: 5 minutes
- Cook Time: 15 minutes
- Total Time: 20 minutes
- Yield: 4-6 generous servings
- Cost Per Serving: Less than $1.50
- Primary Equipment: Large deep skillet or Dutch oven, stirring spoon
The Budget-Friendly Ingredient List
Every item in this recipe was chosen for its accessibility, affordability, and ability to maximize flavor. There are no fancy cheeses or hard-to-find imports here—just pure, rustic comfort.
- 16 ounces (1 lb) Dry Elbow Macaroni: The classic shape that holds onto cream sauce perfectly.
- 1 ½ cups Frozen Sweet Peas: Adds a vibrant pop of color, a subtle natural sweetness, and essential nutrients to balance the rich base.
- 2 cups Whole Milk: Provides the foundational creamy liquid. (Sub half-and-half if you want an even richer texture).
- 2 cups Low-Sodium Chicken or Vegetable Broth: Adds a savory, deep layer of background flavor that elevates the pasta beyond plain dairy.
- 1 cup Shredded Sharp Cheddar or Parmesan Cheese: Gives the sauce its subtle cheesy body and signature comforting stretch.
- 4 tablespoons Unsalted Butter: Adds luxurious mouthfeel and essential richness.
- ½ teaspoon Garlic Powder & ½ teaspoon Onion Powder: Essential aromatic ground spices that build flavor effortlessly.
- Salt and Freshly Cracked Black Pepper: To taste (be generous with the black pepper for that true vintage diner finish).
Step-by-Step Instructions
Follow these steps carefully to ensure your pasta achieves the exact velvety consistency.
Step 1: Combine the Liquid Base and Aromatics
In your large skillet or Dutch oven, pour in the whole milk, chicken broth, garlic powder, onion powder, a half teaspoon of salt, and plenty of freshly cracked black pepper. Whisk briefly until the spices are evenly distributed throughout the liquid. Add the butter slices.
Step 2: Simmer the Raw Pasta
Bring the liquid mixture to a gentle boil over medium-high heat. Once bubbling, drop the dry, uncooked elbow macaroni directly into the seasoned liquid. Reduce the heat to medium-low so it maintains a steady, gentle simmer.
Step 3: Stir and Absorb
Cook the pasta uncovered for about 10 to 12 minutes, stirring frequently. It is absolutely crucial that you stir often to keep the pasta from sticking to the bottom of the pan and to help release those glorious starches into the bubbling milk sauce. The liquid will begin to drastically reduce and thicken.
Step 4: Incorporate the Cheese and Sweet Peas
Once the pasta is just al dente and the liquid has transformed into a loose cream sauce, turn off the heat. Immediately fold in the frozen sweet peas and the shredded cheese. The residual heat will melt the cheese instantly and thaw the peas perfectly, keeping them bright green and plump.
Step 5: Rest and Serve
Let the skillet sit undisturbed for 3 to 5 minutes before serving. This allows the sauce to cool slightly, thicken up significantly, and wrap tightly around every single noodle. Give it one final, vigorous stir and serve hot.
Common Mistakes & How to Avoid Them
- Boiling on Maximum Heat: Boiling dairy-based liquids on high heat will cause the milk to split, curdle, and scorch at the bottom of your pan. Keep things at a gentle, controlled simmer.
- Using Pre-Shredded Bagged Cheese: Pre-packaged shredded cheeses are coated in cellulose and anti-caking agents. This prevents them from melting smoothly, which can leave your sauce feeling unpleasantly grainy. Grate your cheese fresh from a block for a silkier sauce.
- Walking Away From the Pan: Because we are cooking the pasta directly in a concentrated dairy broth, walking away for too long guarantees a sticky mess on the bottom of your pan. Keep that wooden spoon moving!
Ingredient Substitutions & Variations
- The Protein Boost: If you have leftover holiday ham, canned tuna, or a couple of strips of bacon in the fridge, chop them up and fold them in alongside the sweet peas at the very end.
- The Dairy-Free Alternative: To make this dairy-free, swap the whole milk for an unsweetened high-protein oat milk, use vegan butter sticks, and substitute a quality nutritional yeast or plant-based cheddar alternative.
- The Veggie Swap: If your family isn’t fond of sweet peas, you can easily swap them out for tiny broccoli florets, chopped canned pimentos, or sweet corn kernels.
Pro Tips for Blog Success
- The Sauce Thickens as it Sits: Don’t panic if the sauce looks just a tiny bit loose right when you turn off the heat. As the dish rests uncovered for a few minutes, the macaroni will continue to drink up the liquid, transforming into a cohesive, creamy dream texture.
- Reviving Leftovers: Pasta absorbs liquid continuously. If you have leftovers the next day, reheat them on the stovetop or microwave with a tiny splash of extra milk or broth to loosen the sauce back up to its original glory.
Frequently Asked Questions
Can I use gluten-free pasta for this one-pot recipe? Gluten-free pasta behaves very differently because it lacks traditional wheat gluten binders. If you want to make this gluten-free, it is highly recommended to use a sturdy corn and brown rice-based elbow pasta and watch it closely, as it can go from al dente to mushy much quicker than standard pasta.
Why are my peas wrinkly or dull green? If you add frozen peas too early in the cooking process, they will overcook, lose their vibrant green color, and become mushy. By folding them in during the final minutes after turning off the burner, you allow them to heat through completely while retaining their plump texture and sweet pop.
Do I need to boil the macaroni beforehand? Absolutely not! Cooking the macaroni completely raw inside the sauce liquid is the secret to this entire dish. The raw pasta releases its starches directly into the milk and broth mixture, acting as the primary thickening agent for your velvety cream sauce.
Conclusion
This creamy one-pot macaroni and sweet peas proves that you do not need an expensive grocery haul to create an unforgettable, comforting meal that brings the whole family to the table. It is a humble, nostalgic tribute to the home cooks who knew exactly how to turn simple pantry basics into pure magic. Give this vintage classic a try tonight, and don’t forget to leave a comment below sharing your favorite childhood budget meals!