Ingredients You Will Need
For the Chocolate Cake Layers
- 1 ¾ cups all-purpose flour
- ¾ cup unsweetened cocoa powder
- 1 ½ teaspoons baking powder
- 1 ½ teaspoons baking soda
- ½ teaspoon salt
- 2 eggs, room temperature
- 1 ½ cups sugar
- ½ cup vegetable oil
- 1 cup buttermilk
- 1 cup hot coffee or hot water
- 2 teaspoons vanilla extract
For the Filling
- 2 cups heavy whipping cream, cold
- ¼ cup powdered sugar
- 1 teaspoon vanilla extract
- 1 can cherry pie filling OR
- 2 cups fresh or frozen cherries simmered with sugar
- Optional: 2–4 tablespoons kirsch (cherry liqueur)
For the Decoration
- Chocolate curls or grated chocolate
- Extra cherries for topping
- Whipped cream rosettes (optional)
Making the Chocolate Cake
Step 1 – Preheat and Prep
Preheat oven to 175°C (350°F).
Grease and line two round cake pans with parchment paper.
Step 2 – Mix Dry Ingredients
In a large bowl, whisk flour, cocoa powder, baking soda, baking powder, and salt.
Step 3 – Add Wet Ingredients
Beat eggs with sugar until pale and fluffy.
Pour in oil, buttermilk, and vanilla and mix until combined.
Step 4 – Add Hot Liquid
Slowly pour in hot coffee or hot water.
Mix gently—your batter will be thin, which creates moist layers.
Step 5 – Bake
Divide batter between pans and bake 30–35 minutes, or until a toothpick comes out clean.
Cool completely before slicing.
Preparing the Whipped Cream
Step 1 – Chill Tools
Place your bowl and beaters in the fridge or freezer for 5–10 minutes—cold tools whip cream better.
Step 2 – Whip Until Fluffy
Beat heavy cream with vanilla and powdered sugar until thick peaks form.
Do NOT overbeat or it will turn grainy.
Cherry Filling Options
Using Cherry Pie Filling
Simply stir and reserve.
Homemade Cherry Filling
Simmer:
- 2 cups cherries
- ¼ cup sugar
- 1 tablespoon cornstarch (optional for thickness)
Cook on low until glossy and spoonable.
Kirsch Version (Traditional)
Drizzle kirsch over the cake layers for a deep cherry aroma.
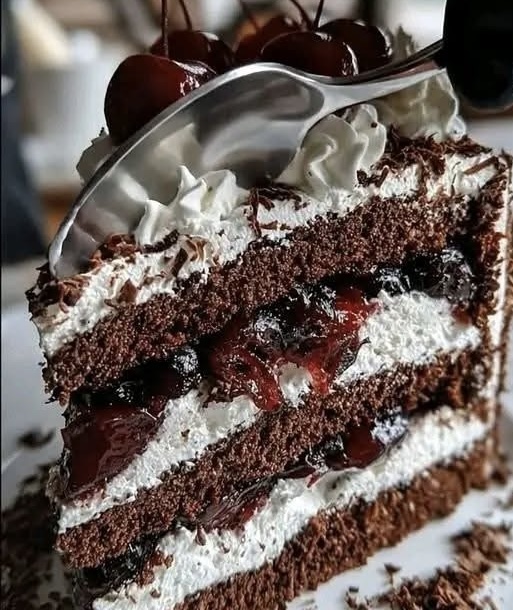
Assembling the Black Forest Cake
Step 1 – Slice the Cake Layers
Carefully slice each cake horizontally to make four thin layers (optional: use three thicker layers if preferred).
Step 2 – Build the First Layer
Place one layer on a serving board.
Spread whipped cream evenly.
Spoon cherries on top.
Step 3 – Repeat the Layers
Add the second layer → whipped cream → cherries
Continue until all layers are used.
Step 4 – Frost the Outside
Cover the entire cake with whipped cream.
Smooth or create rustic swirls.
Step 5 – Decorate Beautifully
Press grated chocolate or curls onto the sides.
Pipe cream swirls and top with whole cherries.
Chill for 1–2 hours before slicing.
Serving Suggestions
A cake this beautiful deserves a perfect moment.
Best Ways to Serve
- Slightly chilled for clean slices
- With fresh berries for contrast
- With cappuccino, espresso, or hot chocolate
Perfect Occasions
- Birthdays
- Anniversaries
- Holiday dinners
- Valentine’s Day
Tips for Success
Keep the Cake Moist
Brush layers with a simple syrup if they seem dry.
Don’t Rush Cooling
Warm cake melts whipped cream—patience makes perfect.
Stabilize Whipped Cream
Add 1 tablespoon cornstarch, pudding mix, or gelatin for firmer cream (optional).
Choose Real Cherries
Fresh or frozen cherries give better flavor than artificial ones.
Variations
Black Forest Cupcakes
Layer filling inside cupcakes—adorable and portable.
Chocolate Ganache Twist
Drizzle melted dark chocolate between layers.
White Forest Cake
Use white chocolate cake and raspberries instead of cherries.
No-Alcohol Version
Skip kirsch—flavor is still amazing.
How to Store
Refrigerator
Keeps well for up to 3 days—cover tightly.
Freezing
Freeze slices for 1 month, wrapped well.
Thaw in fridge before serving.
Conclusion
Black Forest Cake is a masterpiece of flavor and texture—rich cocoa layers, silky cream, and sweet cherries in every bite. This classic German dessert may look elegant, but with simple ingredients and clear steps, anyone can bake it beautifully at home.
Serve it with pride, present it with love, and enjoy watching every slice disappear.