Ingredients
⭐ Choux Pastry Shells
- 1 cup water (or half milk + half water)
- ½ cup (115 g) unsalted butter
- Pinch of salt
- 1 tablespoon sugar (optional, helps browning)
- 1 cup (130 g) all-purpose flour
- 4 large eggs (room temperature)
⭐ Custard Cream Filling
Option 1: Pastry Cream
- 2 cups (500 ml) milk
- 3 egg yolks
- ½ cup sugar
- 3 tablespoons cornstarch
- 1 tablespoon butter
- 1 teaspoon vanilla extract
Optional: whipped cream (fold in for light mousse-style)
Option 2: Instant Cream Hack
- 1 ½ cups cold whipping cream
- 3 tablespoons powdered sugar
- 1 teaspoon vanilla
- 2 tablespoons vanilla pudding mix
Whip until thick
🧈 Step 1 — Make the Choux Pastry
In a saucepan:
Combine water (or half milk), butter, salt, and sugar.
Bring to a boil over medium heat.
Add the flour all at once.
Stir fast with a wooden spoon until dough pulls away from the sides and forms a smooth ball.
Cook 1–2 minutes more to dry dough slightly — helps it puff better.
Transfer dough to a bowl and let cool 5 minutes.
🥚 Step 2 — Add the Eggs (Magic Moment!)
Add eggs one at a time.
Stir or beat until completely absorbed before adding the next egg.
Dough should become:
- Glossy
- Thick
- Pipeable
- Drop slowly from spoon (like thick glue)
Too stiff? Add a tablespoon milk.
Too loose? Chill briefly.
🔪 Step 3 — Pipe the Puffs
Line baking tray with parchment.
Transfer dough to piping bag fitted with round tip
(or drop spoonfuls the rustic way).
Pipe small mounds — about golf ball size — leaving space to expand.
OPTIONAL:
Wet fingertip to press down pointy tips.
🔥 Step 4 — Bake Until Puff & Hollow
Preheat oven to 200°C / 400°F.
Bake:
- 10–12 mins at high heat to inflate shells
- Reduce to 180°C / 350°F
- Bake 15–20 more mins until:
✔ Golden brown
✔ Dry
✔ Crisp all around
DO NOT open oven early
Steam escape = flat puffs 😭
Cool Completely on rack
The inside finishes drying as they cool.
🍮 Step 5 — Prepare the Cream Filling
Classic Pastry Cream
Heat milk to steaming (not boiling).
Meanwhile whisk egg yolks, sugar and cornstarch until pale.
Slowly pour warm milk into yolks while whisking — tempering prevents scrambling.
Return mixture to pot.
Cook over medium heat while whisking until thick pudding forms.
Remove from heat, stir in butter and vanilla.
Cover surface with plastic wrap to prevent skin.
Chill completely — it thickens as it cools.
OPTIONAL (heavenly!):
Fold in whipped cream to make Crème Diplomat — light and airy.
Fast Filling
Beat whipping cream, vanilla, sugar & pudding powder until thick.
🧁 Step 6 — Fill the Puffs
Cut shells slightly OR poke hole underneath.
Pipe custard generously inside — fill all air pockets!
If using soft cream, fill right before serving for best texture.
✨ Step 7 — Serve & Enjoy
Dust with powdered sugar
OR drizzle melted chocolate
OR dip tops in caramel
OR leave plain — they shine on their own 💛
Eat chilled or room temp — both are divine.
💡 Tips & Variations
Make them EXTRA crisp
After baking, poke tiny hole in back
Return to warm oven 5 mins to dry inside
Want chocolate cream?
Add:
- 2 tbsp cocoa to pastry cream
Or - Fold in Nutella
Fresh fruit inside?
Add:
- Raspberries
- Mango cubes
- Strawberries
Savory CHOUX?!
Skip sugar and fill with:
- Tuna salad
- Chicken mousse
- Herbed cream cheese
Freeze-friendly!
- Freeze empty puffs
- Re-crisp in oven 5 mins
- Fill and serve fresh
❄️ Storage
- Unfilled puffs: airtight 2 days
Crisp 5 mins in oven before serving - Filled puffs: fridge 2–3 days
- Cream: fridge 3 days
Do NOT freeze filled cream puffs — custard splits.
🎉 Perfect for:
- Eid & Iftar platters
- Tea parties
- Fancy dessert tables
- Birthdays
- Picnics
- Pastry boxes & gifting
So simple yet SO elegant.
❤️ Final Thoughts
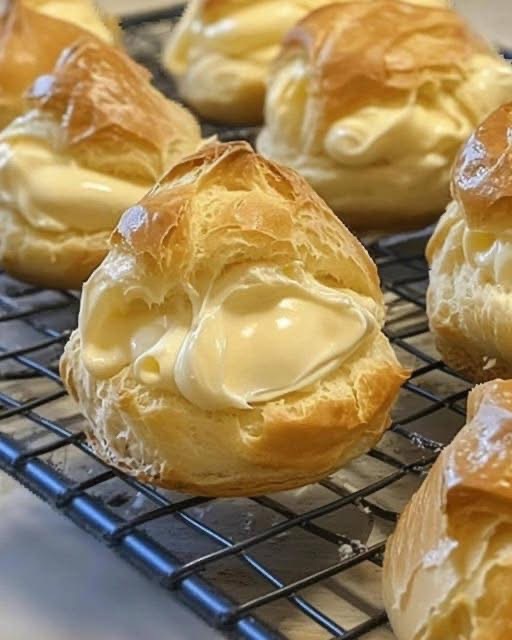
These custard cream puffs are the perfect marriage of texture and flavor — airy, crispy shells hiding luscious sweet cream. They feel like patisserie magic but are surprisingly beginner-friendly once you understand the basic choux steps.
Bake them once and you’ll feel like a pastry chef.
Bake them twice and everyone will ask for more.
Bake them three times… and you’ll be unstoppable 😉