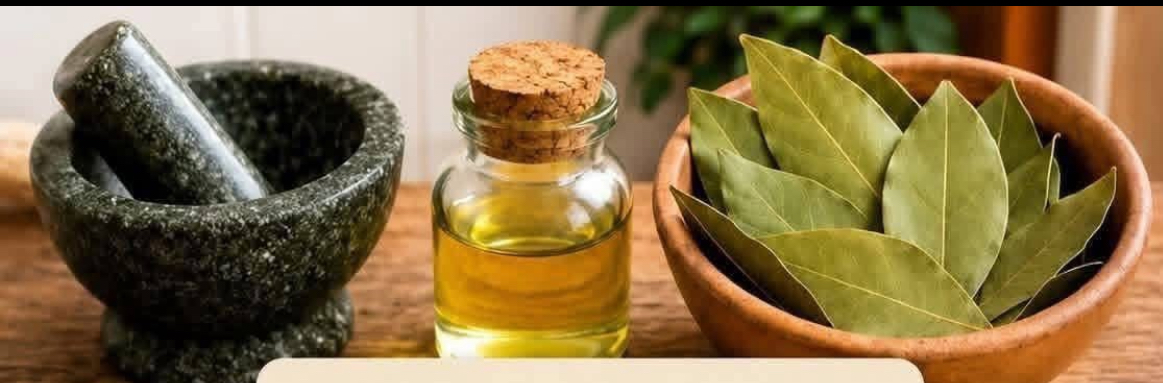
The image shows bay leaves, oil, and a homemade preparation presented as a natural alternative to Botox. One important correction before trying the recipe: bay leaves are not 100,000 times more powerful than Botox, and there is no good evidence that bay leaves can reproduce the wrinkle-reducing effects of Botox. Botox works by temporarily reducing the activity of specific muscles, while a homemade bay-leaf preparation cannot do that.
That said, bay leaves contain aromatic plant compounds and can be used in a simple infused oil for cosmetic purposes. An oil like this can help moisturize the skin and temporarily make dry fine lines look less noticeable because well-hydrated skin generally appears smoother. It should be viewed as a skin-conditioning oil, not an anti-wrinkle medical treatment.
Here is a gentle homemade version you can prepare at home.
🌿 Ingredients
For the bay-leaf infused oil:
- 8–10 dried bay leaves
- 100 ml jojoba oil, sweet almond oil, or sunflower oil
- 1 small clean glass jar with a lid
- A fine strainer or clean cheesecloth
- A dark glass bottle for storage
Optional:
- 1 teaspoon vitamin E oil, added after straining
Jojoba oil is particularly convenient for facial care because it has a relatively lightweight feel. If you have very dry skin, sweet almond oil can provide a richer finish.
If you have a known allergy to nuts, choose jojoba or sunflower oil instead of almond oil.
🍃 Step 1: Prepare the Bay Leaves
Use completely dry bay leaves rather than fresh leaves for this recipe.
Check the leaves carefully and discard any that have visible mold, moisture, discoloration, or an unusual smell.
Do not wash the leaves immediately before making the oil because introducing water into an oil infusion can shorten its shelf life and increase the risk of contamination.
Instead, make sure you are starting with clean, properly dried leaves.
Gently crush or break the leaves into smaller pieces with clean hands.
You don’t need to grind them into powder.
Breaking them into pieces simply exposes more of the plant material to the carrier oil.
🫙 Step 2: Put the Bay Leaves in a Jar
Place the crushed bay leaves into a clean, completely dry glass jar.
Pour approximately 100 ml of your chosen carrier oil over the leaves.
The oil should completely cover the plant material.
Close the jar tightly.
If some leaves float above the oil, press them down with a clean spoon.
It is important that the ingredients remain covered by oil during the infusion.
♨️ Step 3: Gentle Warm Infusion
One way to speed up the infusion is with gentle indirect heat.
Place the closed jar in a saucepan containing warm water.
The water should come only partway up the outside of the jar.
Heat the water gently for approximately 30–60 minutes.
Do not place the jar directly over a flame.
Do not allow the oil itself to become very hot.
The objective is gentle warming rather than cooking the leaves.
Afterward, remove the jar from the water and allow it to cool.
Alternatively, you can skip the heating process and leave the jar in a cool, dark place for approximately 1–2 weeks, shaking it gently once a day.
The longer infusion method is slower but very simple.
🌙 Step 4: Strain the Oil
Once the infusion is finished, place a fine strainer or clean cheesecloth over another dry container.
Pour the oil through it.
Press the leaves gently to extract the remaining oil.
Discard the leaves.
You should now have a golden or greenish aromatic oil.
If you see water droplets or moisture in the finished oil, it is better not to store it for an extended period. Homemade oil preparations are much more stable when all ingredients and equipment are completely dry.
✨ Step 5: Optional Vitamin E
If you want, add approximately 1 teaspoon of vitamin E oil to the strained preparation.
Mix thoroughly.
Vitamin E is commonly used in cosmetic oils as an antioxidant, although it should not be considered a preservative that makes a homemade preparation completely shelf-stable.
Transfer the finished oil into a clean, dark glass bottle.
Keep the bottle tightly closed and away from direct sunlight and excessive heat.
💆♀️ How to Use Bay Leaf Facial Oil
The best way to use this preparation is as a small amount of facial oil rather than a heavy mask.
First, wash your face with a gentle cleanser.
Pat your skin dry, leaving it slightly damp.
Place 2–3 drops of the oil into the palm of your hand.
Rub your hands together gently.
Press the oil onto your cheeks, forehead, and other areas that feel dry.
Avoid getting it directly into your eyes.
You don’t need to aggressively massage the face.
A gentle application is enough.
For the first few uses, apply it 2–3 evenings per week rather than every night.
If your skin tolerates it well, you can decide whether you want to use it more frequently.
🌸 What Can This Oil Actually Do?
A homemade bay-leaf oil can mainly function as an emollient.
That means it can help soften the surface of the skin and reduce the feeling of dryness.
When the outer layer of the skin is properly moisturized, it can appear:
- Softer
- Smoother
- More supple
- Less flaky
- More comfortable
- Temporarily plumper-looking
This can make some superficial lines look less obvious, particularly if dry skin is making them more visible.
But there is a major difference between temporarily improving the appearance of fine lines and actually changing the biological processes responsible for wrinkles.
Bay leaf oil cannot be considered a replacement for Botox.
It also cannot permanently erase wrinkles.
⚠️ Important: Patch Test First
Bay leaves are aromatic plants, and aromatic plant compounds can irritate some people’s skin.
Before applying the oil to your entire face, perform a patch test.
Apply a tiny amount to a small area of skin, such as the inner forearm.
Wait and observe how your skin responds.
If you experience significant:
- Burning
- Itching
- Redness
- Swelling
- Rash
- Stinging
wash the area and discontinue use.
Do not use the preparation on damaged, sunburned, recently exfoliated, or irritated skin.
If your skin is particularly sensitive, you may want to skip bay leaf preparations altogether and use a simple fragrance-free moisturizer instead.
🚫 Don’t Use Bay Leaf Essential Oil Directly
This is particularly important.
Bay leaf essential oil is much more concentrated than an infused oil.
Do not simply add several drops of bay essential oil to your face and assume it is equivalent to the recipe above.
Essential oils can cause irritation or sensitization when used incorrectly.
For facial skincare, simpler is generally better.
The recipe above uses dried bay leaves infused into a carrier oil, which is substantially different from applying concentrated essential oil.
☀️ Don’t Forget Sunscreen
If your main goal is reducing the visible signs of aging, sunscreen is considerably more important than a homemade bay-leaf recipe.
UV exposure contributes significantly to premature skin aging, including wrinkles, uneven pigmentation, and loss of elasticity.
During the daytime, use a broad-spectrum sunscreen with SPF 30 or higher and reapply as appropriate for your exposure.
A beautiful homemade oil cannot compensate for regular unprotected sun exposure.
You can use the bay-infused oil at night and keep your daytime routine focused on gentle skincare and sun protection.
🥑 Can You Add Olive Oil?
Yes, you technically can use olive oil as the carrier, but it may feel relatively heavy on some facial skin.
If you enjoy richer oils, olive oil can work.
For a lighter facial preparation, however, jojoba or sunflower oil may be more comfortable.
The carrier oil often has a greater effect on how the final product feels than the bay leaves themselves.
🌿 A Simpler Version for Sensitive Skin
If you are concerned about irritation, you don’t actually need bay leaves.
Try this much simpler option:
Ingredients
- 1–2 teaspoons jojoba oil
- Your regular fragrance-free moisturizer
Apply your moisturizer first, then press 1–2 drops of jojoba oil over it.
This provides much of the basic cosmetic benefit people seek from homemade facial oils: reducing dryness and giving the skin a softer, smoother appearance.
Sometimes the simplest recipe is the best one.
🧴 How Long Does Homemade Bay Oil Last?
Because homemade preparations don’t have the controlled preservation systems used in commercial cosmetics, don’t make a huge quantity.
Keep your finished oil in a clean, tightly closed dark bottle.
Store it somewhere cool and away from sunlight.
Check it before every use.
If it develops a rancid, sour, unpleasant, or noticeably different smell, discard it.
Also discard it if you see unexpected cloudiness, mold, or other signs of contamination.
A small batch is preferable because it allows you to use the preparation while it is fresh.
🌟 Final Recipe
Homemade Bay Leaf Infused Facial Oil
Ingredients:
- 8–10 dried bay leaves
- 100 ml jojoba, sunflower, or sweet almond oil
- 1 teaspoon vitamin E oil, optional
Method:
- Make sure the bay leaves and equipment are completely dry.
- Break the leaves into smaller pieces.
- Place them in a clean glass jar.
- Cover completely with the carrier oil.
- Close the jar.
- Warm gently using a water bath for 30–60 minutes, or infuse at room temperature for 1–2 weeks.
- Strain thoroughly.
- Add vitamin E if desired.
- Transfer to a clean dark bottle.
- Store away from heat and sunlight.
- Patch test before facial use.
- Apply 2–3 drops to clean, slightly damp skin at night.
💚 The realistic expectation
Think of this as a homemade moisturizing and skin-softening oil, not a natural Botox replacement.
The claim in the image that bay leaves are “100,000 times more powerful than Botox” is misleading. There is no credible basis for that comparison, and a bay-leaf preparation should not be presented as a treatment capable of producing Botox-like muscle relaxation or guaranteed wrinkle removal.
If your goal is younger-looking skin, the most useful routine is usually much simpler: gentle cleansing, regular moisturizing, daily broad-spectrum sunscreen, and—if appropriate for your skin—a well-formulated anti-aging ingredient such as a retinoid. A homemade bay-leaf oil can be an optional cosmetic addition, but it shouldn’t replace evidence-based skincare.
A useful next step: if you want to turn this into a recipe-style post for your page, I can also format it as a 1,000+ word viral Facebook/Pinterest recipe article with a catchy title, ingredients, instructions, benefits, precautions, and SEO-friendly wording.