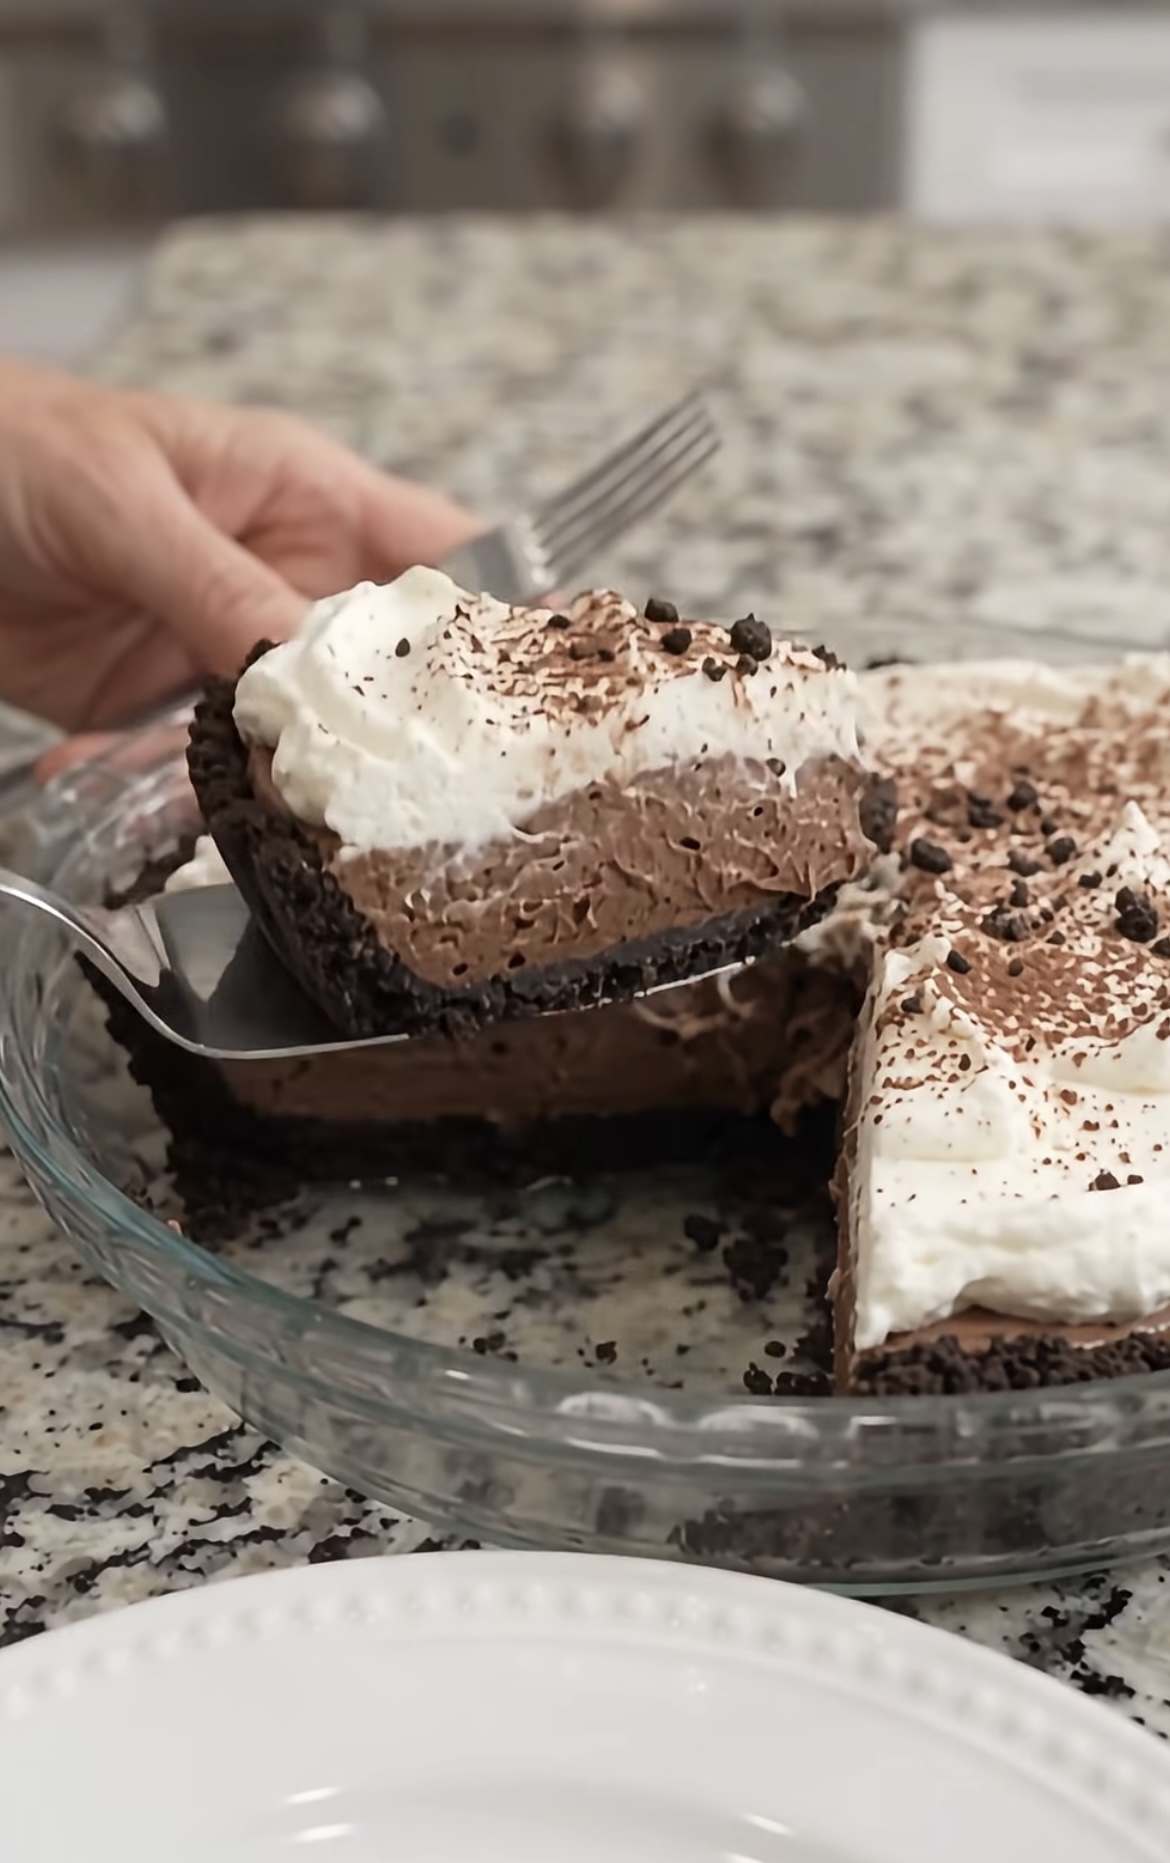
Why You’ll Love This Chocolate Mousse Pie
There are so many reasons to love this delicious no-bake chocolate pie.
- No oven required: Everything comes together without baking.
- Rich chocolate flavor: The chocolate mousse is smooth, creamy, and wonderfully decadent.
- Perfect texture: A crunchy Oreo crust balances the soft and airy filling.
- Beautiful presentation: The whipped cream topping and chocolate garnish make it look elegant.
- Make-ahead friendly: Prepare it the day before and let it chill overnight.
- Great for sharing: One pie makes several generous slices, making it ideal for parties and celebrations.
Preparation Time and Servings
- Preparation time: 35 minutes
- Chilling time: 6 hours
- Total time: Approximately 6 hours and 35 minutes
- Servings: 8–10 slices
- Difficulty: Easy to moderate
- Cooking method: No-bake
Ingredients
For the Oreo Cookie Crust
- 24 Oreo chocolate sandwich cookies
- 5 tablespoons (70 g) unsalted butter, melted
- 1 tablespoon granulated sugar (optional)
- A small pinch of salt
For the Chocolate Mousse Filling
- 200 g semi-sweet chocolate, finely chopped
- 1 ½ cups (360 ml) cold heavy whipping cream, divided
- 4 ounces (115 g) cream cheese, softened
- ⅓ cup (40 g) powdered sugar
- 1 teaspoon pure vanilla extract
- 2 tablespoons unsweetened cocoa powder
- A small pinch of salt
For the Whipped Cream Topping
- 1 cup (240 ml) cold heavy whipping cream
- ¼ cup (30 g) powdered sugar
- 1 teaspoon vanilla extract
For Decoration
- 1 tablespoon unsweetened cocoa powder
- Chocolate shavings or grated chocolate
- Mini chocolate chips
- Crushed Oreo cookies (optional)
Instructions
Step 1: Prepare the Oreo Crust
Start by preparing the chocolate cookie crust, which will provide a delicious crunchy base for the creamy filling.
Place the Oreo cookies, including their cream filling, into a food processor. Pulse until they become very fine crumbs. If you don’t have a food processor, place the cookies inside a large resealable plastic bag and crush them using a rolling pin.
Transfer the cookie crumbs into a medium mixing bowl. Add the melted butter and a small pinch of salt. Stir everything together until the crumbs are evenly coated and resemble wet sand.
Pour the mixture into a 9-inch pie dish. Using the bottom of a measuring cup or a flat spoon, press the crumbs firmly across the bottom and up the sides of the dish.
Make sure the crust is evenly distributed and compact. This helps prevent it from crumbling when you cut the finished pie.
Place the crust in the refrigerator for at least 30 minutes to firm up while you prepare the chocolate filling.
Step 2: Melt the Chocolate
Finely chop the semi-sweet chocolate and place it in a heatproof bowl.
You can melt the chocolate using a microwave or a double boiler.
For the microwave method, heat the chocolate in 20-second intervals, stirring after each interval until completely melted and smooth.
For the double-boiler method, place the bowl over a saucepan containing gently simmering water. Make sure the bottom of the bowl does not touch the water. Stir until the chocolate has melted.
Once smooth, remove the chocolate from the heat and allow it to cool until lukewarm.
Avoid adding hot chocolate directly to the whipped cream because it can melt the cream and affect the mousse texture.
Step 3: Prepare the Chocolate Mousse Base
In a large mixing bowl, beat the softened cream cheese with an electric mixer until completely smooth and fluffy.
Add the powdered sugar, cocoa powder, vanilla extract, and a small pinch of salt.
Continue mixing until everything is well combined and no lumps remain.
Slowly pour in the cooled melted chocolate while mixing on low speed. Scrape down the sides of the bowl as needed.
The mixture should become thick, smooth, and rich in chocolate flavor.
Set aside while you prepare the whipped cream.
Step 4: Whip the Cream
Pour 1 ½ cups of cold heavy whipping cream into a clean mixing bowl.
Using an electric mixer, beat the cream on medium-high speed until medium-stiff peaks form.
This usually takes approximately 3–5 minutes, depending on the mixer and the temperature of the cream.
The whipped cream should be fluffy and hold its shape when you lift the beaters, but it should not look grainy or overwhipped.
Add about one-third of the whipped cream to the chocolate mixture and gently fold it in with a spatula.
This first addition helps loosen the chocolate mixture and makes it easier to incorporate the remaining cream.
Add the rest of the whipped cream in two additions. Gently fold using a circular motion, lifting the mixture from the bottom of the bowl.
Be careful not to overmix. You want to preserve as much air as possible to create a light, fluffy chocolate mousse.
Step 5: Assemble the Chocolate Mousse Pie
Remove the chilled Oreo crust from the refrigerator.
Spoon the chocolate mousse filling into the crust.
Spread it evenly using an offset spatula or the back of a spoon. Smooth the top so the pie has an attractive, even surface.
Make sure the mousse reaches all the edges of the crust.
Cover the pie loosely with plastic wrap, making sure the wrap does not touch the filling.
Place it in the refrigerator for at least 4–6 hours, or preferably overnight.
This chilling time is important because it allows the chocolate mousse to become firm enough to slice while maintaining its creamy texture.
Step 6: Make the Whipped Cream Topping
Once the chocolate mousse layer has set, prepare the final whipped cream topping.
Pour 1 cup of cold heavy whipping cream into a chilled mixing bowl.
Add the powdered sugar and vanilla extract.
Beat using an electric mixer until stiff peaks form.
Start at medium speed and gradually increase the speed as the cream thickens.
Be careful not to overbeat, as the cream can become grainy and eventually turn into butter.
The finished whipped cream should be thick, smooth, and fluffy.
Step 7: Add the Whipped Cream Layer
Remove the chilled pie from the refrigerator.
Spread the whipped cream evenly over the chocolate mousse layer.
You can create a smooth finish using a spatula or make decorative swirls with the back of a spoon.
For a more elegant presentation, transfer the whipped cream into a piping bag fitted with a star-shaped nozzle and pipe small decorative rosettes around the edges.
This extra step makes the dessert look beautiful and bakery-worthy.
Step 8: Decorate and Chill
Dust the top lightly with unsweetened cocoa powder using a fine-mesh sieve.
Sprinkle chocolate shavings, grated chocolate, or mini chocolate chips over the whipped cream.
You can also add a few crushed Oreo cookies for extra crunch and decoration.
Return the pie to the refrigerator for another 30 minutes to allow the topping to settle.
When ready to serve, carefully slice the pie using a sharp knife.
For cleaner slices, dip the knife into warm water and wipe it dry between cuts.
Serve chilled and enjoy every delicious bite!
Tips for the Perfect Chocolate Mousse Pie
1. Use good-quality chocolate.
Chocolate is the main flavor in this dessert, so choosing good-quality semi-sweet chocolate makes a noticeable difference. Chocolate bars generally melt more smoothly than some chocolate chips.
2. Make sure the chocolate has cooled.
Never mix hot melted chocolate directly into whipped cream. Allow it to cool until lukewarm before combining it with the cream cheese mixture.
3. Keep your whipping cream cold.
Cold heavy whipping cream whips faster and holds its shape better. For extra stability, chill your mixing bowl and beaters for about 10–15 minutes before whipping.
4. Don’t rush the chilling process.
The mousse needs enough time to set properly. Although four hours may be sufficient, overnight refrigeration gives the best results.
5. Press the Oreo crust firmly.
A tightly packed crust holds together better when slicing. Pay special attention to the edges and corners of the pie dish.
6. Fold the whipped cream gently.
Use a spatula rather than an electric mixer when combining the whipped cream with the chocolate mixture. Gentle folding keeps the mousse light and airy.
Delicious Variations to Try
One of the best things about this chocolate mousse pie is how easy it is to customize.
- Dark Chocolate Mousse Pie: Replace semi-sweet chocolate with dark chocolate for a deeper, more intense chocolate flavor.
- Milk Chocolate Version: Use milk chocolate for a sweeter, creamier dessert.
- Chocolate Peanut Butter Pie: Add ⅓ cup of creamy peanut butter to the cream cheese mixture for a delicious chocolate and peanut butter combination.
- Mint Chocolate Pie: Add a small amount of peppermint extract to the chocolate mousse and decorate with chocolate curls.
- Cookies and Cream Pie: Fold crushed Oreo cookies into the mousse before spreading it over the crust.
- Caramel Chocolate Pie: Drizzle caramel sauce over the chocolate mousse before adding the whipped cream topping.
- Mocha Chocolate Pie: Dissolve 1 teaspoon of instant espresso powder into the melted chocolate for a subtle coffee flavor.
You can also experiment with different cookie crusts. Chocolate graham crackers, chocolate wafer cookies, or even chocolate digestive biscuits can make excellent alternatives to Oreos.
How to Store Chocolate Mousse Pie
Because this dessert contains cream cheese and whipped cream, it should always be stored in the refrigerator.
In the refrigerator: Cover the pie tightly with plastic wrap or place it in an airtight container. It will keep well for approximately 3–4 days.
In the freezer: You can freeze the chocolate mousse pie for up to 1 month. For the best results, freeze it before adding the whipped cream topping. Wrap it tightly to prevent freezer odors and ice crystals from affecting the texture.
When ready to enjoy, transfer the pie to the refrigerator and allow it to thaw slowly. Add freshly whipped cream before serving if you froze it without the topping.
Avoid leaving the finished pie at room temperature for more than 2 hours.
Frequently Asked Questions
Can I make this chocolate mousse pie the day before?
Absolutely! In fact, preparing it the day before is highly recommended. The overnight chilling time helps the mousse become firm and makes slicing much easier. Add the decorative chocolate topping just before serving for the freshest appearance.
Can I use Cool Whip instead of homemade whipped cream?
Yes! You can substitute thawed Cool Whip for the homemade whipped cream in the mousse and topping. The texture and sweetness will be slightly different, but it is a convenient alternative.
Why is my chocolate mousse too soft?
The most common reasons are insufficient chilling time, melted chocolate that was too hot, or cream that was not whipped enough. Make sure the chocolate is cooled before folding and allow the pie to chill for at least 6 hours.
Can I make this recipe without cream cheese?
Yes, but the filling will have a different texture and may be less stable. You can use mascarpone cheese as an alternative, or choose a traditional chocolate mousse recipe designed without cream cheese.
How do I get clean slices?
Use a sharp knife warmed under hot water. Wipe the blade clean between every slice. Make sure the pie is thoroughly chilled before cutting.
Can I use a store-bought Oreo crust?
Yes! A prepared 9-inch chocolate cookie crust works perfectly and saves preparation time. Simply prepare the filling and assemble the pie as directed.
Final Thoughts
This No-Bake Triple Chocolate Mousse Pie is everything a chocolate dessert should be: rich, creamy, fluffy, and wonderfully satisfying. The crunchy Oreo crust provides the perfect contrast to the smooth chocolate mousse, while the homemade whipped cream adds a light and delicate finish.
Whether you’re making it for a holiday celebration, a birthday party, a weekend family dinner, or simply because you’re craving chocolate, this dessert is guaranteed to impress.
It’s easy to prepare ahead, requires no baking, and looks absolutely stunning when sliced and served.
Make it once, and don’t be surprised if everyone asks you for the recipe! 🍫❤️