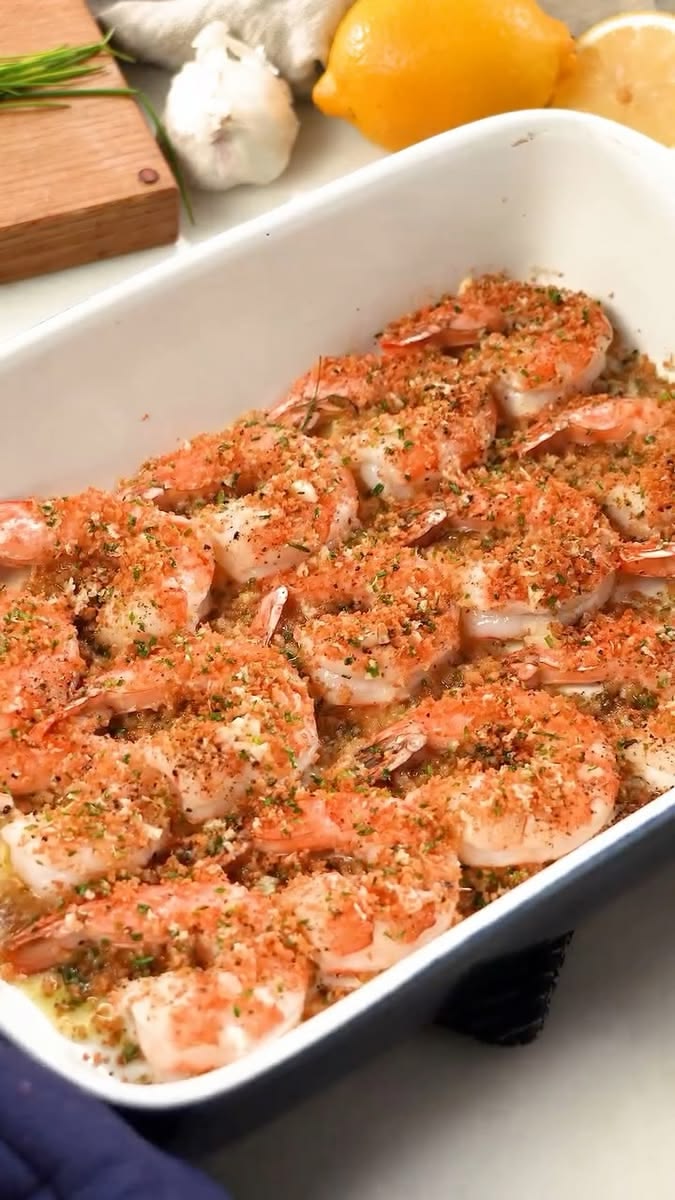
Baked shrimp usually means trading crunch for convenience — skip the fryer, and you often skip the crispy coating too. This version keeps both. A three-step breading (flour, egg, then a panko-parmesan crust) gives the shrimp something real to crisp up against in a hot oven, and a wire rack underneath lets air circulate so the bottom browns as well as the top. What comes out is deeply golden, genuinely crunchy shrimp with a savory, cheesy edge, all without a drop of frying oil. It’s ready in under 30 minutes, and cleanup is one baking sheet instead of a pot of hot oil to deal with.
Why This Crispy Panko-Parmesan Baked Shrimp Works
- A wire rack does real work. Air circulating underneath means the bottom crisps too, not just the side facing the oven’s heat.
- Panko crisps better than regular breadcrumbs. The larger, airier flakes bake up crunchier than fine dried breadcrumbs ever do.
- Parmesan adds flavor and helps browning. The cheese browns and crisps right along with the panko, adding a savory edge.
- No oil bath, no mess. All the crunch of fried shrimp with one baking sheet to clean instead of a pot of hot oil.
What You’ll Need
You’ll want a rimmed baking sheet with a wire rack set on top — the rack is what keeps the bottom crispy, so don’t skip it — plus three shallow dishes for the breading station.
- 1 1/2 pounds large raw shrimp, peeled and deveined, tails on
- 1/3 cup all-purpose flour
- 2 large eggs, beaten
- 1 cup panko breadcrumbs
- 1/2 cup grated parmesan
- 1 teaspoon garlic powder
- 1/2 teaspoon paprika
- 1/2 teaspoon salt
- 1/4 teaspoon black pepper
- 3 tablespoons butter, melted (or olive oil)
- Lemon wedges, for serving
- Fresh parsley, chopped, for garnish, optional
Step-by-Step Instructions
- Preheat and prep. Preheat the oven to 425°F. Line a baking sheet with foil and set a wire rack on top.
- Set up the breading station. Put the flour in one shallow dish, the beaten eggs in a second, and the panko, parmesan, garlic powder, paprika, salt, and pepper mixed together in a third.
- Bread the shrimp. Dredge each shrimp in the flour, shaking off the excess, then dip in the egg, then press firmly into the panko mixture until fully coated.
- Arrange on the rack. Place the breaded shrimp on the wire rack in a single layer, without touching.
- Add the butter. Drizzle or brush the melted butter lightly over the top of each piece — this helps the panko brown since there’s no frying oil doing that work.
- Bake. Bake 10 to 12 minutes, until deeply golden brown and crisp, flipping halfway through for the most even color — your kitchen will smell like a bakery crossed with a seafood shack by the time they’re done.
- Serve. Serve immediately with lemon wedges and a scatter of parsley, while the coating is at its crispest.
Pro Tips
- Press the panko on firmly. A light dusting falls off in the oven; pressing it into the egg-coated shrimp is what makes it stick through baking.
- Don’t skip the wire rack. Baking directly on the sheet pan traps steam underneath, and the bottom half of the shrimp never crisps.
- Keep one hand dry during breading. Use one hand for the flour and panko, the other for the egg, so you don’t end up with thick, clumpy breading on your fingers instead of the shrimp.
- Serve immediately. Like any breaded, baked food, this loses its crunch fast as it sits and steams itself.
- Pat the shrimp dry before breading. Extra moisture on the surface keeps the flour from adhering evenly, which means patchy breading.
Variations & Alternatives
- Extra crispy: Broil for the last 1 to 2 minutes of baking, watching closely, for deeper color.
- Spicier version: Add 1/4 teaspoon cayenne to the panko mixture.
- Gluten-free: Swap in gluten-free panko and a gluten-free flour blend; both work well in this method.
- Air fryer version: Cook at 400°F for 7 to 9 minutes, flipping halfway, until golden.
Storage & Reheating
Refrigerate leftovers in an airtight container for up to 2 days, though the coating won’t stay as crisp. Reheat in a 400°F oven for about 5 minutes to bring back some crunch — the microwave turns the panko soft almost instantly. This dish is best made fresh and doesn’t freeze well once baked.
FAQ
Why is my panko coating falling off? Usually the panko wasn’t pressed on firmly enough, or the shrimp was too wet before breading. Pat the shrimp dry first and press the coating on with real pressure.
Can I fry this instead of baking it? Yes. Fry in oil heated to 350°F for about 2 to 3 minutes, until golden, though baking gets a similar crunch with far less mess.
Do I need a wire rack for this recipe? It makes a real difference. Without one, the bottom of the shrimp sits in its own steam and never crisps the way the top does.
Can I bread the shrimp ahead of time? Yes, up to a few hours ahead. Arrange the breaded shrimp on the rack, cover loosely, and refrigerate until ready to bake.
Crispy Panko-Parmesan Baked Shrimp — Recipe Card
Prep Time: 15 minutes Cook Time: 12 minutes Total Time: 27 minutes Servings: 4 Course: Appetizer Cuisine: American
Ingredients
- 1 1/2 lbs large raw shrimp, peeled and deveined, tails on
- 1/3 cup all-purpose flour
- 2 large eggs, beaten
- 1 cup panko breadcrumbs
- 1/2 cup grated parmesan
- 1 tsp garlic powder
- 1/2 tsp paprika
- 1/2 tsp salt
- 1/4 tsp black pepper
- 3 tbsp butter, melted
- Lemon wedges, for serving
- Fresh parsley, chopped, for garnish, optional
Instructions
- Preheat oven to 425°F; set a wire rack on a baking sheet.
- Set up flour, egg, and panko-parmesan-seasoning dishes.
- Dredge shrimp in flour, then egg, then panko mixture, pressing to coat.
- Arrange on the rack in a single layer; drizzle with melted butter.
- Bake 10 to 12 minutes, flipping halfway, until golden and crisp.
- Serve with lemon and parsley.