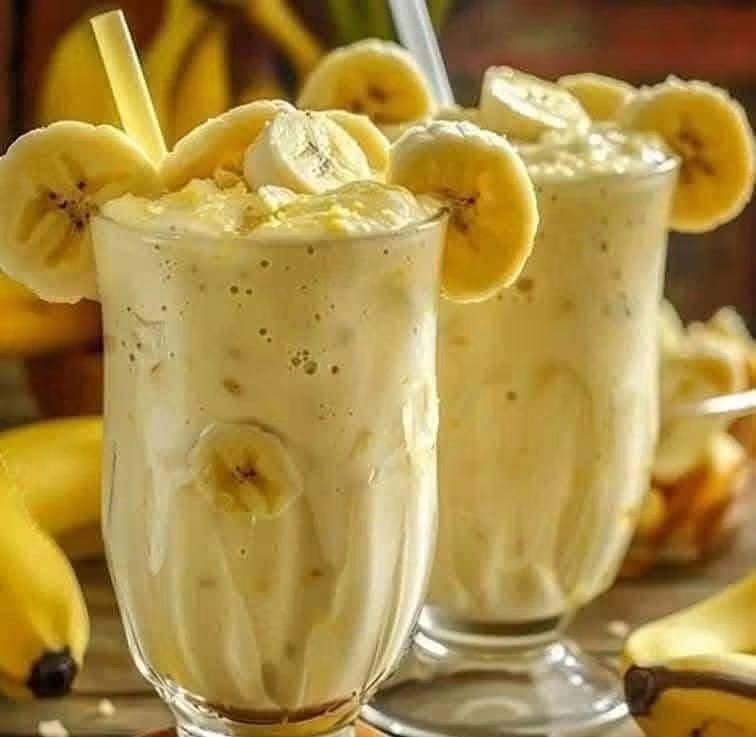
There is a fine line between a rich, velvety smoothie and a thin, lukewarm glass of fruit juice.
If you have ever made a pineapple banana smoothie at home, you have likely encountered the primary culinary challenge this fruit combination presents: excess liquid. Pineapple is packed with water, and when blended with fresh bananas, it often yields a runny texture that separates in your glass within minutes.
The secret to a café-quality, spoonably thick smoothie isn’t adding ice—which actually dilutes flavor as it melts—or dumping in scoops of artificial thickeners. It comes down to freezing technique, ingredient layering, and balancing the natural acidity of pineapple with rich, emulsifying fats.
Here is everything you need to know to craft a vibrant, tropical pineapple banana smoothie with a silky texture and a perfectly balanced sweet-tart flavor profile every single time.
Why Ice Ruins Your Smoothie: Adding plain ice cubes creates a slushy texture initially, but as the friction of the blender blades heats the mixture, the ice melts rapidly into plain water, watering down the tropical flavors. Always use frozen fruit instead of ice for texture.
Recipe Overview
- Prep Time: 5 minutes
- Blend Time: 2 minutes
- Total Time: 7 minutes
- Servings: 2 full glasses (approx. 16 oz each)
- Dietary Profile: Vegetarian, Gluten-Free (easily adaptable to Dairy-Free/Vegan)
Ingredients & Function
Every ingredient in this recipe serves a specific structural or flavor purpose.
| Ingredient | Amount | Culinary Purpose |
|---|---|---|
| Frozen Pineapple Chunks | 2 cups | Provides bright acidity, natural sweetness, and frozen body. |
| Ripe Frozen Banana | 1 large (sliced) | Acts as the primary emulsifier, adding creamy texture and natural sugar. |
| Greek Yogurt (Plain or Vanilla) | ½ cup | Introduces lactic tang, protein, and a smooth, velvety mouthfeel. |
| Unsweetened Almond Milk | ¾ cup | The liquid base—just enough to get the blender blades turning. |
| Chia Seeds or Hemp Hearts | 1 tablespoon | Adds healthy fats (Omega-3s), fiber, and subtle nuttiness while binding liquid. |
| Pure Vanilla Extract | ½ teaspoon | Mutes harsh acidic notes and rounds out tropical flavors. |
| Fresh Lime Juice | 1 teaspoon (optional) | Brightens the entire flavor palette and cuts through heavy sweetness. |
Step-by-Step Instructions
Follow this precise sequence to protect your blender motor and guarantee a smooth, chunk-free texture.
Step 1: Prep and Freeze Your Fruit in Advance
Never use warm, fresh fruit if you want a thick texture. Peel your ripe, spotty bananas, slice them into coin-sized pieces, and freeze them flat on a parchment-lined baking sheet before transferring them to an airtight bag. Do the same for fresh pineapple, or buy pre-frozen chunks to save time.
Step 2: Load the Blender in Correct Order
Liquid distribution is crucial for motor efficiency and uniform blending. Load your ingredients into the blender jar in the following order:
- Liquids & Solubles: Almond milk, lime juice, vanilla extract.
- Soft & Creamy Items: Greek yogurt, chia seeds.
- Frozen Solids: Frozen banana coins, frozen pineapple chunks.
Blender Physics Tip: Placing liquid at the bottom allows the rotating blades to create a vortex immediately, pulling the heavy frozen fruit down from the top into the blade zone.
Step 3: Start Low, Then Blend High
Place the lid securely on your blender. Start on the lowest speed setting for 10 to 15 seconds to break up the large frozen chunks without overheating the motor. Once the mixture starts to move, gradually increase the speed to high.
Step 4: Blend and Tamp
Blend on high for 45 to 60 seconds. If your blender came with a tamper tool, use it to push the frozen ingredients down toward the blades. If the blades spin freely without catching the fruit (an air pocket), stop the blender, scrape down the sides with a rubber spatula, add an extra tablespoon of milk if necessary, and resume blending.
Step 5: Texture Check & Serve
Stop the blender and inspect the mixture. It should be thick, pale yellow, and hold its shape slightly when lifted with a spoon. Pour immediately into chilled glass tumblers. Garnish with a sprinkle of chia seeds, hemp hearts, or a small pineapple wedge on the rim.
3 Common Mistakes & How to Avoid Them
1. Using Unripe Bananas
- The Problem: Green or bright yellow bananas contain high levels of raw starch rather than simple sugars. They lend a bitter, chalky taste and an astringent mouthfeel to your smoothie.
- The Fix: Use bananas with brown spots on the peel. As bananas ripen, their starches break down into natural sugars (fructose and glucose), offering peak sweetness and maximum creaminess when frozen.
2. Adding Too Much Liquid Upfront
- The Problem: Pouring in a full cup or more of milk right away makes blending easy, but results in a thin, watery drink that separates into clear liquid and pulp.
- The Fix: Start with less liquid than you think you need (¾ cup for this ratio). You can always add an extra splash through the lid opening while blending, but you cannot take liquid out once added.
3. Ignoring Pineapple’s Enzymes (Bromelain)
- The Problem: Fresh pineapple contains an active enzyme called bromelain, which breaks down proteins. If you mix fresh pineapple with dairy yogurt and let it sit for 30–60 minutes, the smoothie will turn unpleasantly bitter.
- The Fix: Drink your smoothie immediately after blending. Alternatively, using frozen or light canned pineapple tempers enzyme activity.
Substitutions & Flavor Variations
- Make it Dairy-Free / Vegan: Replace the dairy Greek yogurt with a thick coconut milk yogurt or cashew-based yogurt. Coconut yogurt works especially well here, giving the drink a subtle Piña Colada profile.
- Boost the Protein: Add 1 scoop of unflavored or vanilla whey or plant-based protein powder. When adding powder, increase the almond milk by 2–3 tablespoons to prevent the blend from becoming dry or pasty.
- Green Tropical Twist: Add 1 packed cup of fresh baby spinach or kale to the liquid layer. Baby spinach blends away completely without changing the sweet flavor, though it will turn the bright yellow color to vibrant green.
- Liquid Swaps: Replace almond milk with unsweetened coconut water for maximum hydration, or freshly squeezed orange juice for an extra punch of citrus acidity.
Pro Tips for the Ultimate Smoothie
- Chill Your Glassware: Place your glass tumblers in the freezer for 10 minutes before pouring. A frosted glass keeps the smoothie cold twice as long and prevents edge-melting.
- Pre-Blend Leafy Greens: If you choose to add greens like kale or spinach, blend them alone with the almond milk first until totally liquefied before adding the frozen fruit. This eliminates leafy flecks in your finished drink.
- Batch-Prep Smoothie Bags: Slice bananas and pineapple, measure out chia seeds, and place individual portion sizes into reusable silicone freezer bags. In the morning, dump the contents of one bag into the blender, add milk and yogurt, and blend in under 60 seconds.
Frequently Asked Questions
Can I make this pineapple banana smoothie ahead of time?
Smoothies are best consumed immediately for optimal texture and nutrition. However, you can store leftover smoothie in an airtight glass jar (like a Mason jar) filled to the top to minimize air exposure. Keep it in the refrigerator for up to 24 hours. Shake well before drinking, as natural separation will occur.
Why is my smoothie blending unevenly or getting stuck?
This usually happens when there isn’t enough liquid at the base to create a vortex, or when the frozen pieces are too large. Stop the blender, stir the ingredients manually with a spatula to release trapped air bubbles, add 1 to 2 tablespoons of liquid, and restart on low speed before ramping up to high.
How do I make my smoothie sweeter without refined sugar?
If your pineapple isn’t at peak sweetness, avoid adding white table sugar. Instead, blend in 1 to 2 pitted Medjool dates, a teaspoon of raw honey, or pure maple syrup. Dates add a subtle caramel note that pairs exceptionally well with banana.
Final Thoughts
Mastering a thick, refreshing pineapple banana smoothie isn’t complex, but it does require attention to simple mechanics: ditch the ice, freeze your fruit ahead of time, measure your liquid conservatively, and layer your ingredients correctly. Once you have this baseline ratio down, feel free to experiment with coconut milk, greens, or protein powders to fit your daily routine.