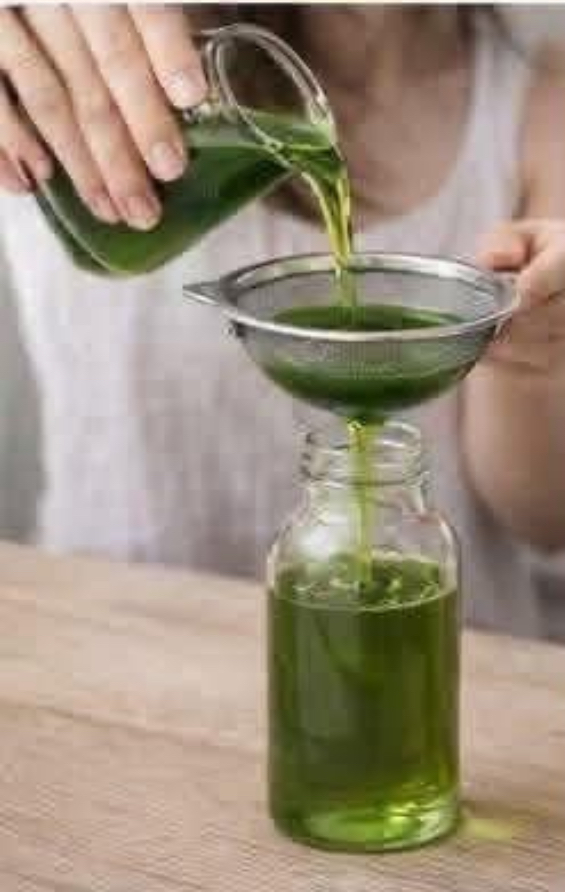
The images show a simple homemade aloe vera hair treatment made from fresh aloe vera leaves. The leaves are cut into pieces, heated in water, strained, and the resulting green liquid is transferred into a bottle. This type of preparation can be used as a hair rinse or pre-shampoo treatment to leave the hair feeling softer, smoother, and refreshed.
However, fresh aloe contains not only the clear inner gel but also a yellow latex layer called aloin. This can be irritating, so the most important part of making an aloe treatment at home is removing the yellow sap and using the clear gel carefully. Boiling aloe does not guarantee that all irritating compounds have been removed, so this recipe uses a short heating step and recommends rinsing the treatment out rather than leaving a homemade preparation on the scalp for hours.
Below is a detailed version you can prepare at home.
⸻
🌱 Ingredients
For approximately 250–300 ml of homemade aloe hair rinse:
- 1 large fresh aloe vera leaf
- 500 ml water
- 1 teaspoon dried rosemary, optional
- 1 teaspoon dried mint, optional
- 1 teaspoon vegetable glycerin, optional
- A clean glass bottle or spray bottle
Optional additions
You can keep the recipe very simple with only aloe and water. If you want a more fragrant herbal rinse, you can add a small amount of dried rosemary or mint.
Avoid adding lemon juice, baking soda, essential oils, or large quantities of vinegar. These ingredients can make a homemade scalp preparation more irritating, particularly if your scalp is sensitive.
⸻
🧴 Step 1: Choose and Prepare the Aloe Vera
Start with a fresh, firm aloe vera leaf.
Wash the outside of the leaf thoroughly under cool running water. Place it on a clean cutting board.
Using a sharp knife, cut away the base and the pointed tip.
Then cut the leaf into several large pieces.
At this point, you may notice a yellowish liquid coming out of the cut edges. This is the aloe latex. It is different from the clear gel inside the leaf and can be irritating.
Stand the pieces upright in a glass or bowl for about 10–15 minutes so some of the yellow sap can drain away.
Afterward, rinse the pieces several times with clean water.
This step is important and should not be skipped simply because the aloe will be heated.
⸻
🌿 Step 2: Separate the Clear Aloe Gel
Place an aloe piece flat on the cutting board.
Carefully remove the green outer skin using a knife or vegetable peeler.
You should see the transparent, slippery aloe gel inside.
Scoop the clear gel away from the green skin with a clean spoon.
Try to avoid including the yellow material immediately underneath the skin.
Repeat with the remaining pieces.
You should now have approximately 2–4 tablespoons of fresh aloe gel, depending on the size of your leaf.
⸻
💧 Step 3: Prepare the Aloe Water
Pour 500 ml of water into a small saucepan.
Add the clear aloe gel.
If you want, add one teaspoon of dried rosemary or mint.
Place the saucepan over low to medium heat.
Bring the mixture gently toward a simmer while stirring occasionally.
Do not aggressively boil it for a long time. A gentle heating period of approximately 5–10 minutes is enough for this homemade rinse.
As the aloe warms, the gel will break apart and the water may become slightly greenish or cloudy.
This is normal.
The goal is not to cook the aloe until it becomes extremely concentrated. You simply want to create a light aloe-infused water that can be used as a hair treatment.
⸻
🥣 Step 4: Cool and Strain
Remove the saucepan from the heat.
Allow the mixture to cool until it is comfortable to handle.
Place a fine mesh strainer over a clean bowl.
Pour the aloe mixture through the strainer.
Press gently with the back of a spoon to extract the liquid, but don’t force large pieces of plant material through the strainer.
The finished liquid should be relatively smooth and free from large pieces of aloe.
If you added rosemary or mint, the straining process will also remove the herbs.
⸻
🍃 Step 5: Optional Conditioning Addition
Once the aloe liquid has cooled completely, you can add 1 teaspoon of vegetable glycerin.
Glycerin is a humectant, meaning it helps attract and retain moisture. It can make the rinse feel more conditioning.
Stir thoroughly.
This step is optional. If your hair becomes sticky or heavy easily, simply leave the glycerin out.
For the simplest version, aloe and water are enough.
⸻
🧴 Step 6: Transfer to a Clean Bottle
Pour the finished aloe rinse into a clean bottle.
A spray bottle makes application easier, particularly if you have long hair.
Label the bottle with the date you made it.
Because this is a homemade water-based preparation without a cosmetic preservative, it can spoil relatively quickly. Store it in the refrigerator and use it within a few days. If it develops an unusual smell, changes dramatically in appearance, becomes slimy in an unusual way, or shows signs of contamination, throw it away.
Do not store homemade aloe water at room temperature for extended periods.
⸻
💆♀️ How to Use the Aloe Vera Hair Rinse
There are two easy ways to use this treatment.
Method 1: Pre-Shampoo Treatment
This is my preferred method for a homemade preparation because you can rinse it out afterward.
First, gently wet your hair with lukewarm water.
Divide your hair into sections.
Apply a small amount of the aloe liquid to your lengths and ends. If you tolerate aloe well, you can apply a small amount to the scalp as well, but avoid soaking the scalp.
Massage gently with your fingertips for approximately 2–3 minutes.
Leave the treatment on for about 10–15 minutes.
Then wash your hair with your normal shampoo.
Follow with your regular conditioner.
This method allows you to enjoy the slippery, moisturizing feel of aloe without leaving an unpreserved homemade mixture sitting on your scalp for a long period.
⸻
🌿 Method 2: Hair Rinse
After shampooing, apply the cooled aloe rinse over the lengths of your hair.
Make sure the hair is thoroughly coated but not dripping excessively.
Leave it for approximately 5–10 minutes.
Then rinse thoroughly with cool or lukewarm water.
You can finish with conditioner if your hair needs additional softness.
For dry or curly hair, concentrate the treatment on the mid-lengths and ends.
For oily hair, use a smaller amount and focus primarily on the lengths.
⸻
✨ What Can Aloe Vera Do for Hair?
Aloe vera is popular in hair-care routines because its gel contains a high percentage of water and has a naturally slippery texture.
When applied to hair, it can make the strands feel:
- Softer
- Smoother
- More hydrated
- Easier to detangle
- Less rough
- More conditioned
It can also make curls feel more defined because the gel provides some natural slip and light hold.
However, it is important not to treat aloe vera as a miracle cure.
Aloe cannot permanently repair split ends, reverse genetic hair loss, or transform damaged hair overnight. If the hair shaft has been severely damaged by bleaching, chemical treatments, or excessive heat, the damaged portion cannot biologically return to its original condition. Conditioning treatments can nevertheless improve the feel, appearance, and manageability of the hair.
⸻
💚 How Often Can You Use It?
For most people, once a week is a reasonable starting point.
If your hair responds well, you can continue using the rinse weekly.
There is usually no advantage to applying large amounts every day.
If your hair starts feeling coated, sticky, stiff, or unusually dry, reduce the frequency.
Remember that everyone’s hair behaves differently. Fine hair may need considerably less product than thick, curly, or very dry hair.
⸻
⚠️ Important Safety Precautions
Although aloe vera is a common cosmetic ingredient, natural does not automatically mean irritation-free.
Before applying your homemade preparation generously, perform a small patch test.
Apply a tiny amount to a small area of skin and wait to see how your skin responds. If you experience burning, significant itching, redness, swelling, or irritation, wash the area and do not use the preparation.
Do not apply aloe to broken or irritated skin.
Also avoid getting the mixture into your eyes.
If it gets into your eyes, rinse thoroughly with clean water.
Most importantly, do not use the yellow latex/sap intentionally as a scalp treatment. The clear inner gel is the part generally used in cosmetic preparations.
Pregnant people, children, or anyone with a known sensitivity to aloe should be particularly cautious with homemade preparations and may prefer a commercially formulated aloe product.
⸻
🌸 Can You Add Coconut Oil?
You can use coconut oil separately, but I wouldn’t mix a large amount directly into this water-based recipe.
Oil and water do not naturally stay mixed. Without an appropriate emulsifier, the mixture separates and can become difficult to distribute evenly.
Instead, you can apply a small amount of coconut oil to the lengths of your hair before shampooing, then use the aloe rinse afterward.
This gives you two separate treatments rather than creating an unstable homemade mixture.
⸻
🌿 Aloe + Rosemary Version
If you like the idea of the green herbal liquid shown in the image, you can make a rosemary variation.
Use:
- 1 aloe vera leaf
- 500 ml water
- 1 teaspoon dried rosemary
Prepare the aloe as described above.
Add the clear gel and rosemary to the water.
Warm gently for 5–10 minutes.
Cool.
Strain carefully.
Refrigerate.
Use as a rinse within a few days.
Rosemary is commonly used in hair-care routines, but adding it to homemade aloe water doesn’t turn the mixture into a medically proven hair-growth treatment. Think of it primarily as a botanical hair-care rinse.
⸻
🫧 Tips for Better Results
1. Don’t use too much.
A generous amount isn’t necessarily better. Your hair should feel conditioned, not saturated.
2. Focus on the lengths.
The ends are often the driest and most fragile part of the hair.
3. Use cool or lukewarm water.
Very hot water can make hair feel dry and rough.
4. Detangle gently.
Use your fingers or a wide-tooth comb while the hair is slippery with conditioner.
5. Keep the bottle clean.
Never repeatedly touch the liquid with dirty hands.
6. Make small batches.
Because this recipe contains water and no professional preservative system, a small batch is safer and more practical than preparing a large bottle.
⸻
🌱 Final Recipe at a Glance
Ingredients
- 1 fresh aloe vera leaf
- 500 ml water
- 1 teaspoon dried rosemary, optional
- 1 teaspoon vegetable glycerin, optional
Instructions
- Wash the aloe leaf.
- Cut away the ends.
- Allow the yellow sap to drain.
- Rinse the leaf thoroughly.
- Remove the green skin.
- Collect only the clear inner gel.
- Add the gel to 500 ml water.
- Add rosemary if desired.
- Heat gently for 5–10 minutes.
- Allow the mixture to cool.
- Strain through a fine mesh strainer.
- Add glycerin if desired.
- Transfer to a clean bottle.
- Refrigerate.
- Use as a pre-shampoo treatment or rinse.
- Rinse the hair thoroughly afterward.
⭐ Recommended frequency
Once a week is a good starting point.
This homemade aloe vera rinse is a simple way to add a refreshing botanical step to your hair-care routine. The key is to keep the preparation gentle, remove the yellow aloe latex as carefully as possible, avoid long-term storage, and rinse the treatment out rather than treating an unpreserved homemade mixture like a commercial leave-in product.
Tip: If you’re making this specifically for hair growth, dandruff, dry hair, or very long/curly hair, the recipe can be adjusted considerably depending on the goal.