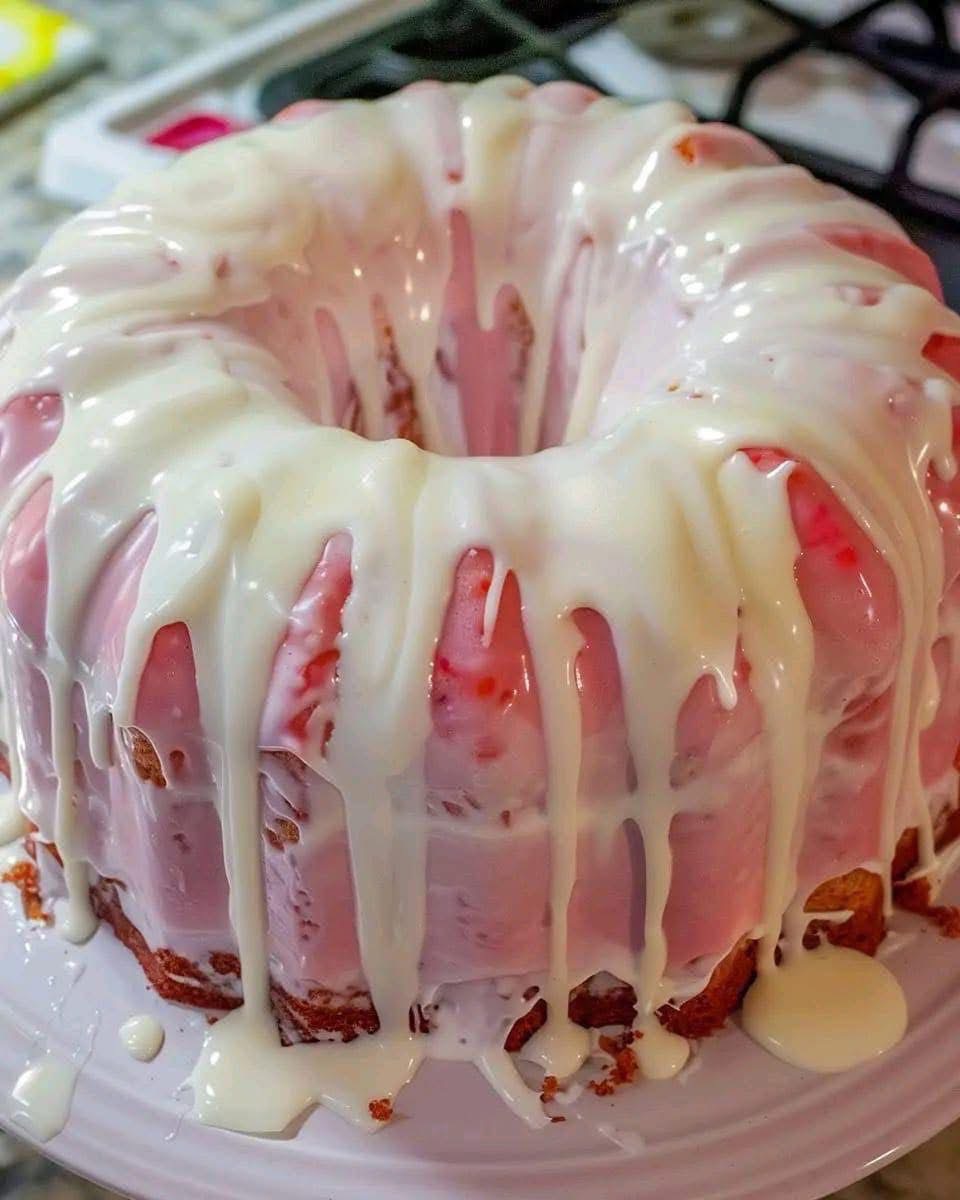
There’s something magical about a bundt cake — the shape, the height, the deep grooves that catch the glaze perfectly. This strawberry bundt cake brings together everything people love in a dessert: a moist texture, a rich fruity flavor, and a creamy sweet glaze that drips down the sides like a waterfall.
In your image, the cake is distinctly pink, indicating the use of strawberry purée, strawberry gelatin, or both. The glaze is thick, pale white, and glossy, likely made from cream cheese, powdered sugar, and vanilla. The contrast between the pink cake and white glaze is visually stunning and tastes even better.
Below is the full detailed recipe to recreate it.
⭐
INGREDIENTS
🍰
For the Strawberry Cake
- 2 ½ cups all-purpose flour
- 1 ½ cups granulated sugar
- 1 cup butter (softened) — or ½ cup butter + ½ cup oil for extra moisture
- 4 large eggs
- 1 cup pureed strawberries (fresh or frozen, blended)
- 1 teaspoon baking powder
- ½ teaspoon baking soda
- ½ teaspoon salt
- 1 teaspoon vanilla extract
- 1 teaspoon strawberry extract (optional but makes it pink & flavorful)
- 1 small box strawberry gelatin (optional, 85 g — gives color & flavor)
- ½ cup milk or buttermilk
- 1 cup chopped fresh strawberries (optional for extra fruit inside)
🥛
For the Vanilla Cream Glaze
This thick glaze is what makes your cake look exactly like the image.
- 120 g cream cheese, softened
- 2 tablespoons butter, softened
- 2 cups powdered sugar
- 1 teaspoon vanilla extract
- 2–4 tablespoons milk or heavy cream
- Pinch of salt
- 1 tablespoon lemon juice (optional for brightness)
🍓 STEP 1 — MAKE THE STRAWBERRY PURÉE
- Wash and hull about 1½ cups of fresh strawberries.
- Place them in a blender with 1–2 tablespoons of sugar if needed.
- Blend until smooth.
- Pour into a saucepan and simmer for 8–10 minutes, reducing by one-third.
This step intensifies the strawberry flavor and prevents the cake from becoming too watery.
Let the purée cool completely before using.
🧁 STEP 2 — PREPARE THE CAKE BATTER
✔ Cream Butter and Sugar
Beat the butter and sugar together on medium speed for 3–4 minutes until pale and fluffy.
This creates air pockets that make the cake light.
If using half oil, add it after the butter mixes with sugar.
✔ Add Eggs One at a Time
Add each egg, mixing thoroughly after each addition.
Scrape the bowl as needed.
✔ Add Strawberry & Vanilla Extracts
The extracts intensify the fruit flavor and deepen the pink color.
✔ Add the Cooled Strawberry Purée
Mix until fully combined.
The batter will begin turning pink — do not worry if it looks slightly runny.
🥣 STEP 3 — MIX DRY INGREDIENTS
In a separate bowl, whisk together:
- Flour
- Baking powder
- Baking soda
- Salt
- Strawberry gelatin (if using)
The gelatin adds both flavor and color, but the cake works perfectly even without it.
🥛 STEP 4 — COMBINE WET & DRY MIXTURES
Alternate adding the dry ingredients and the milk/buttermilk into the wet mixture:
- Add 1/3 of the dry ingredients
- Add half the milk
- Add another 1/3 of the dry ingredients
- Add remaining milk
- Add final dry ingredients
Mix only until combined — do not overmix, or the cake becomes dense.
🍓 Optional: Fold in Fresh Strawberries
If you want small strawberry pockets like in some bakery-style cakes, fold in 1 cup finely chopped strawberries.
🧁 STEP 5 — BAKE THE CAKE
✔ Prepare Your Bundt Pan
Grease the bundt pan thoroughly with:
- Butter or oil
- A dusting of flour
Or use baking spray with flour (“Bake Easy”).
Be VERY thorough — bundt pans can stick easily.
✔ Fill the Pan
Pour the batter evenly.
Tap the pan lightly to release air bubbles.
✔ Bake
Bake at 175°C (350°F) for 55–70 minutes.
The cake is done when:
- A skewer comes out clean
- The top feels springy
- The cake has pulled slightly from the edges
Let it rest 15 minutes before flipping.
✔ Invert the Cake
Place a cooling rack over the cake and flip carefully.
Let it cool completely for at least 1 hour.
🍶 STEP 6 — MAKE THE VANILLA CREAM GLAZE
This thick, luxurious glaze is the exact one seen in your photo — creamy white and beautifully drip-able.
✔ Beat Cream Cheese & Butter
Mix until smooth and lump-free.
✔ Add Powdered Sugar
Gradually add powdered sugar while mixing on low speed.
✔ Add Vanilla, Salt, Milk
Add:
- Vanilla
- A small pinch of salt
- 2–4 tablespoons milk or cream
Start with 2 tablespoons of milk.
If you want thinner drips like in your image, add more liquid slowly.
✔ Add Lemon Juice (Optional)
This brightens the flavor and makes the glaze taste more like bakery frosting.
When the glaze is smooth and pourable, it is ready.
🫧 STEP 7 — GLAZE THE CAKE
This is the fun part!
- Place the cooled cake on its serving plate.
- Slowly pour the glaze from the top center.
- Allow it to drip naturally down the sides.
For the dramatic waterfall effect seen in your picture, pour generously in several layers.
🍰 STEP 8 — SERVE & STORE
✔ Serve
The cake is delicious at room temperature or slightly chilled.
✔ Store
- In the fridge: up to 5 days
- In the freezer (without glaze): up to 2 months
💡 PRO TIPS FOR BEST RESULTS
⭐ For a Moist Cake
- Use room-temperature ingredients
- Do NOT overmix after adding flour
- Add half oil for extra tenderness
- Use reduced strawberry purée — never watery puree
- Don’t overbake
⭐ For the Perfect Pink Color
- Use strawberry gelatin
- Add 2–3 drops of pink food coloring (optional)
- Use ripe strawberries
⭐ For a Smooth Glaze
- Sift your powdered sugar
- Beat cream cheese until perfectly smooth
- Adjust milk slowly until perfect consistency
🎉 OPTIONAL VARIATIONS
🍫 Strawberry-Chocolate Drizzle
Top the cake with melted white chocolate.
🍓 Strawberry-Lemon
Add lemon zest to the batter and glaze.
🍰 Strawberry Swirl
Swirl extra purée into the batter.