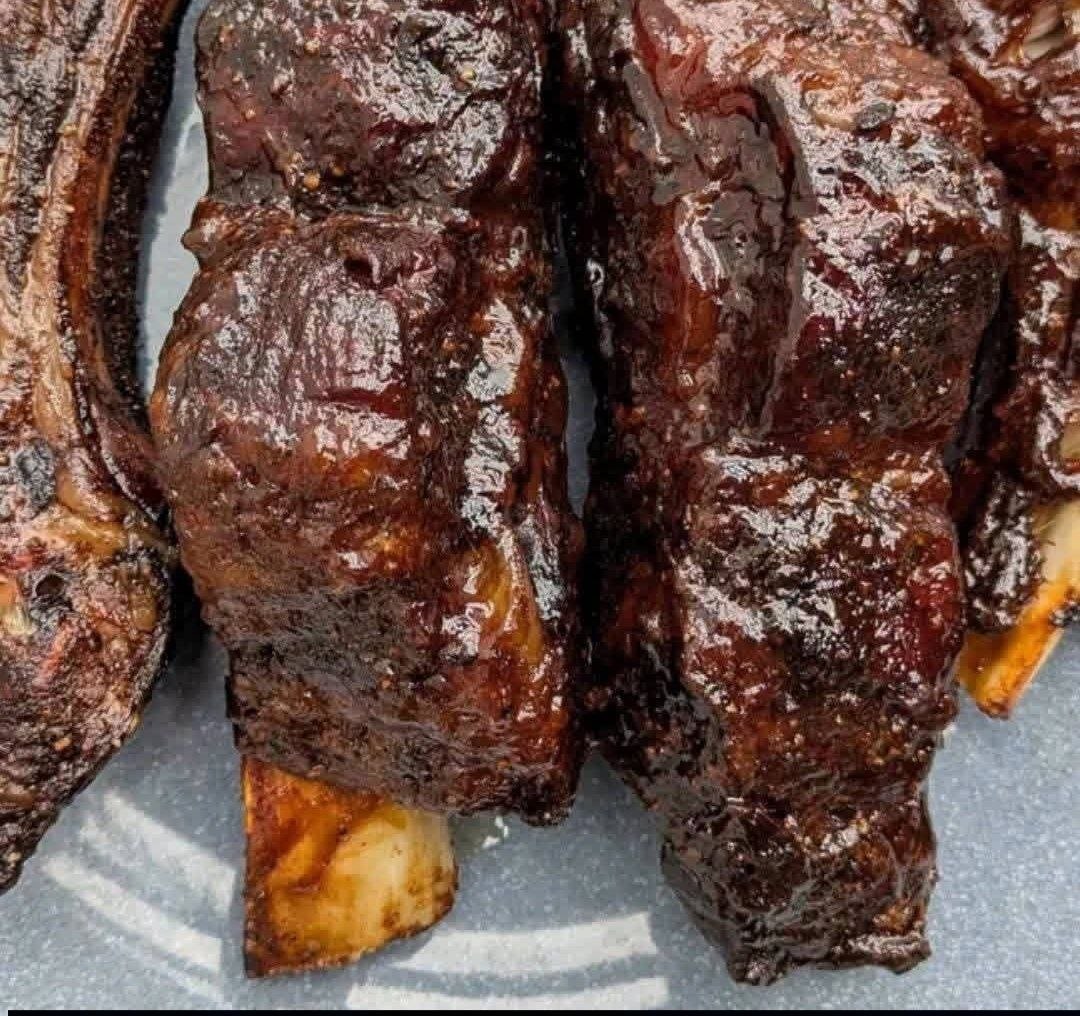
There’s a particular kind of quiet pride that comes from pulling a rack of beef back ribs off the smoker, watching that dark mahogany bark catch the light, and knowing you’ve spent the better part of a day earning this moment. Smoked beef back ribs are a true low-and-slow project — they demand patience, but they reward it with meat so tender it practically pulls away from the bone with a gentle tug, wrapped in a deeply caramelized, sticky-sweet BBQ glaze. If you’ve ever wondered what separates backyard barbecue from something you’d find at a serious smokehouse, this recipe is a great place to find out.
Beef back ribs come from the section of the cow just above the ribeye, meaning they’re the bones left behind after ribeye roasts are cut away. There’s usually a good amount of meat left on top of the bones, along with a rich marbling of fat that renders beautifully during a long smoke, basting the meat from the inside out. Compared to pork ribs, beef back ribs have a bolder, beefier flavor and a slightly different texture, but the technique for smoking them low and slow follows many of the same principles pitmasters have relied on for generations.
Why Low and Slow Is Non-Negotiable
Ribs, whether beef or pork, are cuts loaded with connective tissue, particularly collagen, which is tough and chewy when raw or quickly cooked. The entire purpose of smoking ribs at a low temperature for an extended period of time is to give that collagen the time it needs to slowly break down into gelatin, which is what creates that famously tender, almost melt-in-your-mouth texture barbecue lovers chase. Cook ribs too hot or too fast, and you’ll end up with tough, chewy meat no amount of sauce can fix. Cook them low and slow, and you get ribs that practically fall off the bone, saturated with smoky flavor throughout.
This is why patience really is the main ingredient in a recipe like this one. There’s no shortcut that replicates what happens inside a smoker held steady at 225°F for several hours. Time and temperature control are doing the real work here.
Understanding the Process: The 3-2-1-ish Method
Many barbecue smoking methods follow some version of a staged approach, and this recipe does too, broken into three main phases: an initial unwrapped smoke to build bark and smoke flavor, a wrapped phase to lock in moisture and speed up tenderizing, and a final unwrapped phase to set the glaze and firm the bark back up. Beef back ribs don’t always need quite as long as a full pork spare rib cook, but the same principles apply — smoke first for flavor and color, wrap to power through the toughest part of the cook, then finish uncovered to build that final sticky, caramelized exterior.
Ingredients You’ll Need
- 2 racks beef back ribs
- 2 tablespoons yellow mustard (as a binder)
- 3 tablespoons brown sugar
- 2 tablespoons smoked paprika
- 1 tablespoon garlic powder
- 1 tablespoon onion powder
- 2 teaspoons kosher salt
- 1 teaspoon black pepper
- ½ teaspoon cayenne pepper (optional)
- 1 cup BBQ sauce, for glazing
- ½ cup apple juice or cider, for spritzing
Step-by-Step Instructions
Step 1: Prep the ribs. Beef back ribs have a tough membrane, called the silverskin, running along the bone side of the rack. Removing it is an important step, since leaving it on prevents smoke and seasoning from penetrating the meat and can result in a chewy, unpleasant texture. Slide a butter knife under the membrane at one end, get a good grip with a paper towel, and peel it away in one motion. Pat the ribs dry with paper towels once trimmed.
Step 2: Season the ribs. Rub the entire surface of the ribs with a thin coat of yellow mustard. This might sound unusual, but the mustard acts as a binder, helping the dry rub adhere evenly to the meat, and its flavor cooks off almost entirely during the smoke, leaving behind just a subtle tang. In a small bowl, combine the brown sugar, smoked paprika, garlic powder, onion powder, kosher salt, black pepper, and cayenne if using. Apply the rub generously and evenly over all sides of the ribs, pressing gently so it adheres well.
Step 3: Preheat the smoker. Set your smoker to a steady 225°F, using a wood like oak, hickory, or cherry, all of which pair beautifully with beef. Cherry wood in particular adds a slightly sweeter smoke flavor and a nice color to the bark. Allow the smoker to come fully up to temperature and stabilize before adding the ribs.
Step 4: Smoke the ribs, unwrapped. Place the ribs bone-side down on the smoker grates. Let them smoke undisturbed for the first hour to allow the bark to begin forming, then start spritzing the ribs with apple juice or cider every hour to keep the surface moist and help the smoke adhere. Continue smoking for approximately 3 hours, or until the internal temperature reaches around 165°F.
Step 5: Wrap and continue smoking. Once the ribs hit around 165°F internally, remove them from the smoker and wrap tightly in aluminum foil or, for a slightly firmer bark, butcher paper. This wrapped phase, sometimes called “the crutch,” traps steam and moisture around the meat, speeding up the breakdown of connective tissue and helping push through the temperature plateau that ribs often hit partway through cooking. Return the wrapped ribs to the smoker and continue cooking for another 1.5 to 2 hours, until the internal temperature reaches 200 to 203°F and the meat feels fork-tender with little resistance.
Step 6: Glaze and set the bark. Carefully unwrap the ribs and brush generously with your favorite BBQ sauce. Return them to the smoker, uncovered, for another 20 to 30 minutes. This final stage allows the sugars in the sauce to caramelize and tackify into a sticky, glossy glaze, while the bark firms back up after being softened during the wrapped phase.
Step 7: Rest before slicing. Remove the ribs from the smoker and let them rest, loosely tented with foil, for 10 to 15 minutes. This resting period allows the juices to redistribute throughout the meat rather than spilling out the moment you slice into it. Slice between the bones and serve hot.
Tips for the Best Results
- Don’t skip removing the membrane. It’s a small step that makes a big difference in both texture and how well the seasoning and smoke penetrate the meat.
- Use a meat thermometer, not just time. Every rack of ribs is different, and internal temperature is a far more reliable indicator of doneness than the clock. Look for that 200 to 203°F range and a probe that slides in with little resistance.
- Maintain steady smoker temperature. Fluctuating temperatures can extend cook times unpredictably and affect texture. A consistent 225°F is the sweet spot for tender, well-smoked ribs.
- Spritzing matters. Keeping the surface of the ribs moist during the early smoking phase helps smoke adhere and prevents the exterior from drying out and turning leathery before the wrap stage.
- Let them rest. Cutting into ribs immediately after pulling them off the smoker lets all those flavorful juices run out onto the cutting board instead of staying in the meat.
Variations Worth Trying
- Swap the wood. Mesquite delivers a much stronger, more intense smoke flavor if you prefer bold barbecue; applewood offers a milder, slightly fruity option.
- Make your own BBQ sauce from scratch with ketchup, brown sugar, vinegar, and spices for a fully homemade glaze.
- Add a dry-rub finish instead of a wet glaze for ribs with a drier, more classic Texas-style bark rather than a sticky sauce coating.
- Spice it up with extra cayenne or a chili powder blend in the rub for ribs with more heat.
- Try a coffee-based rub, adding a tablespoon of finely ground coffee to the dry rub for deeper, more complex smoky notes that pair beautifully with beef.
Serving Suggestions
Smoked beef back ribs pair perfectly with classic barbecue sides: creamy coleslaw, baked beans, cornbread, or mac and cheese all balance the rich, smoky meat nicely. A tangy pickle or a simple vinegar-based slaw helps cut through the richness of the glaze. For drinks, a cold beer or a smoky bourbon cocktail rounds out the meal beautifully.
Storage and Reheating
Leftover ribs keep well in the refrigerator for up to 4 days when stored in an airtight container. To reheat without drying them out, wrap the ribs in foil with a small splash of broth or apple juice and warm them in a 300°F oven until heated through, which helps restore some of the moisture lost during storage. Ribs also freeze well for up to 3 months — wrap tightly in foil and then place in a freezer bag, and thaw overnight in the refrigerator before reheating.
Smoked beef back ribs are the kind of dish that turns a regular weekend into an event. The long cook time is genuinely part of the appeal — there’s something deeply satisfying about tending a smoker for hours and finally being rewarded with ribs this tender, this smoky, and this good.