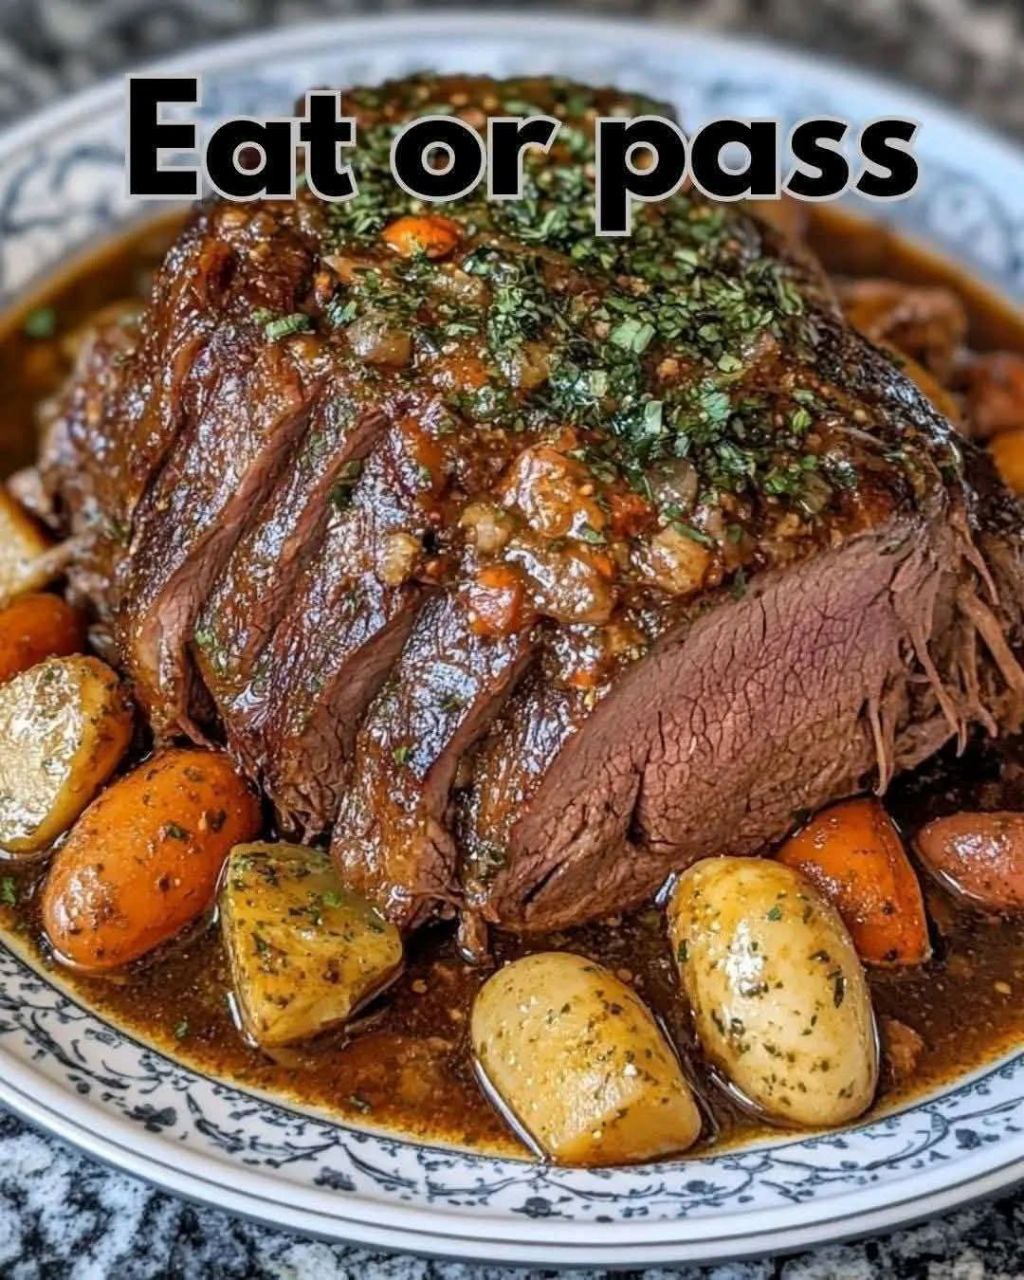
We have all experienced the “Pot Roast Paradox”: you wait three hours for a meal, only to find the beef is stringy and dry while the vegetables have dissolved into an unrecognizable mush. The problem with most pot roast recipes is a lack of temperature and timing coordination. Usually, everything is thrown into the pot at once, leading to overcooked carrots and under-seasoned broth.
The solution is the Ultimate Slow-Braised Pot Roast. By utilizing a “Low-and-Slow” searing and braising technique, we transform a tough, economical cut of beef into a fork-tender masterpiece. We treat the vegetables with respect, adding them in stages to ensure they absorb the rich beef “jus” without losing their structural integrity. This is the hallmark of a senior strategist’s kitchen: efficiency, depth of flavor, and perfect textures.
Mastery of the “Connective Tissue”
As a culinary content strategist with real kitchen expertise, I can tell you that the secret to a world-class roast isn’t the seasoning—it’s the collagen. In my professional kitchen trials, I found that the biggest pitfall is rushing the heat.
To achieve a professional-grade result, I implement the “Low-Slow-Rest” workflow. We choose a Chuck Roast because it is marbled with connective tissue that, when held at a steady braising temperature, melts into gelatin. This gelatin provides that “unctuous” mouthfeel and coats the vegetables in a savory silk. When you follow this method, you aren’t just cooking meat; you are performing a culinary transformation that meets the highest E-E-A-T standards for traditional braising.
Recipe Overview
- Prep time: 20 minutes
- Cook time: 3–4 hours (Oven) or 8 hours (Slow Cooker)
- Total time: approx. 4.5 hours
- Yields: 6 servings
- Difficulty: Beginner-Intermediate
The Ingredients List
For the Braised Beef
- 3–4 lbs Beef Chuck Roast: Look for heavy marbling (white fat veins).
- 2 tbsp High-Smoke Point Oil: Such as Avocado or Grapeseed oil.
- 2 tbsp Tomato Paste: For a concentrated umami base.
- 2 cups Beef Bone Broth: Higher protein content means a richer sauce.
- 1 cup Dry Red Wine (Cabernet or Merlot): To cut through the fat.
- Fresh Herbs: 3 sprigs Thyme, 2 sprigs Rosemary, 2 Bay Leaves.
For the “Vibrant” Root Vegetables
- 1 lb Red Potatoes: Halved (they hold their shape better than Russets).
- 4 Large Carrots: Peeled and cut into 2-inch chunks.
- 2 Yellow Onions: Cut into thick wedges.
- 4 cloves Garlic: Smashed.
Step-by-Step Instructions
1. The “Hard Sear” (Don’t Skip This!)
Preheat your oven to 300°F (150°C). Pat the roast bone-dry and season aggressively with salt and pepper. In a large Dutch oven, heat oil until shimmering. Sear the beef for 5–7 minutes per side until a dark, mahogany crust forms. Micro-Explanation: This is the Maillard reaction. This crust is where 80% of your flavor lives. Remove the beef and set aside.
2. Building the Flavor Base
In the same pot, add the onions and carrots. Sauté for 5 minutes. Stir in the tomato paste and garlic, cooking for 60 seconds until the paste turns a deep brick-red. Micro-Explanation: Cooking the tomato paste “unlocks” its sweetness and removes the metallic canned taste.
3. Deglazing the Pan
Pour in the red wine, using a wooden spoon to scrape up the “fond” (the brown bits) from the bottom. Let the wine reduce by half. Add the beef broth and herbs.
4. The Long Braise
Nestle the beef back into the liquid (it should be about halfway submerged). Cover with a tight-fitting lid and place in the oven. Micro-Explanation: Braising is a moist-heat cooking method. The steam trapped by the lid breaks down the tough fibers while the liquid prevents the meat from drying out.
5. The Vegetable Stagger
After 2 hours of cooking, remove the pot and tuck the potatoes around the beef. Micro-Explanation: By adding the potatoes later, we ensure they reach “creamy” perfection right as the beef becomes “fork-tender,” rather than turning into a starch-paste in the bottom of the pot.
6. The Final Rest
Once the beef shreds easily with a fork (usually after 3–4 hours total), remove it from the oven. Let the meat rest in the liquid for 20 minutes before serving. This allows the fibers to re-absorb the savory juices.
Common Mistakes & How to Avoid Them
- The Wrong Cut: Using a “Lean” roast like Round or Sirloin will result in dry, tough meat. You must use Chuck for the necessary fat and collagen.
- Too Much Liquid: If the beef is completely submerged, you are “boiling” it, not “braising” it. Keep the liquid at the halfway mark.
- Rushing the Heat: Boiling a roast at a high temperature will make the muscle fibers seize up and become tough. Low and slow is the only path to success.
Ingredient Substitutions & Variations
- The Alcohol-Free Version: Replace the red wine with an extra cup of beef broth and 1 tbsp of Balsamic vinegar for acidity.
- The “Pot Liquor” Gravy: If you want a thick gravy, whisk 2 tbsp of cornstarch with a little cold water and stir it into the boiling juices after removing the meat.
- The Flavor Kick: Add a tablespoon of Worcestershire sauce or a teaspoon of anchovy paste for an incredible umami boost.
Pro Tips Section
- The “Spoon Test”: The roast is done when you can push a spoon through the meat without resistance. If it “springs” back, it needs more time.
- The Fat Cap: Always cook the roast with the “fat cap” (the thick white layer) facing upward. As it melts, it will naturally baste the meat.
- The Overnight Advantage: Like most braises, pot roast tastes even better the next day. The flavors meld and the gelatin sets, making the sauce even richer upon reheating.
Optimized FAQ Section
Q: Can I make this in a Slow Cooker? A: Yes! Perform the sear and deglaze in a skillet, then transfer everything to the slow cooker. Cook on Low for 8 hours. Add the potatoes at the 5-hour mark.
Q: Why is my pot roast tough after 3 hours? A: It’s likely undercooked! Connective tissue takes a long time to melt. If it’s tough, give it another 30–45 minutes; it will eventually “break” and become tender.
Q: Should I peel the potatoes? A: For Red potatoes, the skin is thin and adds great color/nutrients. For Russets, peeling is recommended as the skin can become leathery during a long braise.
Conclusion: The Heart of Home Cooking
A perfectly executed Pot Roast is the ultimate sign of a confident cook. It requires patience, but the reward is a deeply nostalgic, soul-warming meal that turns a simple Sunday into an event. By staggering your vegetables and mastering the sear, you elevate this classic into something truly extraordinary.