Ingredients
Main Ingredients
- 3 cups granulated sugar
- ¾ cup unsalted butter
- ⅔ cup evaporated milk
- 1 ½ cups semi-sweet chocolate chips
- 1 cup milk chocolate chips
Additional Flavor Ingredients
- 1 teaspoon vanilla extract
- ¼ teaspoon salt
Optional Add-ins
- 1 cup chopped walnuts or pecans
- ½ cup mini marshmallows
- ½ cup peanut butter chips
Step 1: Prepare the Pan
Line an 8×8 inch baking pan with parchment paper or lightly grease it with butter.
The parchment paper helps lift the fudge out easily after it sets.
If you want thinner fudge squares, you can use a slightly larger pan.
Step 2: Combine Sugar, Butter, and Milk
In a medium saucepan combine:
- Sugar
- Butter
- Evaporated milk
Place the pan over medium heat.
Stir constantly while the butter melts and the sugar dissolves.
Step 3: Bring to a Boil
Once the mixture begins to bubble, allow it to reach a rolling boil.
Continue stirring constantly to prevent burning.
Let the mixture boil for 4–5 minutes.
This stage is important because it determines the final texture of the fudge.
Cooking too little will make soft fudge, while cooking too long may create crumbly fudge.
Step 4: Add Chocolate Chips
Remove the saucepan from heat.
Immediately add:
- Semi-sweet chocolate chips
- Milk chocolate chips
Stir continuously until the chocolate melts completely.
The mixture should become thick, glossy, and smooth.
Step 5: Add Vanilla and Salt
Stir in:
- Vanilla extract
- Salt
The vanilla enhances the chocolate flavor, while the salt balances the sweetness.
If using nuts or other mix-ins, add them at this stage.
Step 6: Pour into the Pan
Pour the hot fudge mixture into the prepared baking pan.
Use a spatula to spread it evenly.
Tap the pan lightly on the counter to remove any air bubbles.
Step 7: Let the Fudge Set
Allow the fudge to cool at room temperature for about 2 hours.
For faster setting, place it in the refrigerator for 1 hour.
Avoid cutting the fudge too early because it needs time to firm up.
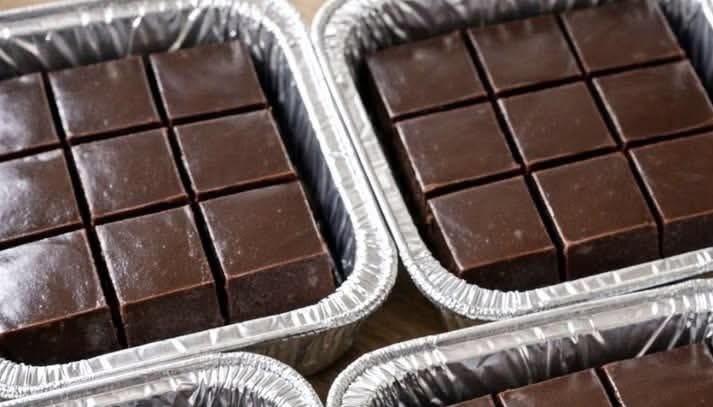
Step 8: Cut into Squares
Once fully set, remove the fudge from the pan using the parchment paper.
Place it on a cutting board.
Using a sharp knife, cut the fudge into small squares or cubes.
Clean the knife between cuts for neat edges.
Serving Suggestions
Chocolate fudge is delicious on its own, but it can also be served with:
- Coffee or espresso
- Vanilla ice cream
- Fresh strawberries
It also works beautifully as a topping for desserts like brownies or cupcakes.
Tips for Perfect Fudge
Use Quality Chocolate
Better chocolate produces richer flavor.
Stir Constantly
Prevent burning and ensure smooth texture.
Follow Boiling Time Carefully
Timing affects texture.
Allow Proper Cooling
Cooling helps the fudge set correctly.
Flavor Variations
Peanut Butter Fudge
Add ½ cup peanut butter to the chocolate mixture.
Cookies and Cream Fudge
Mix crushed chocolate sandwich cookies into the fudge.
Rocky Road Fudge
Add marshmallows and nuts.
Mint Chocolate Fudge
Add peppermint extract.
Storage
Chocolate fudge stores very well.
Room temperature: 1 week in an airtight container.
Refrigerator: 2–3 weeks.
Freezer: up to 3 months.
Separate layers with parchment paper to prevent sticking.
Why Fudge Has Its Unique Texture
Fudge is a type of sugar candy that forms many tiny sugar crystals as it cools.
These crystals create the smooth, creamy texture that distinguishes fudge from other candies.
Careful cooking and cooling ensure that the crystals remain small and evenly distributed.
History of Chocolate Fudge
Fudge originated in the United States during the late 19th century. The story goes that a batch of caramel candy was accidentally “fudged,” creating a softer texture that quickly became popular.
By the early 1900s fudge had become a classic homemade candy, often made in college dormitories and family kitchens.
Today it remains one of the most popular homemade candies in the world.
Final Thoughts
Chocolate fudge is a timeless dessert that combines simplicity with indulgence. With only a few ingredients and easy preparation, you can create rich, creamy chocolate squares that taste like they came from a candy shop.