1️⃣ Hook Introduction: The Solution to Dessert Burnout
We’ve all been there: you want a dessert that feels sophisticated and “high-end,” but you don’t have the energy to spend four hours tempering chocolate or chilling delicate pastry layers. Most store-bought custard treats are either too rubbery or cloyingly sweet. If you are looking for a dessert that delivers a cloud-like, melt-in-your-mouth texture paired with a light, flaky crunch, these Vanilla Custard Bars are your definitive answer.
This recipe is the perfect middle ground between a heavy cheesecake and a simple pudding. It is surprisingly beginner-proof, budget-friendly, and provides that iconic “bakery window” aesthetic that will have your guests asking which local patisserie you visited.
2️⃣ Personal Experience Layer: The “Lamination” Shortcut
In my early baking days, I thought “custard bars” meant I had to make puff pastry from scratch. After one afternoon of failing to get the butter layers right, I nearly gave up. The breakthrough came when I realized that using high-quality, pre-made puff pastry and focusing all my energy on the custard consistency was the real secret.
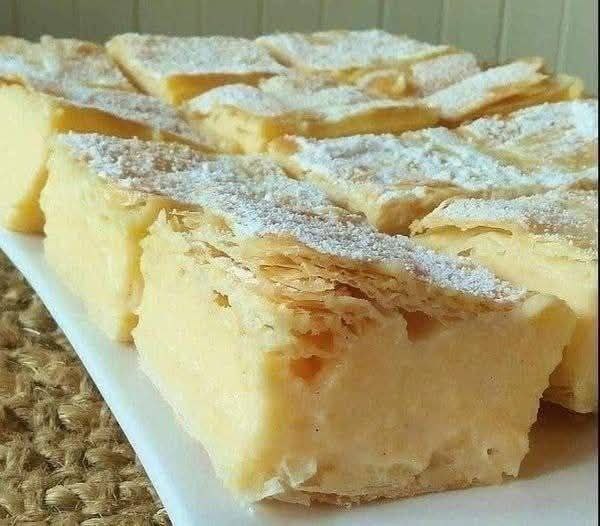
I once made the mistake of pouring the custard while it was still piping hot onto the bottom pastry layer. The result? A soggy, sad mess. I discovered that letting the custard cool to room temperature (while whisking occasionally to prevent a skin) allows it to set perfectly without compromising the crispiness of the pastry. When you see that thick, pale-yellow cross-section topped with a snowy dusting of sugar, you’ll know you’ve mastered the technique.
3️⃣ Structured Recipe Overview
- Preparation Time: 25 minutes
- Cooking Time: 20 minutes (for pastry) + 10 minutes (for custard)
- Total Time: 55 minutes (plus at least 4 hours chilling)
- Servings: 12–16 thick bars
- Difficulty Level: Easy/Intermediate
4️⃣ Ingredients Section
- 2 sheets pre-made puff pastry, thawed
- 1 quart (4 cups) Whole Milk (Do not use skim; the fat is necessary for the set)
- 1 cup Granulated Sugar
- 1/2 cup Cornstarch (The key thickening agent)
- 4 large Egg Yolks (Room temperature for smooth whisking)
- 2 teaspoons Pure Vanilla Extract (or vanilla bean paste for those beautiful black specks)
- 2 tablespoons Unsalted Butter (Cold, to finish the custard)
- Powdered Sugar for dusting
5️⃣ Step-by-Step Instructions
Step 1: The Pastry Base and Lid
Preheat your oven to 200°C. Place the puff pastry sheets on baking trays. Prick them all over with a fork (this prevents them from rising too much) and bake for 12–15 minutes until golden brown and flaky. Let them cool completely.
Step 2: The Custard Base
In a medium saucepan, bring 3 cups of milk and the sugar to a gentle simmer. In a separate bowl, whisk the remaining 1 cup of milk with the cornstarch and egg yolks until perfectly smooth.
Step 3: Tempering and Thickening
Slowly pour a half-cup of the hot milk into the egg mixture while whisking constantly. Then, pour the egg mixture back into the saucepan.
- Why? This “tempering” prevents the eggs from scrambling. Continue to cook over medium heat, whisking vigorously until the mixture becomes thick and glossy.
Step 4: The Finishing Touch
Remove from heat. Whisk in the cold butter and vanilla extract.
- Visual Cue: The custard should be thick enough to hold its shape on a spoon but still look creamy.
Step 5: Assembly and Chill
Place one pastry sheet in the bottom of a rectangular dish. Pour the cooled custard over it, smoothing the top. Place the second pastry sheet on top. Refrigerate for at least 4 hours (overnight is best).
6️⃣ Common Mistakes & How to Avoid Them
- Soggy Pastry: If you don’t prick the pastry with a fork before baking, it will puff up into a ball. If you don’t let the custard cool before assembly, the steam will ruin the crunch.
- Lumpy Custard: This happens if you stop whisking. Constant motion is the only way to get that professional, silky texture.
- Cutting Too Soon: If you slice these while the custard is still warm, it will spill out the sides. Patience in the fridge is mandatory.
- Scrambled Eggs: If you add the egg yolks directly to the boiling milk without tempering, you’ll end up with sweet scrambled eggs.
7️⃣ Ingredient Substitutions & Variations
- Chocolate Twist: Fold in 1/2 cup of mini chocolate chips once the custard has cooled slightly.
- Fruit Layer: Add a thin layer of raspberry jam or fresh sliced strawberries on top of the custard before adding the final pastry sheet.
- Budget Alternative: Use vanilla pudding mix reinforced with an extra egg yolk for a “cheater’s” version.
- Storage: These are best eaten within 48 hours. Store in an airtight container in the fridge to keep the pastry from absorbing too much moisture.
8️⃣ Pro Tips Section
- The Clean Cut: To get those perfect, sharp edges, use a serrated knife for the top pastry layer and a sharp straight-edged knife for the custard. Wipe the blade between every cut.
- Sift for Success: Use a fine-mesh sieve when applying the powdered sugar at the end for that “fallen snow” look.
9️⃣ SEO-Optimized FAQ Section
Q: Can I make these Vanilla Custard Bars gluten-free? A: Yes! Use a gluten-free puff pastry brand and ensure your cornstarch is certified GF. The custard itself is naturally gluten-free.
Q: Why is my custard watery? A: This usually means it wasn’t cooked long enough to activate the cornstarch, or you used a low-fat milk. Ensure the mixture comes to a bubble before removing it from the heat.
Q: Can I freeze these? A: I don’t recommend it. Custard tends to separate and become grainy once thawed, and the pastry will lose its signature flake.
Q: How do I get the bars out of the pan easily? A: Line your baking dish with parchment paper, leaving an “overhang” on the sides. Once the bars are set, you can lift the entire block out onto a cutting board.
🔟 Engagement-Oriented Conclusion
These Vanilla Custard Bars are a testament to the fact that simple ingredients, when treated with care, can create something truly extraordinary. They are the perfect light finish to a heavy meal like steak and creamy pasta.
Did yours come out with that perfect “jiggle”? I’d love to see your results! Tag me in your photos and tell me: are you a “heavy on the powdered sugar” person or do you prefer a light dusting? Save this recipe for your next brunch or family gathering!