🧾 Ingredients
This recipe uses simple pantry staples:
- 500g (about 4 cups) all-purpose flour or bread flour
- 1 ½ teaspoons salt
- ½ teaspoon instant yeast (or 1 teaspoon active dry yeast)
- 375ml (1 ½ cups) warm water (not hot)
- Extra flour for dusting
Optional (for extra flavor):
- 1 tablespoon olive oil
- 1 teaspoon sugar or honey
🥣 Step 1: Mixing the Dough
In a large mixing bowl:
- Add the flour, salt, and yeast.
- Mix them together evenly with a spoon or your hand.
- Slowly pour in the warm water while mixing.
You’ll notice the dough becomes sticky and shaggy—that’s exactly what you want. This is not a smooth dough like pizza or brioche. It should look rough and slightly wet.
👉 Tip: Avoid adding too much flour. Sticky dough = soft airy bread.
Once combined:
- Cover the bowl with plastic wrap or a clean towel.
- Let it rest at room temperature.
⏳ Step 2: Long Fermentation (The Secret)
Let the dough rest for 12 to 18 hours.
Yes, it’s long—but this is what creates:
- The airy holes inside
- The deep flavor
- The crispy crust
During this time, the dough will:
- Rise
- Bubble
- Become stretchy
You don’t need to knead it at all.
👉 Best practice: Prepare the dough at night, bake in the morning.
🍞 Step 3: Shaping the Dough
After fermentation:
- Lightly flour your work surface.
- Gently pour the dough onto the surface.
- Dust your hands with flour (it will be sticky).
Now fold the dough:
- Fold one side over the center
- Then the opposite side
- Repeat 2–3 times
You’re creating surface tension.
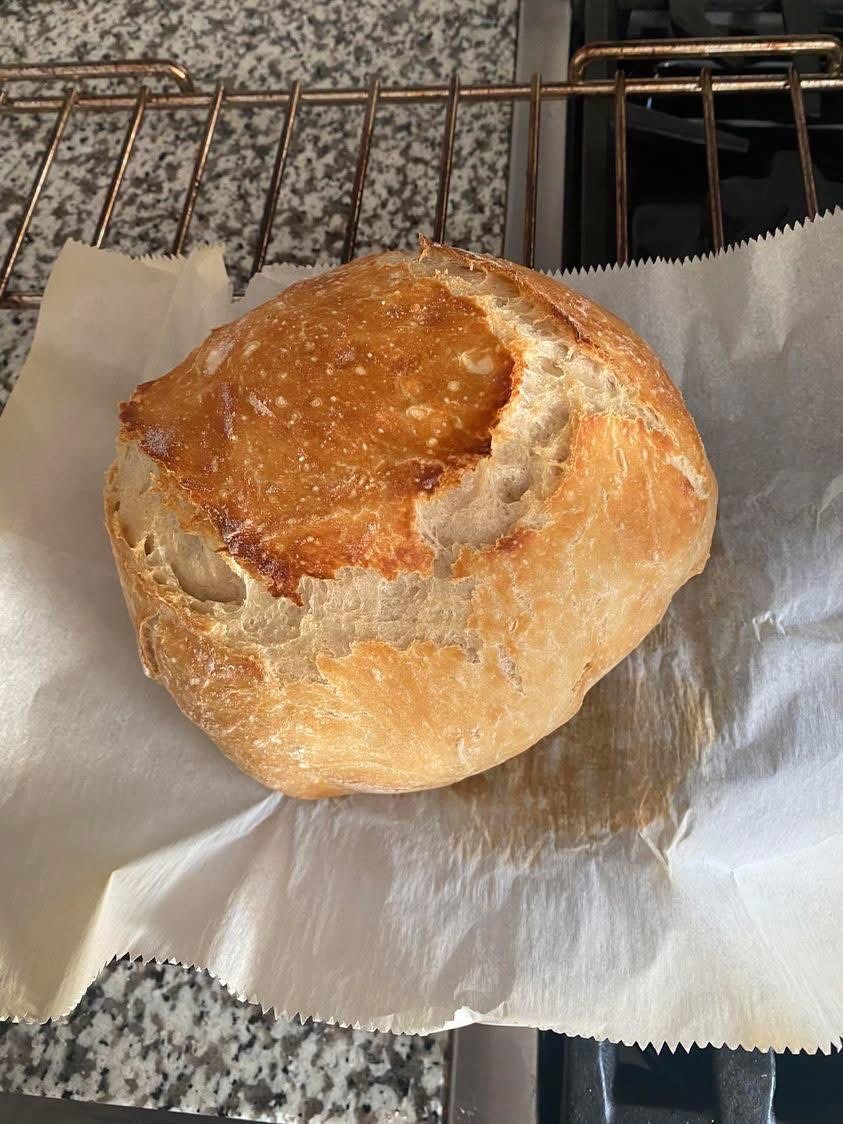
Shape it into a rough ball (like in your image).
Let it rest for 30–60 minutes on parchment paper.
🔥 Step 4: Preheating the Oven
Preheat your oven to 230°C (450°F).
👉 Important: Place a heavy pot (Dutch oven if you have one) inside while preheating.
Why?
- This traps steam
- Creates that crispy crust
If you don’t have a Dutch oven:
- Use a tray + a small pan of water inside the oven
🍳 Step 5: Baking
Carefully place the dough (with parchment paper) into the hot pot.
Cover with lid and bake:
- 30 minutes covered
- Then remove lid and bake another 15–20 minutes
You’ll see:
- Deep golden color
- Crackly crust
- Beautiful expansion
🔊 Step 6: Cooling
Remove the bread and place it on a rack.
Let it cool for at least 1 hour before cutting.
👉 Important: Cutting too early ruins the texture inside.
When ready:
- Slice it
- Enjoy the crispy outside and soft interior
🧠 Tips for Perfect Bread
1. Hydration matters
The wetter the dough, the better the holes inside.
2. Don’t rush fermentation
Time = flavor + texture.
3. Use steam
Steam is what gives you that bakery-style crust.
4. Flour choice
- Bread flour = more chew
- All-purpose = softer crumb
🧀 Variations You Can Try
1. Garlic & Herb Bread
Add:
- Minced garlic
- Dried oregano
- Rosemary
2. Cheese Bread
Mix in:
- Cheddar or mozzarella cubes
3. Whole Wheat Version
Replace 30–50% of flour with whole wheat.
❌ Common Mistakes
- Adding too much flour → dense bread
- Skipping long rise → no flavor
- Not preheating pot → weak crust
- Cutting too early → gummy inside
🍽️ How to Serve
This bread is perfect with:
- Olive oil + salt
- Butter
- Soup
- Sandwiches
Or even just warm on its own 🤤
🏁 Final Result
You’ll get a loaf just like your image:
- Round shape
- Golden cracked crust
- Soft, airy interior