In the vast gallery of comfort food—from the vibrant, citrus-infused Seared Shrimp and Avocado Bowl to the rustic, slow-simmered depth of Crockpot Beef Tips—few dishes command the same emotional and sensory resonance as Pan Fried Chicken with Cream Gravy. This dish is a celebration of texture, representing the peak of “crackle-and-cream” culinary engineering.
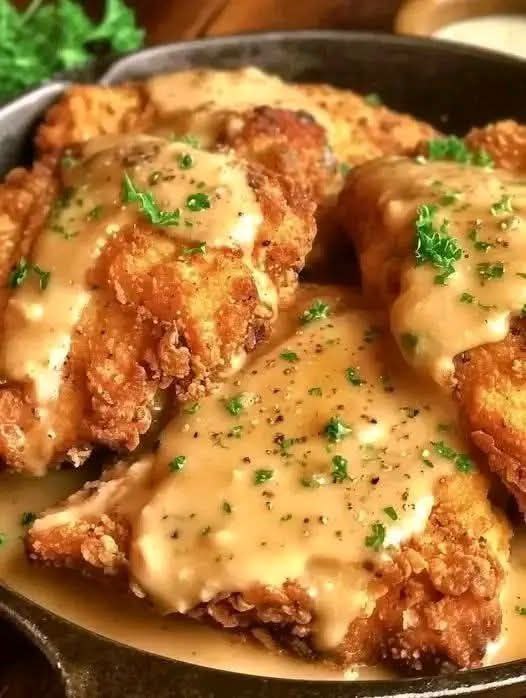
The featured image showcases several large, golden-brown chicken cutlets resting in a heavy cast-iron skillet. Each piece is draped in a generous, silk-textured tan gravy and finished with a bright dusting of fresh parsley.
1. Visual Anatomy: The Architecture of the Crunch
The success of pan-fried chicken is written in its surface area:
The Golden Crust
- Craggy Topography: The chicken features an irregular, ultra-crispy breading with visible “peaks” and “valleys”. This jagged surface is essential for trapping the cream gravy, preventing it from simply sliding off the meat.
- Deep Caramelization: The breading exhibits a range of golden-to-deep-amber hues, suggesting a consistent fry in a shallow pool of hot oil.
- Uniform Thickness: The chicken appears to have been pounded to a uniform thickness, much like a schnitzel or a country-fried steak, ensuring that the meat cooks through at the exact moment the crust reaches peak crispness.
The Velvet Gravy
- Silk-Smooth Finish: Unlike the chunky, vegetable-heavy sauce found in the Creamy Mushroom Meatballs, this cream gravy is perfectly emulsified and smooth.
- Tan Coloration: The gravy has a light tan or “biscuit” color, indicating it was made using the “fond” (the savory browned bits) left in the pan after frying the chicken.
- Herbaceous Garnish: The fine mince of fresh parsley adds a necessary visual pop of green and a mild, earthy freshness to balance the heavy fats.
2. Technical Execution: Mastering the Skillet
Achieving the professional, high-contrast look of the chicken in the image requires mastery of temperature and timing:
The Dredging Process
To get that craggy texture, the chicken is typically subjected to a “double-dredge”.
- Dry: Flour seasoned with salt, pepper, and perhaps garlic powder.
- Wet: An egg wash or buttermilk bath.
- Dry: A final toss in the flour, which creates the “clumps” that become the crispy ridges visible in the skillet.
The Pan-Fry Method
Unlike deep-frying, where the meat is submerged, pan-frying uses about a half-inch of oil.
- Cast Iron Advantage: The use of a cast-iron skillet, hinted at by the dark rim in the photo, provides superior heat retention. This prevents the oil temperature from dropping when the cold chicken is added, ensuring the crust sears instantly rather than absorbing grease.
Building the Gravy
The gravy is a “pan-sauce” in its most indulgent form.
- The Roux: After removing the chicken, most of the oil is drained, leaving just enough to whisk with flour to form a roux.
- The Deglaze: Cold milk or heavy cream is whisked into the hot roux, scraping up the flavorful browned bits from the bottom of the pan to create the rich tan color seen in the image.
3. Flavor Harmony: A Balanced Decadence
This dish is a study in “heavy” flavor profiles that are strategically lightened:
- Savoriness: The chicken and the pan-drippings provide the core umami foundation.
- Salt & Pepper: Bold seasoning in the gravy is crucial; cream-based sauces require significant pepper to cut through the fat.
- Dairy Sweetness: The natural sugars in the milk or cream provide a mellow finish that complements the salty crust.
4. Strategic Menu Pairings
Because pan-fried chicken is exceptionally rich, it pairs best with sides that offer acidity or a different starch profile:
- The Traditional Side: Serve this over a bed of buttery egg noodles, similar to the presentation of the Creamy Chicken Pasta. The noodles act as a neutral vessel for the excess gravy.
- The Acidic Counterpoint: A serving of the Tomato and Feta Salad or the Pickled Vegetable Medley would provide a sharp, vinegary “snap” to reset the palate between bites of fried chicken.
- The Sweet Ending: To follow such a savory main, a fruit-based dessert like the Strawberry Cream Squares or the Banana Pudding Bars offers a light, refreshing conclusion.
5. FAQ: Perfecting the Fried Chicken Result
How do I prevent the breading from falling off? After dredging the chicken, let it rest on a wire rack for 10–15 minutes before frying. This allows the flour to hydrate and “glue” itself to the meat, ensuring the crust stays intact as seen in the photo.
My gravy is lumpy. What happened? Lumps occur if the liquid is added too quickly or if the roux is too dry. To achieve the smooth result shown, add the milk in small splashes at first, whisking vigorously until a thick paste forms, then slowly pour in the rest.
Can I use chicken thighs? While the image appears to show breast cutlets, boneless skinless thighs work excellently. They are more forgiving of high heat and will remain juicier, though they may require a slightly longer fry time.
6. Photography Analysis: Warmth and Abundance
The image uses Short-Range Depth of Field and High-Contrast Warm Lighting to evoke a sense of home-cooked comfort:
- Skillet Frame: By keeping the chicken inside the cast-iron skillet, the photographer reinforces the “rustic” and “authentic” nature of the dish.
- Glossy Highlights: The lighting is positioned to catch the sheen of the gravy and the oil on the crispy breading. These highlights communicate “freshness” and “warmth” to the viewer.
- Color Saturation: The golden tones are pushed slightly toward the orange spectrum, which is a psychological cue for “satiety” and “flavor”.