Why This Sponge Cake Works
Sponge cake is different from butter-heavy cakes because it relies mostly on air instead of fat to rise. When you whip the eggs and sugar correctly, you build structure naturally. The result is:
- Very fluffy crumb
- Light texture
- Slight sweetness
- Perfect for soaking syrups or creams
- Easy to decorate or serve plain
This recipe is beginner-friendly but also includes professional techniques so you can get consistent results every time.
Ingredients
Main Ingredients
- 5 large eggs (room temperature)
- 1 cup granulated sugar (200 g)
- 1 cup all-purpose flour (125 g)
- 3 tablespoons milk
- 3 tablespoons vegetable oil or melted butter
- 1 teaspoon vanilla extract
- 1 teaspoon baking powder (optional for extra safety)
- Pinch of salt
Room-temperature eggs are very important because they whip better and hold more air.
Tools You Need
- Electric mixer or stand mixer
- Large mixing bowls
- Fine sieve
- Rubber spatula
- 9×13 inch rectangular baking pan
- Parchment paper
- Cooling rack
Having the right tools helps prevent deflating the batter, which is the key challenge when making sponge cakes.
Step 1: Prepare the Pan and Oven
Preheat your oven to 170°C (340°F). Line the bottom of your baking pan with parchment paper. Do not grease the sides too much — the batter needs something to hold onto as it climbs upward.
Set everything up before mixing because sponge batter should go into the oven quickly after preparation.
Step 2: Whipping Eggs and Sugar
Place eggs and sugar into a large mixing bowl. Beat on high speed for 8–10 minutes until the mixture becomes pale, thick, and triples in volume.
You know it’s ready when:
- The batter falls like a ribbon
- The surface stays visible for a few seconds
- Color turns light cream
This step is the heart of the recipe. The more stable the foam, the fluffier the cake.
Step 3: Adding Vanilla and Warm Milk
Warm the milk slightly (not hot). Mix it with oil and vanilla in a small cup. Slowly add this mixture to the whipped eggs while mixing on low speed.
Adding liquid slowly prevents the foam from collapsing.
Step 4: Folding in the Flour
Sift flour (and baking powder if using). Add it in 2–3 batches.
Use a spatula to gently fold:
- Move from bottom to top
- Turn the bowl slowly
- Avoid stirring aggressively
The goal is to keep as much air as possible inside the batter.
Step 5: Baking the Sponge Cake
Pour batter into the prepared pan. Smooth the top gently — do not press down.
Bake for 25–30 minutes until golden and springy. Do not open the oven during the first 20 minutes or the cake may collapse.
To test readiness:
- Touch the center lightly — it should bounce back
- Or insert a toothpick — it should come out clean
Step 6: Cooling Properly
Once baked, remove the cake and let it cool for 5 minutes. Then carefully remove from the pan and transfer to a wire rack.
Cooling is important because trapped steam can make the bottom soggy if left inside the pan too long.
The Secret to Extra Soft Texture
Here are professional tips that make a huge difference:
- Use room temperature ingredients.
- Whip eggs long enough — patience matters.
- Fold flour slowly and gently.
- Avoid overbaking.
- Let the cake cool naturally without covering.
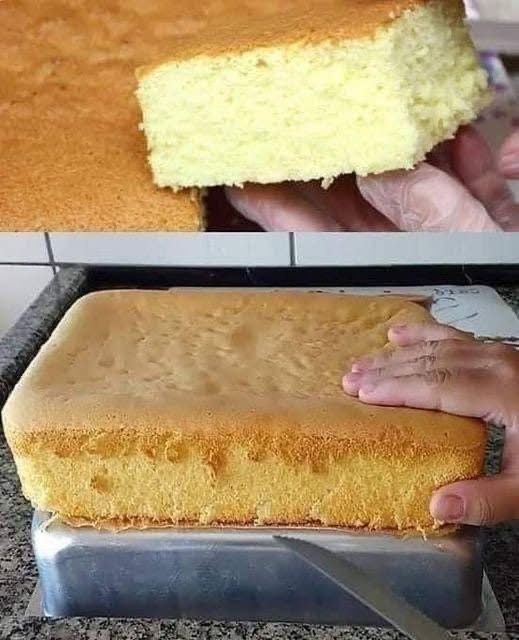
Small details create that bakery-level softness you see in the image.
How to Use This Sponge Cake
This cake is extremely versatile. You can:
- Add whipped cream and strawberries
- Layer with chocolate ganache
- Soak with simple syrup for moisture
- Spread jam or custard
- Use as a base for birthday cakes
Because it’s light, it pairs well with almost any filling.
Flavor Variations
Once you master the basic sponge, try these ideas:
Lemon Sponge
Add lemon zest and replace vanilla with lemon extract.
Chocolate Sponge
Replace ¼ cup flour with cocoa powder.
Coconut Sponge
Add coconut milk instead of regular milk.
Coffee Sponge
Mix 1 tablespoon instant coffee into warm milk.
These variations keep the same technique but create totally different flavors.
Common Problems & Solutions
Cake collapsed after baking
- Eggs not whipped enough
- Oven opened too early
Dense texture
- Overmixed after adding flour
- Batter lost air
Dry sponge
- Overbaked
- Oven temperature too high
Uneven surface
- Oven heat not even or batter not leveled
Don’t worry — sponge cake improves with practice.
Storage Tips
- Room temperature: up to 2 days (covered)
- Refrigerator: up to 5 days
- Freezer: up to 2 months (wrap tightly)
To refresh, warm slightly or brush with syrup.
Serving Suggestions
This sponge cake tastes amazing with:
- Tea or coffee
- Fresh fruits
- Honey drizzle
- Powdered sugar
- Whipped cream
You can keep it simple or turn it into an elegant dessert.
Final Thoughts
A good sponge cake looks simple, but it’s all about technique. Once you learn how to whip the eggs properly and fold gently, you can create a cake that is light, soft, and beautifully fluffy every time. This recipe is reliable, easy to follow, and perfect for beginners or anyone wanting a classic homemade cake.