If you are craving something crispy on the outside and warm, savory, and satisfying on the inside, these pan-fried stuffed rolls are exactly what you need. Perfectly golden and crackly with every bite, these rolls are filled with a flavorful mixture of vegetables, meat, or cheese, then cooked in a hot skillet until beautifully crisp and caramelized.
They are simple to make, incredibly versatile, and ideal for lunch, dinner, or even as a snack or party appetizer. Whether you serve them with dipping sauces, fresh salad, or a bowl of soup, these homemade stuffed rolls always disappear fast.
Think of them as a cross between egg rolls, savory crepes, and stuffed wraps — easy comfort food with a satisfying crunch.
Why You’ll Love These Crispy Stuffed Rolls
This recipe quickly becomes a favorite because it is:
- Quick and easy to prepare
- Made with simple pantry ingredients
- Budget friendly
- Perfect for meal prep
- Crispy without deep frying
- Customizable fillings
- Family friendly
- Great for lunchboxes or gatherings
The skillet cooking method gives you that deep golden crust without the heaviness of deep frying.
Ingredients You’ll Need
For the Rolls
- 10–12 thin wrappers or crepes (spring roll wrappers or tortillas work well)
- 2 cups cooked shredded chicken or ground beef
- 1 cup shredded cabbage
- 1 carrot, grated
- ½ cup chopped bell pepper
- 2 green onions, sliced
- 1 cup shredded cheese (optional)
- 2 tablespoons soy sauce
- 1 tablespoon garlic, minced
- 1 teaspoon black pepper
- Salt to taste
For Frying
- 3–4 tablespoons oil or butter
Simple ingredients come together to create big flavor.
How to Make Crispy Pan-Fried Stuffed Rolls
Step 1 – Prepare the Filling
In a large bowl, combine chicken or beef with cabbage, carrots, peppers, and green onions.
Add soy sauce, garlic, salt, and pepper.
Mix everything well until evenly combined.
This filling should be savory, aromatic, and slightly juicy.
Step 2 – Assemble the Rolls
Lay one wrapper flat on a clean surface.
Place 2–3 tablespoons of filling near one edge.
Fold the sides inward, then roll tightly like a burrito.
Seal with a little water if needed.
Repeat with remaining wrappers.
Make sure the rolls are tight to prevent leaking while frying.
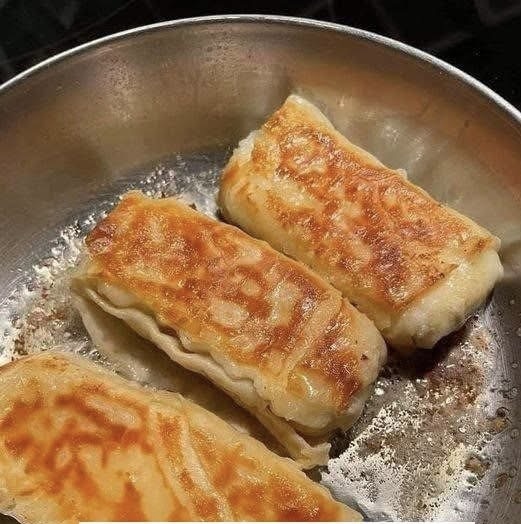
Step 3 – Pan Fry Until Golden
Heat oil or butter in a skillet over medium heat.
Place rolls seam side down.
Cook 3–4 minutes per side until crispy and golden brown.
Turn carefully to crisp all sides.
The exterior should be beautifully crunchy and evenly browned.
Step 4 – Drain and Serve
Remove from pan and place on paper towels.
Serve hot and fresh.
Tips for Extra Crispy Rolls
Do not overcrowd the pan.
Use medium heat to avoid burning.
Roll tightly to prevent filling from spilling.
Cook seam side down first.
Brush lightly with oil for extra crunch.
Serve immediately for best texture.
Small steps make a big difference.
Filling Ideas and Variations
One of the best things about this recipe is how flexible it is.
Try these tasty variations:
Cheesy spinach and ricotta
Ground beef and mushrooms
Chicken and sweet corn
Shrimp and cabbage
Vegetarian mixed vegetables
Potato and cheese
Spicy buffalo chicken
You can easily adjust flavors to match your taste.
Dipping Sauce Suggestions
These rolls taste amazing with dipping sauces:
Sweet chili sauce
Garlic yogurt dip
Soy ginger sauce
Spicy mayo
Teriyaki glaze
Honey mustard
A good sauce takes the flavor to the next level.
Serving Ideas
Serve these crispy stuffed rolls with:
Fresh salad
Steamed rice
Soup or broth
Pickled vegetables
Coleslaw
Fries or roasted potatoes
They work as appetizers or full meals.
Storage and Reheating
Store leftovers in the fridge up to 3 days.
Reheat in a skillet or air fryer to keep them crispy.
Avoid microwaving to prevent sogginess.
You can also freeze uncooked rolls and fry later.
Perfect for busy weeknights.
Meal Prep Friendly
Prepare filling in advance.
Roll and refrigerate until ready.
Cook fresh when needed.
This saves time and keeps texture perfect.
Great for family dinners or quick snacks.
Why This Recipe Works
The magic comes from contrast. The outside gets crisp and golden, while the inside stays tender and flavorful. The thin wrapper seals everything in and forms that irresistible crunch when it hits the hot pan.