Why You’ll Love These Breadsticks
Super Crunchy
Baked thin so they get crispy like crackers.
Easy Ingredients
Simple pantry staples.
Fun to Make
Rolling sticks is relaxing and easy.
Kid Friendly
Everyone loves dipping sticks.
Great for Dips
Perfect with cheese sauce, hummus, or yogurt dip.
Ingredients
For the Dough
- 3 cups all-purpose flour (375 g)
- 1 cup warm water (240 ml)
- 2 teaspoons instant yeast
- 1 tablespoon sugar
- 1 teaspoon salt
- 3 tablespoons olive oil
- ½ cup grated cheese (cheddar or parmesan)
Flavor Add-ins
- 2 tablespoons chopped parsley
- 1 teaspoon garlic powder
- ½ teaspoon paprika
- black pepper to taste
For Topping
- olive oil brush
- extra salt or herbs
Optional Dip
- mayonnaise or yogurt
- ketchup or chili sauce
- garlic powder
- paprika
Ingredient Tips
Cheese
Adds rich flavor and helps crispness.
Herbs
Fresh parsley or dried oregano both work.
Olive Oil
Keeps dough tender and adds taste.
Yeast
Gives light airy texture inside.
Simple ingredients → huge flavor.
Equipment Needed
- Mixing bowl
- Rolling pin
- Knife or pizza cutter
- Baking tray
- Parchment paper
Step-by-Step Instructions
Step 1 – Activate Yeast
In a bowl mix:
- warm water
- sugar
- yeast
Let sit 5–10 minutes until foamy.
This ensures the yeast is alive.
Step 2 – Make the Dough
Add:
- flour
- salt
- cheese
- herbs
- garlic powder
- olive oil
Mix everything together.
Knead for 8 minutes until smooth.
Dough should be:
✔ soft
✔ elastic
✔ not sticky
✔ easy to roll
Add small flour if sticky.
Step 3 – First Rise
Cover dough.
Let rise 45–60 minutes.
It should double in size.
This creates light texture inside.
Step 4 – Roll the Dough Thin
Punch down dough.
Roll into large thin rectangle.
About ½ cm thickness.
Thin dough = crispy sticks.
Too thick → soft bread instead of crunchy sticks.
Step 5 – Cut into Strips
Use knife or pizza cutter.
Cut long thin strips.
About finger width.
Keep them even size.
This helps even baking.
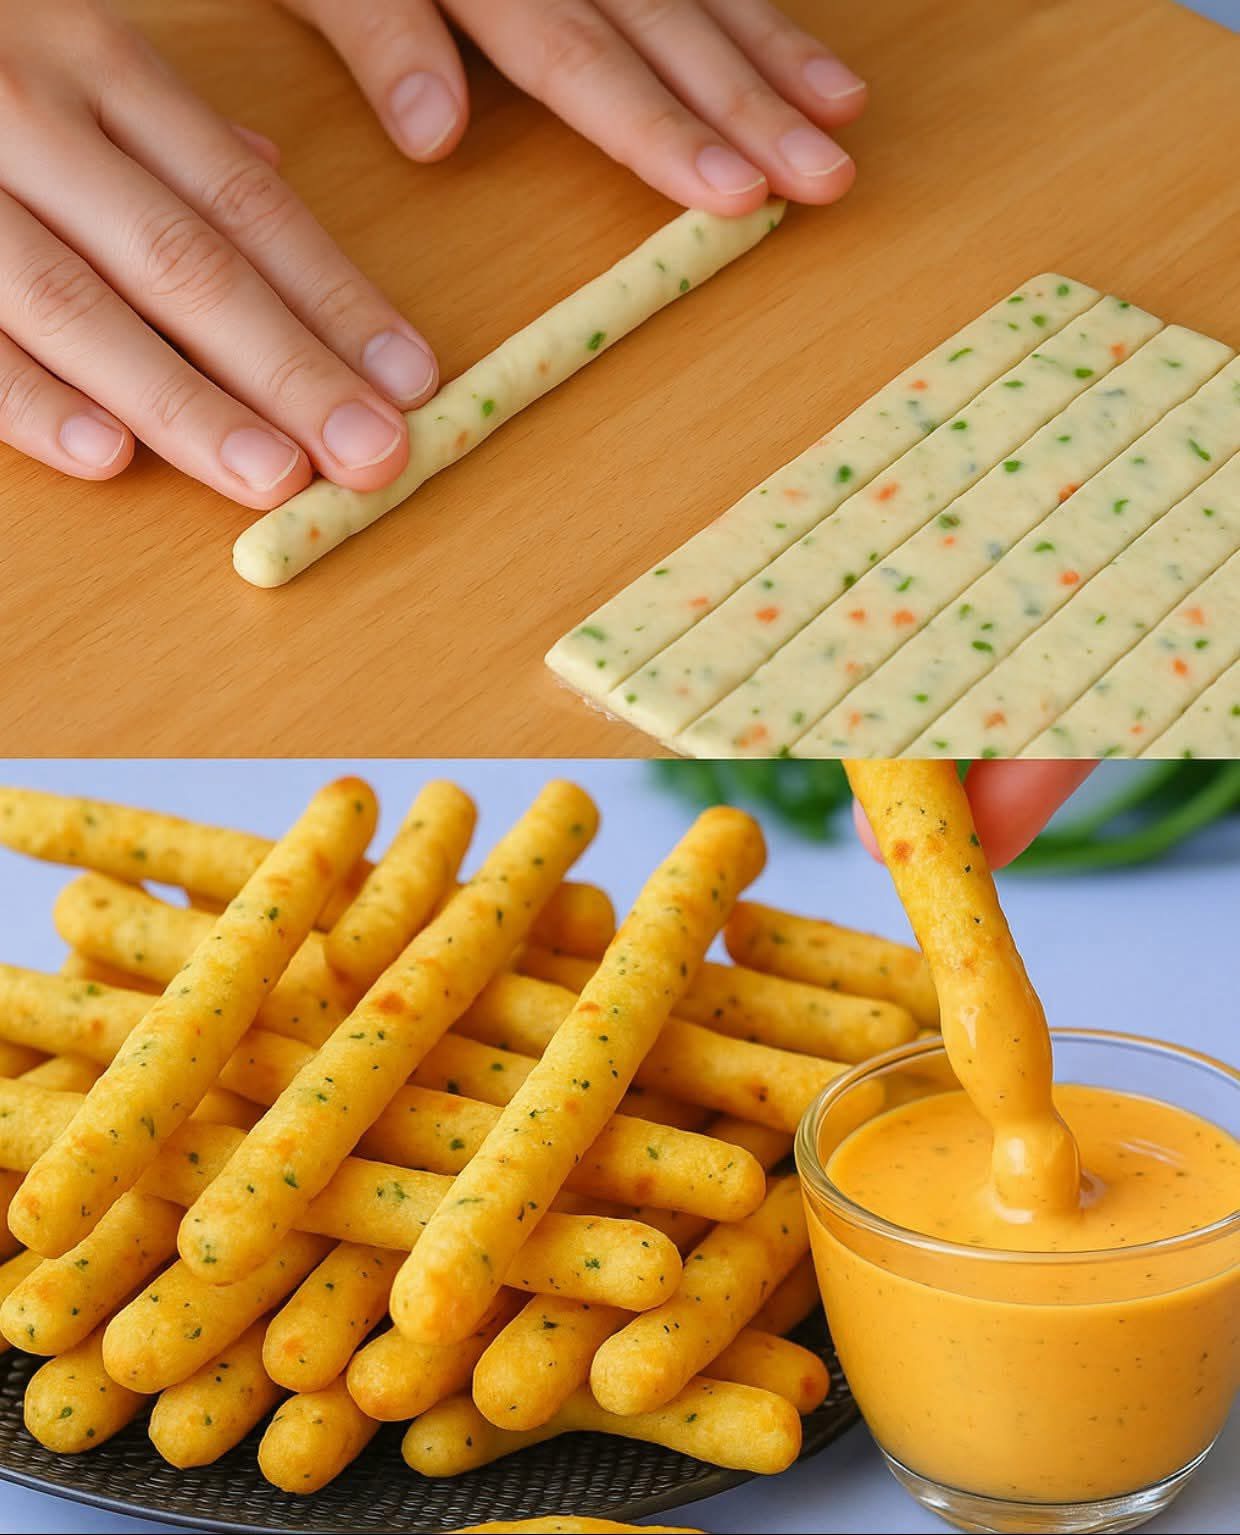
Step 6 – Roll into Sticks
Take each strip.
Roll gently with hands into round sticks.
Just like in the photo.
Make them smooth and thin.
Place on baking tray.
Leave space between each.
Step 7 – Brush and Season
Lightly brush with olive oil.
Sprinkle:
- salt
- herbs
- parmesan
Adds extra flavor and crunch.
Step 8 – Bake
Bake at:
180°C (350°F)
For 15–20 minutes.
Until:
✔ golden brown
✔ crispy
✔ lightly firm
They crisp more while cooling.
Let cool 5–10 minutes.
Texture Guide
Perfect breadsticks should be:
✔ crispy outside
✔ slightly airy inside
✔ not doughy
✔ golden color
✔ crunchy sound when broken
If soft → bake longer
If too hard → rolled too thin
If pale → oven too low
Make the Creamy Dip
Mix:
- ½ cup mayo or yogurt
- 2 tbsp ketchup or chili sauce
- garlic powder
- paprika
- salt
Stir until smooth.
Creamy, tangy, perfect for dipping.
You can also use:
- cheese sauce
- ranch
- hummus
- tzatziki
Serving Ideas
These breadsticks are super versatile.
Snacks
Movie night or party platter.
Appetizers
Serve with dips.
Lunchbox
Kids love them.
Soup Side
Perfect with tomato or chicken soup.
Salad Crunch
Break into pieces like croutons.
Basically… they go with everything.
Flavor Variations
Cheesy Extra
Add mozzarella inside dough.
Spicy
Add chili flakes or cayenne.
Italian Style
Oregano + parmesan.
Sesame
Sprinkle seeds before baking.
Sweet Version
Brush butter + cinnamon sugar.
So many fun options.
Storage Tips
Room temp: 4–5 days (airtight container)
Fridge: 1 week
Freeze: 2 months
Reheat:
oven 3–4 minutes to crisp again.
Pro Tips for Extra Crunch
Roll Thin
Thinner = crispier.
Bake Until Golden
Color = crunch.
Use Parchment Paper
Prevents sticking.
Cool Before Eating
They crisp more after cooling.
Don’t Crowd Tray
Airflow makes them crunchy.
Why This Recipe Always Wins
These breadsticks are simple but addictive. Light, crunchy, cheesy, and herby — they beat chips and packaged snacks every time. They look fancy but are super easy to make at home.
And once you start dipping them… it’s game over 😄
Kids love them. Adults love them. Everyone keeps grabbing “just one more.”
Final Thoughts
Homemade crispy breadsticks are one of those recipes you’ll make again and again. They’re easy, cheap, fun, and delicious. Perfect for sharing or snacking anytime.