Ingredients (Serves 6–8)
Base
- 2 cups (500 ml) cold heavy cream (35% fat or whipping cream)
- 1 can (395 g) sweetened condensed milk
- 1 tsp vanilla extract
- Pinch of salt
Chocolate mix-ins
- 100–150 g dark or milk chocolate (grated or finely chopped)
- ½ cup mini chocolate chips or chunks
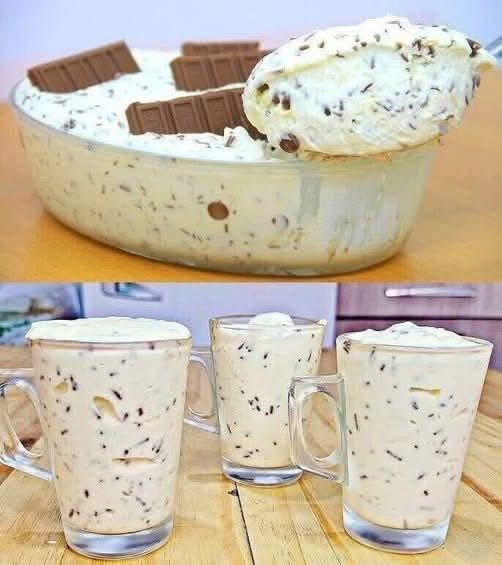
- Optional: chocolate bars broken into pieces (like in the photo)
Optional flavor boosters
- 1 tbsp honey (extra smoothness)
- 1 tbsp cocoa powder (chocolate base version)
- 2 tbsp crushed cookies
- 1 tbsp instant coffee (mocha version)
🧊 Step 1 – Chill Everything First (Important!)
Cold = fluffy ice cream.
Put:
- mixing bowl
- beaters
- cream
in the fridge or freezer for 15–20 minutes.
Why?
Cold cream whips faster and holds air better. This creates a thicker, lighter texture.
If your kitchen is warm, this step really matters.
🥛 Step 2 – Whip the Cream
Pour the cold heavy cream into your chilled bowl.
Using a hand mixer (or stand mixer):
Beat on medium speed → then high speed.
After 3–5 minutes you’ll see:
Soft peaks → then stiff peaks.
You want stiff peaks.
That means:
When you lift the beater, the cream stands up and doesn’t fall.
Do NOT overwhip or it becomes buttery.
Stop as soon as it looks thick and fluffy like shaving cream.
This whipped cream is the “air engine” of your ice cream.
🍯 Step 3 – Mix the Sweet Base
In another bowl combine:
- condensed milk
- vanilla
- pinch salt
- honey (optional)
Mix gently until smooth.
Taste it. It should be sweet and creamy.
The condensed milk:
✔ sweetens
✔ softens texture
✔ prevents ice crystals
✔ makes it scoopable
It replaces sugar + eggs completely. Magic ingredient.
🌀 Step 4 – Fold, Don’t Stir
This is the most important technique.
Add ⅓ of whipped cream into the condensed milk.
Mix normally to loosen.
Now add remaining whipped cream.
Use a spatula.
Gently fold.
Motion:
Down → across → lift → rotate bowl.
Don’t stir aggressively.
We want to keep the air bubbles.
If you mix too hard → dense ice cream.
If you fold gently → fluffy cloud texture like your picture.
Take your time here.
🍫 Step 5 – Add the Chocolate
Now the fun part.
Add:
- grated chocolate
- chips
- chunks
Mix gently.
Pro tip:
Use grated chocolate instead of only chips.
Why?
Tiny pieces melt slightly and create chocolate ribbons throughout the ice cream.
That’s why your picture shows little chocolate streaks everywhere.
Optional:
Drop bigger chocolate blocks on top for decoration like the photo.
❄️ Step 6 – Freeze
Transfer mixture to:
- loaf pan
- glass dish
- plastic container
Smooth top.
Cover tightly with plastic wrap touching the surface (prevents ice crystals).
Freeze:
Minimum → 6 hours
Best → overnight
After freezing, it becomes firm but still creamy.
🍨 Step 7 – Scoop & Serve
Remove from freezer 5 minutes before serving.
Dip scoop in warm water.
Scoop slowly.
You’ll get:
- smooth curls
- soft scoops
- creamy texture
Exactly like your image.
Serve in:
- cups
- mugs
- cones
- bowls
Or eat straight from the container (no judgment 😂)
🔥 Texture Secrets (Pro Tips)
Want ultra creamy results like professional ice cream?
Follow these:
✅ Use full-fat cream only
Low fat = icy texture
✅ Don’t skip condensed milk
Regular sugar makes crystals
✅ Fold gently
Keeps air inside
✅ Cover tightly
Air = freezer burn
✅ Add 1 tbsp alcohol (optional)
Vodka or rum keeps it softer
🍫 Flavor Variations
Once you master this base, you can create ANY flavor.
🍫 Double Chocolate
Add:
- 2 tbsp cocoa powder
- extra chocolate chunks
Deep, rich chocolate flavor.
🍪 Cookies & Cream
Add:
- crushed Oreos or biscuits
So good it disappears instantly.
☕ Mocha Coffee
Add:
- 1 tbsp instant coffee
- chocolate chips
Tastes like café ice cream.
🍓 Strawberry
Add:
- blended strawberries
- swirl jam
Fresh and fruity.
🍯 Caramel Swirl
Add:
- caramel sauce ribbons
Looks fancy and tastes amazing.
🧊 Storage
Freezer life:
Up to 2 weeks airtight
To avoid ice crystals:
Press plastic wrap on surface.
If too hard:
Let sit 5–10 minutes.
❤️ Why This Recipe Works So Well
This style of ice cream is popular because:
No eggs
No cooking
No machine
No churning
No stress
But still:
✔ creamy
✔ rich
✔ airy
✔ professional texture
Honestly? Many people prefer this over store-bought.
And it’s cheaper too.
🍽 Serving Ideas
Make it extra fun:
Top with:
- chocolate syrup
- nuts
- whipped cream
- crushed cookies
- caramel
- fresh fruit
Or use it for:
- milkshakes
- ice cream sandwiches
- cake filling
- affogato (coffee pour-over)
🎉 Final Thoughts
This is one of those “dangerous” recipes because it’s too easy 😄
Once you try it, you’ll start thinking:
“What flavor should I make next?”
Chocolate chip
Oreo
Nutella
Pistachio
Coffee
Caramel
Endless possibilities.
And the best part?
It looks impressive — like the creamy mugs in your photo — but secretly takes only 10 minutes of work.