Ingredients (Serves 4–5)
For the chicken rolls
- 4 large chicken breasts (boneless, skinless)
- 150–200 g mozzarella cheese sticks or slices
- 8–10 slices turkey ham or beef ham (optional but recommended)
- Salt (to taste)
- Black pepper (to taste)
- 1 tsp garlic powder
- 1 tsp paprika
- 1 tsp dried oregano or Italian herbs
For the coating
- 1 cup all-purpose flour
- 2 large eggs
- 2 tbsp milk
- 2 cups breadcrumbs or panko (panko = extra crispy)
- ½ cup grated parmesan (optional but amazing flavor)
- ½ tsp salt
- ½ tsp black pepper
- ½ tsp paprika
For cooking
- Oil for frying
OR - Olive oil spray for baking/air frying
Optional extras
- Mustard or mayo for spreading
- Chili flakes
- Fresh parsley
- Wooden skewers (soaked in water 20 minutes if baking)
🔪 Step 1 – Prepare the Chicken
This step is the secret to tender, rollable chicken.
Place each chicken breast on a cutting board. Using a sharp knife, carefully slice horizontally to butterfly it (don’t cut all the way through). Open it like a book.
Now cover with plastic wrap and gently pound with a meat mallet or rolling pin until thin and even — about ½ cm thick.
Why this matters:
- Thin chicken cooks evenly
- Easier to roll
- Stays juicy
- Looks cleaner when sliced
Season both sides with:
- salt
- pepper
- garlic powder
- paprika
- herbs
Massage the seasoning in well.
🧀 Step 2 – Add the Filling
Now the fun part.
Lay one slice of ham on the chicken.
Place a cheese stick or thick strip of mozzarella at one end.
Don’t overfill — too much cheese will leak during cooking.
Optional flavor boost:
Spread a very thin layer of mustard or mayo before adding cheese. It adds moisture and richness.
🌯 Step 3 – Roll It Up
Starting from the cheese side, roll tightly like a burrito.
Keep it compact so it holds shape.
If needed, secure with:
- toothpicks
OR - directly slide onto skewers (2–3 rolls per skewer)
The skewers help everything stay together and make flipping easier while cooking.
🥚 Step 4 – Breading Station
Classic 3-step coating method.
Prepare 3 bowls:
Bowl 1 – Flour
Flour + pinch of salt
Bowl 2 – Egg wash
Eggs + milk, whisked
Bowl 3 – Breadcrumb mix
Breadcrumbs + parmesan + paprika + pepper
Coating process (important!)
For each roll:
- Flour → shake excess
- Egg → coat fully
- Breadcrumbs → press firmly
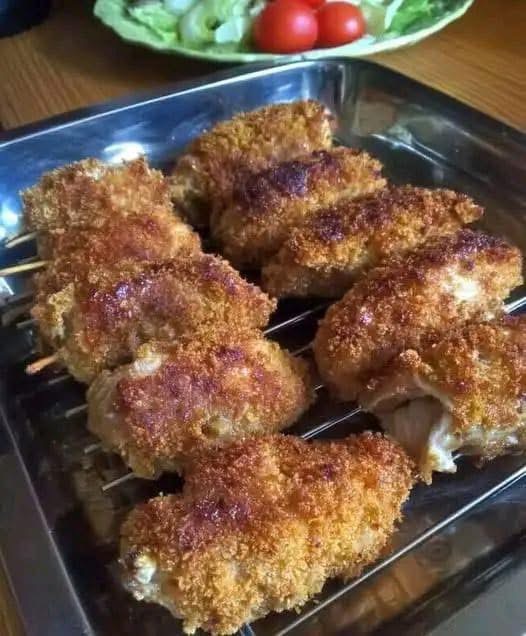
For EXTRA crunch:
Repeat egg + breadcrumbs again (double coating).
This gives you that thick crispy crust like in the photo.
🍳 Step 5 – Cooking Methods
Choose your favorite:
Method 1 – Frying (crispiest)
Heat oil in a deep pan to medium heat (about 170–180°C).
Don’t overcrowd.
Fry 4–5 minutes per side until:
- deep golden brown
- crispy
- chicken fully cooked inside
Transfer to paper towels.
This gives the most beautiful crunchy texture.
Method 2 – Baking (healthier)
Preheat oven to 200°C.
Place skewers on a rack or tray lined with parchment.
Spray or brush lightly with oil.
Bake 25–30 minutes, turning halfway.
For extra crisp:
Broil/grill 3–4 minutes at the end.
Method 3 – Air Fryer (easy & fast)
Set to 190°C.
Cook 15–18 minutes, flipping halfway.
Spray lightly with oil first.
This gives nearly fried texture with less oil.
🧀 Step 6 – Rest & Slice
Let rest 5 minutes after cooking.
This keeps cheese from spilling out.
Slice into chunks or serve whole on skewers.
When you cut them, you should see:
- juicy chicken
- melted cheese pull
- crunchy crust
Pure magic.
🍽 Serving Ideas
These go with everything.
Serve with:
- Garlic sauce
- Ranch dip
- Honey mustard
- Spicy mayo
- BBQ sauce
- Ketchup (simple but classic)
Sides:
- Fries
- Salad
- Coleslaw
- Rice
- Grilled vegetables
- Potato wedges
Or slice and add inside sandwiches or wraps.
🔥 Flavor Variations
Once you master the basic version, try these:
Mexican
Add jalapeños + cheddar + taco seasoning
Italian
Mozzarella + pesto + parmesan
Spicy
Hot sauce + pepper jack cheese
Mushroom & cheese
Add sautéed mushrooms
Crispy cornflake crust
Replace breadcrumbs with crushed cornflakes
💡 Pro Tips (very important)
✅ Pound chicken thin
✅ Don’t overfill cheese
✅ Double coat for crunch
✅ Rest before slicing
✅ Medium heat (too hot burns outside, raw inside)
✅ Use rack when baking for airflow
🧊 Storage & Reheating
Fridge:
Store 3–4 days airtight
Freezer:
Freeze uncooked or cooked for up to 2 months
Reheat:
Air fryer or oven (don’t microwave or it gets soggy)
❤️ Why You’ll Love This Recipe
Honestly, this is one of those foods that disappears FAST.
It’s:
- crispy
- cheesy
- juicy
- handheld
- kid friendly
- party perfect
- meal prep friendly