Ingredients
Vegetables
- 4–5 medium cucumbers (Persian or English work best)
- 1 red onion (thinly sliced)
- 1 yellow or red bell pepper (thin strips)
- 1 carrot (optional, thin slices or julienne)
- 2–3 garlic cloves (sliced)
- 2 tablespoons fresh parsley or dill
Optional extras:
- jalapeño slices (spicy kick)
- cabbage
- radish
- cherry tomatoes
- cauliflower florets
Pickle Brine
- 1 cup white vinegar or apple cider vinegar
- 1 cup water
- 2 tablespoons sugar (adjust to taste)
- 1½ teaspoons salt
- 1 teaspoon black pepper
- 1 teaspoon mustard seeds
- ½ teaspoon chili flakes
- 1 teaspoon dried oregano or dill
- 2 tablespoons olive oil (optional, adds richness)
👩🍳 Step-by-Step Instructions
Step 1 – Slice the Vegetables
This is key for texture.
Cut everything thin and even.
Thin slices:
✔ absorb brine faster
✔ taste better
✔ look prettier
✔ stay crunchy
For cucumbers:
Use knife or mandoline for thin rounds.
For onions:
Slice very thin so they soften quickly.
For peppers:
Thin strips work best.
Try to keep all pieces similar size for even pickling.
Step 2 – Salt the Cucumbers (optional but pro trick)
If you want extra crisp pickles:
Sprinkle cucumbers with 1 teaspoon salt.
Let sit 15–20 minutes.
They release extra water.
Then gently pat dry.
This prevents watery pickles and keeps them super crunchy.
Totally optional — but worth it.
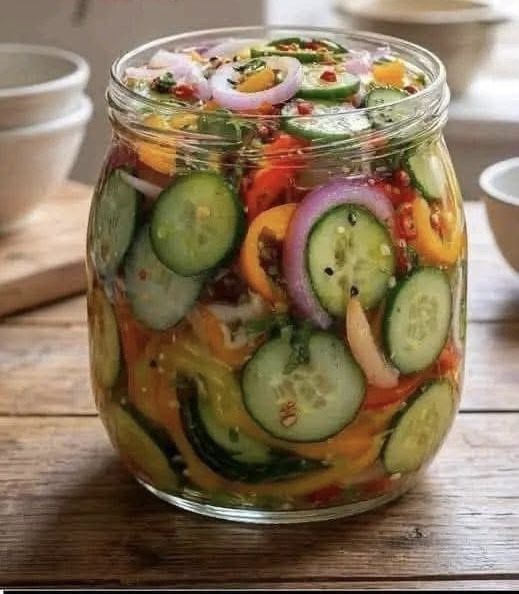
Step 3 – Pack the Jar
Grab a clean glass jar or container.
Layer:
- cucumbers
- onions
- peppers
- garlic
- herbs
Mix colors for a beautiful look.
Don’t pack too tight — brine needs space to flow.
Press lightly only.
Step 4 – Make the Brine
In a small pot combine:
- vinegar
- water
- sugar
- salt
- spices
Heat just until sugar dissolves.
No need to boil hard.
Warm brine helps flavors blend better.
Taste it.
It should be:
Tangy + slightly sweet + salty + spicy
Adjust sugar/salt if needed.
Step 5 – Pour the Brine
Pour warm brine over vegetables.
Make sure everything is fully submerged.
Add olive oil if using.
Tap jar gently to release air bubbles.
Seal with lid.
Step 6 – Chill
Let cool to room temperature.
Then refrigerate at least:
2 hours (minimum)
But best: overnight
Flavor improves with time.
Day 2 or 3 = PERFECT.
🧠 Texture & Taste
After chilling, you’ll get:
Crunchy cucumber snap
Sweet pepper bite
Tangy onion
Garlicky aroma
Herby freshness
It’s bright, zesty, refreshing, and addictive.
Cuts through heavy foods beautifully.
Like a flavor reset button.
🔥 Pro Tips
🥒 Use small cucumbers
They’re crunchier and less watery
🧂 Don’t skip salt balance
Too little = bland
Too much = harsh
Taste your brine!
🫙 Always use glass jars
Metal can react with vinegar
❄ Keep submerged
Vegetables above brine spoil faster
⏳ Wait at least few hours
Fresh is good, but marinated is AMAZING
🌶 Flavor Variations
This recipe is super customizable.
Asian Style
Add:
- soy sauce
- sesame oil
- rice vinegar
- ginger
Mediterranean
Add:
- lemon zest
- oregano
- olive oil
- feta cubes
Spicy
Add:
- jalapeño
- chili flakes
- hot sauce
Sweet Pickles
Increase sugar + add honey
Garlic Lovers
Double the garlic
Fermented Version
Skip vinegar → use salt brine → ferment 3 days
(Probiotic style)
🍽 How to Serve
These go with EVERYTHING.
✔ Shawarma
✔ BBQ
✔ Burgers
✔ Sandwiches
✔ Rice bowls
✔ Grilled chicken
✔ Fried food
✔ Tacos
✔ Eggs
✔ Or straight from jar 😄
They add crunch and brightness to any meal.
🧊 Storage
Fridge only.
Lasts:
7–10 days easily
Sometimes up to 2 weeks.
Flavor keeps improving.
Always use clean spoon.
❤️ Final Thoughts
This is one of those recipes that feels so simple but totally changes your meals.
Cheap ingredients
5 minutes prep
Huge flavor payoff