Why This Bread Recipe Works So Well
- Crispy, golden crust without special equipment
- Soft interior with irregular air pockets
- Uses basic pantry ingredients
- Perfect for sandwiches, toast, and dipping
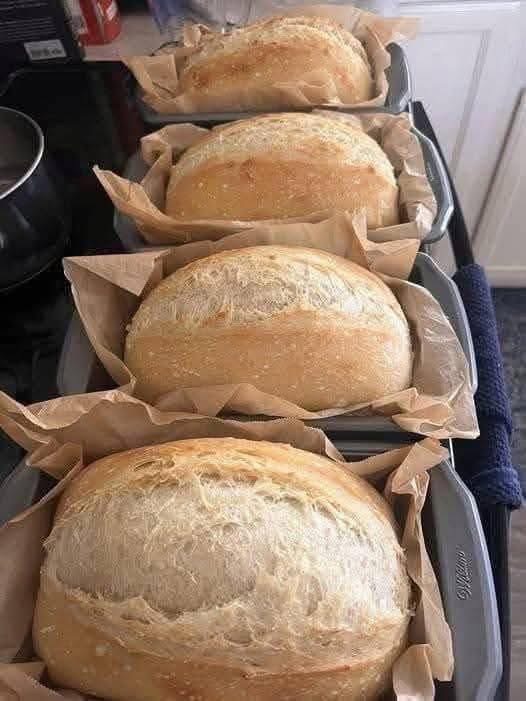
- Scales easily (make 1 loaf or 4 like in the photo)
- No fancy shaping required
What Style of Bread Is This?
This bread is a rustic white artisan loaf, baked in a loaf pan rather than free-form.
It sits between:
- Traditional country bread
- No-knead artisan bread
- Everyday sandwich loaf
The loaf pan gives structure and height, while the hydration level creates that open, soft crumb.
Ingredients (Makes 2 Large Loaves or 4 Medium Loaves)
Dough
- 1 kg (8 cups) all-purpose or bread flour
- 700 ml (3 cups) warm water (about 38–40°C / 100–105°F)
- 10 g (2 teaspoons) instant yeast
- 20 g (1 tablespoon + 1 teaspoon) salt
- 1 tablespoon sugar or honey (optional, helps fermentation)
For Baking
- Extra flour for dusting
- Parchment paper
Choosing the Right Flour
- Bread flour → chewier crumb, stronger structure
- All-purpose flour → softer crumb, still excellent
Avoid cake flour—it lacks the strength needed for good rise.
Step-by-Step Instructions
Step 1: Activate the Yeast
- In a large bowl, pour warm water.
- Add yeast and sugar (if using).
- Stir gently and let rest 5–10 minutes.
The mixture should become foamy.
If not, the yeast may be inactive.
Step 2: Mix the Dough
- Add flour gradually to the yeast mixture.
- Add salt.
- Mix with a wooden spoon or your hand until a sticky dough forms.
The dough should be:
- Soft
- Slightly sticky
- Rough and shaggy
Do not add extra flour too early.
Step 3: First Knead (Short & Gentle)
Turn dough onto a lightly floured surface.
Knead for 8–10 minutes:
- Push forward with the heel of your hand
- Fold back
- Rotate and repeat
The dough will become smooth, elastic, and slightly tacky but not sticky.
Step 4: First Rise (Bulk Fermentation)
- Place dough in a lightly oiled bowl.
- Cover with a towel or plastic wrap.
- Let rise in a warm place for 1½–2 hours, until doubled.
This step develops flavor and structure.
Step 5: Divide & Pre-Shape
- Gently deflate the dough.
- Divide into:
- 2 large pieces or
- 4 equal pieces (like in the photo)
- Shape each piece lightly into a ball.
- Let rest 10 minutes (this relaxes the gluten).
Step 6: Shape for Loaf Pans
- Flatten each dough piece gently into a rectangle.
- Roll tightly from one short end.
- Pinch the seam closed.
- Place seam-side down on parchment.
This creates a tight surface for a beautiful rise.
Step 7: Prepare the Pans
- Line loaf pans with parchment paper
- Leave parchment slightly overhanging (easy lifting)
Place shaped dough into pans.
Step 8: Second Rise (Proofing)
- Cover loosely with a towel.
- Let rise 45–60 minutes, until:
- Dough domes above the pan
- Feels airy and light when touched
Do not overproof—this can cause collapse.
Step 9: Prepare for Baking
- Preheat oven to 230°C / 450°F.
- Place a small metal pan on the bottom rack.
- Dust loaf tops lightly with flour.
- Score with a sharp knife (one long cut or cross).
Scoring allows controlled expansion.
Step 10: Bake with Steam (Key for Crust)
- Place loaves in the oven.
- Pour 1 cup hot water into the empty metal pan.
- Close oven door immediately.
Steam helps:
- Crust expand
- Create shine and crackle
Baking Time
- Bake at 230°C / 450°F for 20 minutes
- Reduce to 200°C / 390°F
- Bake another 15–20 minutes
The bread is done when:
- Deep golden brown
- Sounds hollow when tapped
- Internal temp ≈ 96°C / 205°F
Cooling (Very Important)
- Remove bread from pans immediately.
- Cool on a wire rack for at least 1 hour.
Cutting too early traps steam and makes the crumb gummy.
Texture & Flavor Breakdown
- Crust: Thick, crisp, slightly blistered
- Crumb: Soft, airy, irregular holes
- Flavor: Mild wheat sweetness, lightly fermented
Perfect balance for both sweet and savory uses.
How to Serve This Bread
- Sandwiches
- Toast with butter or honey
- Dipping in olive oil
- Soup companion
- Bruschetta base
It’s an everyday bread that still feels special.
Storage & Freezing
Room Temperature
- Wrap in cloth or paper
- Keeps 2 days
Freezer
- Slice first
- Freeze up to 2 months
- Toast straight from frozen
Avoid refrigerating—it dries bread out.
Common Mistakes to Avoid
- ❌ Adding too much flour
- ❌ Rushing the rise
- ❌ Skipping steam
- ❌ Overproofing
- ❌ Cutting while hot
Variations You Can Try
- Add seeds on top (sesame, flax)
- Replace 20% flour with whole wheat
- Add olives or herbs
- Brush crust with olive oil for softer finish
Final Thoughts
This homemade rustic white bread is simple, honest, and deeply satisfying. It’s the kind of bread that makes you proud to bake—golden, crackly, and perfect straight from the oven. Whether you’re baking one loaf or filling your kitchen with four at once, this recipe delivers reliable, bakery-style results every time.