Why This No-Bake Cake Is So Popular
- No oven, no baking skills needed
- Simple, affordable ingredients
- Creamy, soft, and luxurious texture
- Perfect for summer and holidays
- Can be made a day ahead
- Easy to customize with flavors
What Kind of Dessert Is This?
This is a refrigerator cake, also known as:
- Biscuit cake
- Icebox cake
- No-bake layered cake
The biscuits soften in the cream, creating a texture similar to sponge cake after chilling.
Ingredients (Serves 8–10)
Biscuit Layers
- 300 g (about 10 oz) plain tea biscuits or digestive biscuits
- 200 ml (¾ cup + 2 tbsp) milk (for dipping)
Cream Filling
- 500 ml (2 cups) cold heavy whipping cream
- 250 g (1 cup) mascarpone cheese or cream cheese (softened)
- 120 g (½ cup) powdered sugar (adjust to taste)
- 1 teaspoon vanilla extract
Optional Chocolate Flavor
- 2 tablespoons cocoa powder or
- 80 g (3 oz) melted milk or dark chocolate
Topping
- Chocolate shavings or grated chocolate
- Cocoa powder (optional)
Choosing the Right Biscuits (Very Important)
Use plain, dry biscuits, not filled cookies.
Best options:
- Tea biscuits
- Digestive biscuits
- Maria biscuits
Avoid:
- Cream-filled cookies
- Very sweet biscuits
- Soft cookies (they turn mushy)
Step-by-Step Instructions
Step 1: Prepare the Cream Base
- In a large bowl, add mascarpone (or cream cheese).
- Add powdered sugar and vanilla.
- Mix until smooth and creamy.
Make sure there are no lumps.
Step 2: Whip the Cream
- In a separate bowl, whip cold heavy cream.
- Beat until soft to medium peaks form.
- Do not overwhip.
The cream should be fluffy and hold its shape gently.
Step 3: Combine Creams
- Add whipped cream to the mascarpone mixture.
- Fold gently with a spatula.
- Use slow movements to keep the mixture airy.
If using chocolate:
- Add cocoa powder or melted chocolate at this stage.
Step 4: Prepare the Dish
- Use a glass or ceramic dish (round or rectangular)
- Lightly grease or line with parchment (optional)
This makes serving easier.
Step 5: Dip the Biscuits
- Pour milk into a shallow bowl.
- Dip each biscuit very quickly (1–2 seconds per side).
- Do not soak.
The biscuit should be moist, not soggy.
Step 6: Assemble the Layers
- Arrange a layer of dipped biscuits in the dish.
- Spread a generous layer of cream on top.
- Smooth evenly.
Repeat:
- Biscuit layer
- Cream layer
End with a thick cream layer on top.
Usually 4–5 layers, depending on dish depth.
Step 7: Final Topping
- Sprinkle grated chocolate generously on top
- Or dust with cocoa powder
This adds flavor and a beautiful finish.
Step 8: Chill (Very Important)
Cover and refrigerate for:
- At least 6 hours
- Overnight is best
This allows:
- Biscuits to soften
- Flavors to blend
- Cake to set perfectly
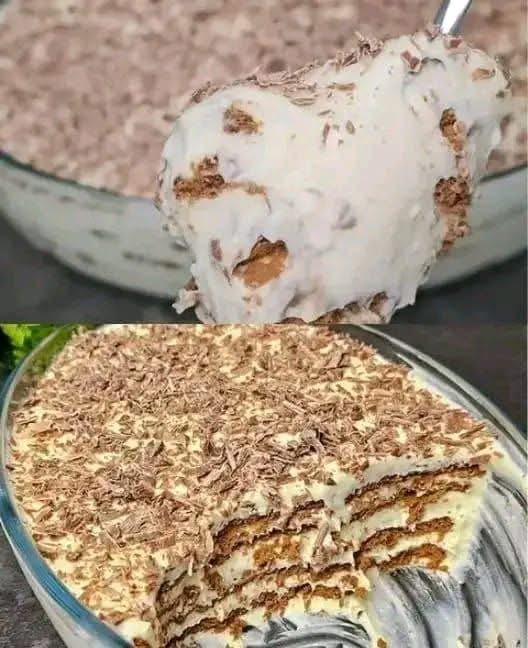
Texture & Flavor Experience
- Top: Light, creamy, chocolatey
- Inside: Soft biscuit layers like sponge cake
- Overall: Smooth, airy, balanced sweetness
No dry layers, no heaviness.
Delicious Variations
Chocolate Lovers
- Use chocolate biscuits
- Add chocolate chips between layers
Coffee Version
- Dip biscuits in coffee instead of milk
- Add 1 teaspoon instant coffee to cream
Nutty Version
- Add crushed walnuts or hazelnuts between layers
Fruit Version
- Add sliced bananas or strawberries between layers
How to Slice Perfectly
- Use a sharp knife
- Wipe blade between cuts
- Serve chilled for clean layers
Storage & Make-Ahead Tips
Refrigerator
- Store covered
- Keeps 3–4 days
Freezer
- Freeze slices individually
- Thaw in fridge before serving
- Texture becomes ice-cream-like
Common Mistakes to Avoid
- ❌ Over-soaking biscuits
- ❌ Overwhipping cream
- ❌ Too much sugar
- ❌ Not chilling long enough
- ❌ Using warm cream
Nutrition (Approx. per Slice)
- Calories: 320–360 kcal
- Protein: 5 g
- Fat: 22 g
- Carbs: 26 g
Final Thoughts
This no-bake layered biscuit & cream cake is proof that you don’t need an oven or complicated techniques to make a stunning dessert. Creamy, soft, and endlessly customizable, it’s perfect for family gatherings, celebrations, or whenever you crave something sweet and comforting.