If you are looking for the quintessential sweet treat that perfectly balances salty crunch with indulgent smoothness, look no further than Chocolate Peanut Clusters. This confection is a staple at holiday gatherings, bake sales, and as a quick homemade gift for one simple reason: it is undeniably delicious. Its simple composition—fresh, roasted peanuts enveloped in premium melted chocolate—makes it a crowd-pleaser that appeals to all ages. In this comprehensive guide, we will walk you through everything you need to know to create a professional-quality treat that will have your guests asking for the recipe before the plate is even empty.
The Timeless Appeal of Chocolate Peanut Clusters
While the exact origin of combining nuts and chocolate is a global culinary tradition, Chocolate Peanut Clusters gained massive popularity in North America during the early 20th century. Often sold in classic candy shops as “Googlers” or “Nut Clusters,” this modern iteration is beloved for its simplicity and the perfect marriage of textures.
Over the decades, home cooks have elevated this humble snack into a gourmet dessert by experimenting with different chocolate blends, adding sea salt, or using a variety of nut roasts. Today, it stands as a symbol of easy, high-impact homemade confectionery, representing the best of simple sweet-and-salty traditions.
Nutritional Benefits of Peanuts and Dark Chocolate
While Chocolate Peanut Clusters are certainly an indulgent treat, their primary ingredients offer several nutritional perks when consumed in moderation:
- Heart-Healthy Fats: Peanuts are rich in monounsaturated and polyunsaturated fats, which are beneficial for heart health.
- Plant-Based Protein: Peanuts are a dense source of plant protein, providing sustained energy and satiety.
- Antioxidants: High-quality dark chocolate is loaded with flavonoids, which can help support blood flow and lower blood pressure.
- Essential Minerals: This treat provides a dose of magnesium, phosphorus, and potassium from the peanuts.
Essential Ingredients for the Perfect Cluster
To achieve the signature glossy finish and satisfying snap of professional Chocolate Peanut Clusters, you need the right balance of fats and solids. Here is what you will need:
The Core Ingredients
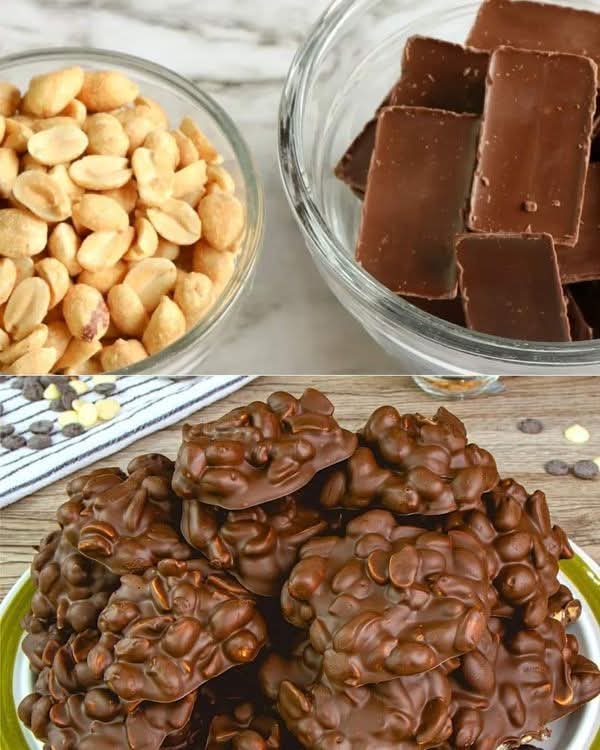
- Roasted Peanuts: 2 cups of salted or unsalted roasted peanuts. Using pre-roasted peanuts ensures the best crunch and flavor.
- High-Quality Chocolate: 12 oz of chocolate (chips, bars, or melting wafers). A blend of milk and dark chocolate often provides the most balanced flavor profile.
- Coconut Oil (Optional): 1 teaspoon. This helps thin the chocolate for easier dipping and adds a beautiful professional sheen.
- Sea Salt: A pinch for topping to enhance the sweet-and-salty contrast.
Possible Substitutions
- Variety of Nuts: You can swap peanuts for almonds, cashews, or pecans to vary the flavor and texture.
- Vegan Option: Use dairy-free chocolate chips and coconut oil to make this treat entirely plant-based.
- Sugar-Free: Utilize keto-friendly chocolate chips to accommodate low-sugar dietary needs.
Step-by-Step Culinary Instructions
Follow these detailed steps to ensure your Chocolate Peanut Clusters turn out perfectly every single time.
1. Preparation of Workspace
Line a large baking sheet with parchment paper or a silicone baking mat. This ensures the clusters do not stick and are easy to remove once set.
2. Melting the Chocolate
Place your chocolate and coconut oil in a microwave-safe bowl. Heat in 30-second intervals, stirring thoroughly between each interval, until the chocolate is completely smooth and glossy. Alternatively, use a double boiler on the stovetop for more control over the heat.
3. Incorporating the Peanuts
Once the chocolate is smooth, add the roasted peanuts to the bowl. Use a spatula to fold the peanuts in until every single nut is thoroughly coated in a thick layer of chocolate.
4. Forming the Clusters
Using a tablespoon or a small cookie scoop, drop rounded mounds of the mixture onto the prepared baking sheet. Space them about an inch apart to prevent them from merging.
5. The Final Touch
While the chocolate is still wet, sprinkle a tiny pinch of sea salt or extra crushed peanuts over the top of each cluster for a professional look.
6. Setting the Treats
Place the baking sheet in the refrigerator for at least 30 to 45 minutes. This allows the chocolate to firm up completely and gives the clusters their characteristic snap.
Professional Tips for Best Results
- Avoid Overheating: Chocolate can easily seize if it gets too hot. Always use low heat and stir frequently.
- Quality Matters: Since there are only two main ingredients, using high-quality chocolate bars rather than just chips will result in a much smoother, richer flavor.
- Temper Your Chocolate: For a truly professional result that doesn’t melt at room temperature, look into basic chocolate tempering techniques to ensure a stable, snap-worthy finish.
Common Mistakes to Avoid
- Water Contamination: Even a single drop of water in your melting chocolate will cause it to “seize,” turning it into a grainy, unusable mess. Ensure all bowls and spoons are completely dry.
- Using Raw Peanuts: Raw peanuts lack the depth of flavor and crunch needed for this recipe. Always ensure your peanuts are roasted.
- Skipping the Chill: If you don’t let the clusters set in the fridge, they may remain soft and messy to handle.
Serving and Presentation Ideas
To make your Chocolate Peanut Clusters look as good as they taste:
- Gift Tins: Place individual clusters in small paper candy cups inside a decorative tin for a perfect homemade gift.
- Dessert Platter: Serve them alongside fresh fruit and cheese for a balanced after-dinner platter.
- The Drizzle: For extra flair, drizzle a small amount of melted white chocolate over the finished dark chocolate clusters.
Storage and Leftovers Tips
These treats are incredibly stable and easy to store!
- Refrigeration: Store in an airtight container in the fridge for up to 2 to 3 weeks.
- Room Temperature: If tempered correctly, they can stay in a cool, dry place for about a week.
- Freezing: You can freeze these clusters for up to 3 months. Just thaw them in the refrigerator before serving to prevent condensation on the chocolate.
Frequently Asked Questions (FAQ)
Can I make Chocolate Peanut Clusters in a slow cooker?
Yes! You can melt large batches of chocolate and peanuts in a slow cooker on low heat, stirring every 15-20 minutes until melted.
Why did my chocolate turn white?
This is called “bloom” and happens when the fats in the chocolate separate due to temperature changes. It is still safe to eat, though it may look less professional.
Can I use white chocolate?
Absolutely! White chocolate peanut clusters are a delicious, creamy variation. Just be extra careful when melting white chocolate, as it burns more easily than dark chocolate.
Conclusion: Try This Sweet Classic Today!
There is a reason Chocolate Peanut Clusters remain a favorite across generations. They are incredibly easy to prepare, require minimal ingredients, and deliver a flavor profile that is both sophisticated and nostalgic. Whether you are looking for a quick snack or a thoughtful homemade gift, this recipe is a guaranteed winner.
Give this recipe a try this weekend, and don’t forget to share your results! Did you use a special blend of chocolate or a different kind of nut? Leave a comment below and let us know how your clusters turned out!