Ingredients
To achieve that perfect crust and flavor, gather the following ingredients:
For the Chicken & Marinade:
- 1 kg chicken thighs or chicken pieces, bone-in or boneless
- 2 cups buttermilk (or milk + 2 tbsp lemon juice)
- 1 tbsp hot sauce (optional but recommended)
- 1 tbsp garlic powder
- 1 tbsp onion powder
- 1 tsp smoked paprika
- 1 tsp black pepper
- 1 tsp salt
For the Seasoned Flour Coating:
- 3 cups all-purpose flour
- 1 cup cornstarch (essential for extra crispiness)
- 1 tbsp paprika
- 1 tbsp garlic powder
- 1 tbsp onion powder
- 2 tsp dried thyme or oregano
- 1 tsp cayenne pepper (optional for heat)
- 2 tsp salt
- 1 tsp ground black pepper
For Frying:
- Vegetable oil, canola oil, or peanut oil
- Heavy pot or fryer
- Cooling rack for draining
Preparing the Chicken Marinade
The secret to juicy fried chicken begins with a good marinade. Buttermilk is the classic choice because its mild acidity tenderizes the meat without making it mushy. Combine the buttermilk with your spices—garlic powder, onion powder, paprika, black pepper, and salt—and whisk until smooth. Add a dash of hot sauce for depth and flavor.
Submerge all the chicken pieces in the marinade, ensuring each piece is fully coated. Cover the bowl and refrigerate for at least 3 hours, though overnight gives the best results. During this time, the chicken absorbs flavor and becomes incredibly tender once fried.
Creating the Crispy Flour Mixture
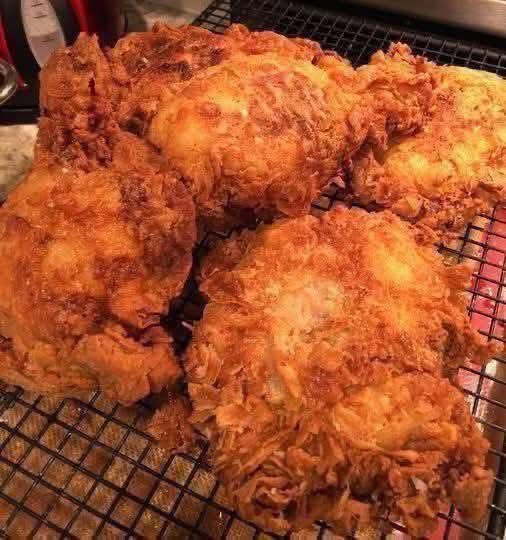
What makes the chicken in your image so beautifully textured is the crust—thick, flaky, and extra crunchy. To achieve this, the coating mixture must be well-seasoned and include a blend of flour and cornstarch.
In a large bowl, mix the flour, cornstarch, paprika, garlic powder, onion powder, thyme, cayenne, salt, and black pepper. Cornstarch is key here because it lightens the flour, helping the crust crisp up perfectly while frying.
For an even crunchier texture, reserve ¼ cup of the buttermilk marinade and drizzle it into the flour mixture, tossing lightly with your hands. This creates tiny clumps in the flour that stick to the chicken and form an ultra-craggy crust—just like in the photo.
Coating the Chicken for Maximum Crunch
Remove each piece of marinated chicken, allowing excess buttermilk to drip off, then press it firmly into the flour mixture. Use your hands to pack the coating onto the chicken, especially around folds and edges. Make sure no wet spots remain.
Once fully coated, place the chicken onto a tray and let it rest for 10 minutes. This resting time is important because it helps the coating adhere tightly, preventing it from falling off while frying.
Heating the Oil the Right Way
To achieve a golden crust without burning, the frying oil must reach the perfect temperature. Heat oil in a deep pot or fryer to 170°C (340°F). If the temperature is too low, the chicken absorbs oil and becomes greasy; if too high, the crust burns before the inside cooks.
A thermometer is ideal, but you can also test with a pinch of flour—if it sizzles gently, the oil is ready.
Frying the Chicken to Golden Perfection
Carefully lower the chicken pieces into the hot oil, making sure not to overcrowd the pot. Frying too many pieces at once drops the temperature and prevents crisping.
Fry each piece for 12–15 minutes, depending on size. Turn occasionally to ensure an even golden color. The crust should puff up beautifully, creating layers of flaky crispiness.
Once cooked, place the chicken on a cooling rack instead of paper towels. This prevents steam from softening the crust.
For extra crunch, some cooks recommend double-frying:
- Fry at 160°C (320°F) for 8 minutes, remove chicken
- Increase oil temperature to 190°C (375°F)
- Fry again for 2 minutes
This step isn’t required, but it creates an unbelievable crispiness.
Tips for Professional-Level Fried Chicken
Let the Chicken Rest After Coating
A brief rest helps the crust form a sticky layer, ensuring an even, well-adhered coating.
Don’t Touch the Chicken Too Much While Frying
Handling it can break off the crust or cause uneven browning.
Use Dark Meat for Best Results
Thighs and drumsticks stay juicier and more flavorful than chicken breast.
Season Every Layer
Season the marinade, the flour, and even the final fried chicken with a pinch of salt while it’s still hot.
Keep the Oil Clean
Remove floating crumbs between batches to prevent bitterness.
Serving Suggestions
Crispy fried chicken pairs wonderfully with classic comfort sides:
- Creamy mashed potatoes
- Buttery cornbread
- Homemade coleslaw
- Mac and cheese
- French fries or potato wedges
- Honey biscuits
- Pickles (for contrast and acidity)
To elevate it further, drizzle with hot honey, garlic butter, or spicy mayo.
Storage & Reheating
If you have leftovers, store them in an airtight container in the fridge for up to 3 days. To keep the crust crispy when reheating:
- Preheat oven to 200°C (400°F)
- Reheat chicken on a rack for 10–12 minutes
Avoid microwaving, as it softens the crust.
Final Thoughts
This crispy golden fried chicken recipe delivers the same crunch and deep flavor shown in your image—thick, rugged coating, juicy interior, and rich seasoning in every bite. With the right preparation and frying technique, you’ll achieve a restaurant-quality result in your own kitchen. Whether for a family dinner, party, or comfort-food craving, this recipe promises satisfaction with every crispy mouthful.