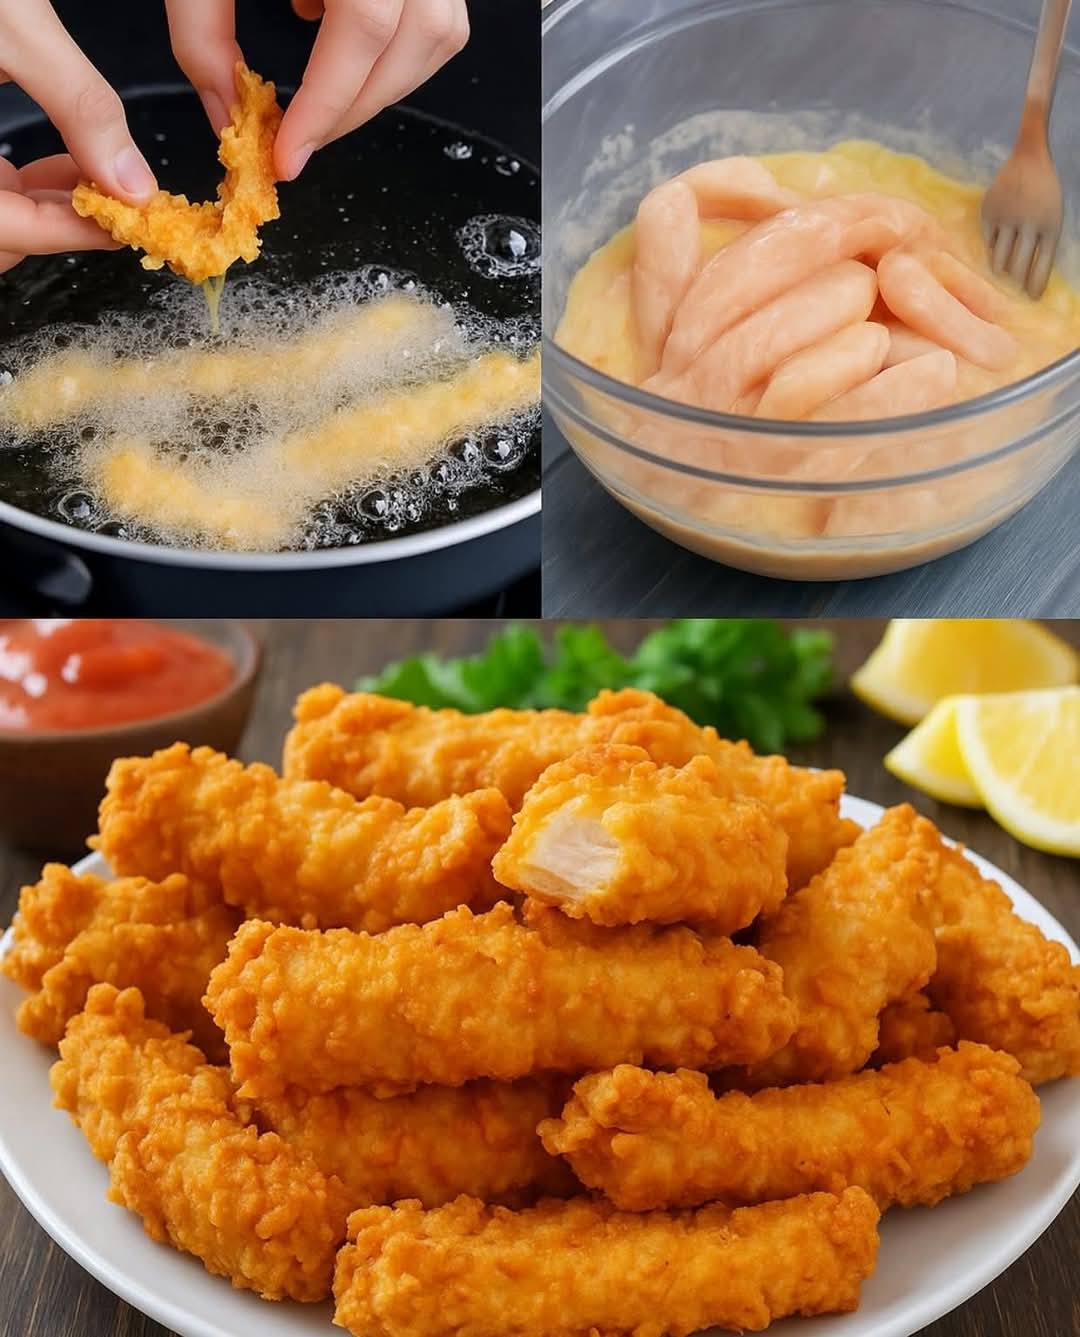
There are few comfort foods more universally loved than crispy chicken strips. Whether served as a snack, a main dish, or part of a party platter, they are one of those timeless foods that people return to again and again. The version you see in the image is especially tempting because the coating looks extra golden and crunchy, while the chicken inside appears juicy and perfectly cooked. This recipe will guide you through every detail needed to recreate that result at home. The goal is not just to fry chicken; it is to create chicken that stays tender on the inside and crisps beautifully on the outside. With the right technique, ingredients, and timing, you’ll have chicken strips that rival any restaurant’s.
Ingredients
For the chicken:
Chicken breast, cut into strips
Eggs
A splash of milk or water
Salt
Black pepper
Garlic powder
Paprika
Lemon juice or vinegar (optional, for marinating)
For the crispy coating:
All-purpose flour
Cornstarch
Baking powder (optional, helps create bubbles)
Salt
Paprika
Black pepper
Onion powder
Turmeric or curry powder (optional for color)
For frying:
Neutral oil (sunflower, vegetable, or canola)
Heavy-bottomed pan or deep pot
Step-by-Step Preparation
- Preparing the Chicken
Start by slicing your chicken breasts into long, even strips. Try to keep them similar in size so that they cook evenly later. Too thin, and they will dry out quickly; too thick, and they may not cook through before the coating burns. A medium thickness works best.
Once cut, place the strips into a bowl. Season them directly with salt, pepper, garlic powder, and paprika. These basic spices help develop flavor inside the chicken so it doesn’t rely only on the coating. If you want the chicken to be extra tender, you can add a small amount of lemon juice or vinegar. Just a teaspoon or two is enough to help soften the fibers without making the meat mushy.
Mix everything well and let the chicken sit for at least fifteen minutes. If you have more time, marinating the chicken for an hour in the refrigerator will make it even more flavorful.
- Creating the Egg Mixture
Crack a few eggs into a bowl. Depending on how many strips you’re making, two or three eggs should be enough. Add a splash of milk or water, then whisk until the mixture is smooth. This mixture serves two purposes: it helps the flour stick to the chicken, and it keeps the chicken moist during frying.
Dip each chicken strip into the egg mixture and let any excess drip off. Do not rush this process. A thin, even layer of egg helps create that beautiful, crunchy coating you see in the photo.
- Mixing the Dry Coating
In a large bowl, combine flour, cornstarch, and seasonings. Cornstarch is an essential part of the coating because it helps create that slightly rough, bubbly texture that becomes extra crisp. Baking powder is optional but adds lightness by helping form small air pockets during frying.
The seasoning inside the flour mixture is crucial. If the dry mixture has no flavor, the final chicken strips will taste plain. Add salt, paprika, pepper, onion powder, and garlic powder. You can also add turmeric or curry powder if you want a deep golden color.
Mix everything thoroughly so that every scoop of flour has the flavor evenly distributed.
- Coating the Chicken
Take one strip at a time from the egg mixture and place it into the flour coating. Press gently to ensure the flour sticks. For an even crunchier exterior, you can use the double-coating method:
- Dip in flour
- Dip again in the egg mixture
- Return to the flour mixture for a second coating
This method creates a thick, crispy shell similar to fast-food chicken tenders.
As you coat more chicken, place the strips on a tray. Letting them rest for five minutes before frying helps the coating adhere better and prevents it from falling off in the oil.
- Heating the Oil
Pour oil into a deep pan or pot. The oil must be hot enough so the chicken cooks quickly and absorbs very little oil. The right temperature is around medium-high heat. If the oil is too cool, the chicken will become greasy; if it’s too hot, the outside will burn before the inside cooks.
A simple test is to drop a small pinch of flour into the oil:
– If it sizzles immediately and rises to the top, the oil is ready.
– If it burns instantly, reduce the heat slightly.
– If it sinks without bubbling, let the oil heat longer.
- Frying the Chicken
Carefully place a few chicken strips into the oil. Do not overcrowd the pan because that lowers the oil temperature and prevents the coating from crisping.
The chicken will begin to bubble and float slightly as it cooks. Turn each strip carefully so that it browns evenly on all sides. Fry until the exterior is deep golden and crunchy, just like in the photo.
Each batch usually takes several minutes, depending on size. When done, transfer the strips to a plate lined with paper towels to drain excess oil.
- Serving the Chicken
Serve the crispy chicken strips hot. They pair wonderfully with sauces like spicy ketchup, garlic mayo, honey mustard, ranch, or simple chili sauce. For extra freshness, add lemon wedges or a green salad.
Tips for Perfect Crispy Chicken Strips
Do not skip the cornstarch – it creates the iconic crunchy texture.
Do not overcrowd the oil – this is the number one reason chicken becomes soggy.
Season every layer – the chicken, the egg mixture, and the flour coating should all contain seasoning.
Use medium-high heat – too low and the coating absorbs oil; too high and it burns quickly.
Let the coated chicken rest before frying – this helps the coating stick.
Conclusion
The crispy chicken strips you see in the image look like something straight out of a professional kitchen, but with the right method, you can achieve the same result easily at home. The key is proper seasoning, a balanced coating, and controlling your frying temperature. With these steps, you’ll consistently produce chicken strips that are crunchy on the outside, tender on the inside, and bursting with flavor from start to finish. This recipe is perfect for family dinners, parties, or a simple meal that feels indulgent but is surprisingly easy to make. Enjoy every bite, and feel free to customize the spices or dipping sauces to match your personal taste.