If you are looking for a dessert that is easy, refreshing, and guaranteed to impress, this no-bake cherry cheesecake delight is exactly what you need. Featuring layers of buttery crushed biscuits, smooth whipped cheesecake cream, bright cherry filling, and a generous topping of crumbs and whole cherries, this dessert brings together simplicity and elegance in the most delicious way. It is perfect for family gatherings, holidays, or simply when you crave a sweet treat that requires no oven time. With simple ingredients and a preparation process that even beginners can master, this recipe will quickly become one of your favorite go-to desserts.
What makes this recipe so appealing is the balance of textures and flavors. The base is slightly crunchy with a buttery aroma that sets the foundation for the creamy layer above it. The cheesecake mixture is light, silky, and sweet with a hint of tanginess that pairs wonderfully with the vibrant cherry filling. The cherries themselves provide an inviting burst of color and fruity freshness, creating a beautiful contrast against the pale cream. The crumb topping adds a bit of texture that keeps every bite interesting, while the whole cherries on top enhance the presentation and make the dessert look festive and irresistible.
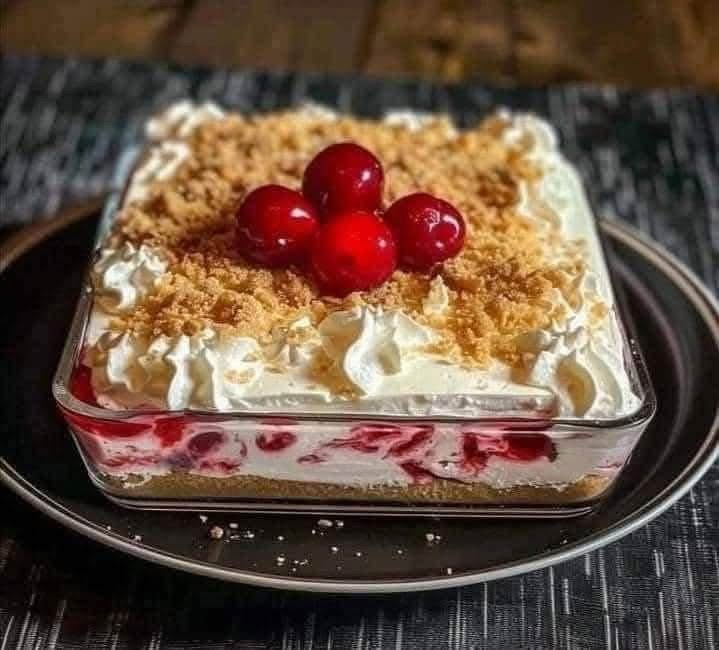
To prepare this dessert, you need just a few easy-to-find ingredients. The crust is made with crushed biscuits such as graham crackers, digestive biscuits, or any butter cookie you like. Mixing the crumbs with melted butter helps the base set nicely and gives it a rich, satisfying flavor. For the creamy layer, cream cheese is essential because it provides the traditional cheesecake taste. Combining it with powdered sugar and whipped cream results in a luscious, airy filling that melts beautifully in your mouth. Cherry pie filling, fresh cherries, or a homemade cherry compote can be used for the fruity layer, depending on how sweet or natural you prefer it. Finally, decorating with extra whipped cream and more crumbs gives the dessert that signature look seen in the picture.
Ingredients you need:
2 cups crushed biscuits
1/2 cup melted butter
400g cream cheese, softened
1 cup powdered sugar
2 cups whipped cream or Cool Whip
1 can cherry pie filling or 2 cups cherry compote
Extra biscuit crumbs for topping
Whole cherries for decoration
Begin by preparing the crust. Crush the biscuits until they reach a fine, sand-like texture. Mix them with melted butter until every crumb is coated and the mixture feels like wet sand. Press this mixture firmly into the bottom of your serving dish, ensuring the crust is even and compact. Refrigerate it while you prepare the next layers, allowing the butter to solidify and form a stable base.
Next, prepare the cheesecake layer. In a mixing bowl, beat the softened cream cheese until smooth and free of lumps. Add the powdered sugar and continue mixing until the mixture becomes creamy and glossy. Fold in the whipped cream gently to create a light, fluffy texture. This step ensures the filling stays smooth and airy instead of dense. Spread half of this cheesecake mixture over the chilled biscuit crust, smoothing it with a spatula.
Now add the cherry layer. Spoon the cherry pie filling generously over the cream layer, distributing the fruit evenly so every bite includes cherries. The contrast of the red cherries against the creamy white filling creates a delightful visual effect. After spreading the cherries, add the remaining cheesecake mixture on top, creating a beautiful layered effect similar to the image. Smooth the top gently and avoid pressing too hard so the layers stay distinct.
To finish, pipe or spoon whipped cream decoratively along the top of the dessert. Sprinkle extra biscuit crumbs for texture and presentation. Place whole cherries in the center or arrange them creatively around the top to enhance the appearance and make the dessert look festive, vibrant, and appetizing.
Refrigerate the dessert for at least four hours, but overnight chilling is best. This resting time helps the layers firm up, allowing the dessert to cut neatly into perfect squares and giving the flavors time to blend together.
This no-bake cherry cheesecake delight is incredibly versatile. You can customize it depending on your preferences or the season. Use blueberries, strawberries, or raspberries for a summer twist, or try peach or pineapple for a refreshing tropical version. Chocolate lovers can drizzle melted chocolate over the top or even mix chocolate chips into the cream layer. If you want to make the dessert lighter, use Greek yogurt in place of half the cream cheese for a slightly tangy, refreshing variation.
The dessert is also ideal for parties or meal-prepping because it can be made in advance and stored in the refrigerator for up to three days. The flavors remain fresh, and the texture stays creamy without becoming soggy. If you want to transport it, simply cover the dish with plastic wrap or a fitted lid and keep it chilled until serving time.
When it comes time to serve, slice the dessert into neat squares and lift them gently with a spatula. Each piece will showcase the beautiful layers: the golden crust at the bottom, the creamy middle, the bright cherries, and the decorative topping. It is a dessert that not only tastes delicious but also looks like something from a bakery display. The combination of creaminess, fruitiness, and crunch creates a perfect balance that keeps everyone coming back for more.
No-bake cherry cheesecake delight is proof that you do not need complicated techniques or long baking hours to achieve an elegant and flavorful dessert. With simple ingredients, a few layers, and enough chilling time, you can create a creamy masterpiece that melts in the mouth and pleases the eye. Whether you are hosting a dinner, surprising a loved one, or treating yourself, this dessert always delivers.