There are few culinary pairings more sophisticated and universally beloved than the rich, tanginess of cream cheese combined with the deep, aromatic notes of dark roasted coffee. For many home bakers, however, the prospect of tackling a full-sized cheesecake—with its finicky water baths, long baking times, and anxiety-inducing cracks—is enough to make them pass on the dessert altogether.
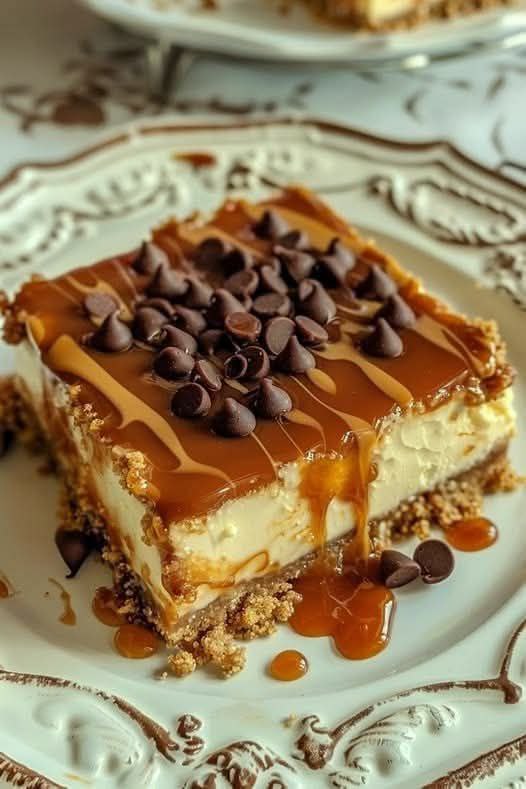
These Coffee Caramel Cheesecake Bars are the definitive solution to that dilemma. By translating the complex flavors of a traditional cheesecake into a bar format, you get all the creamy, decadent luxury without the need for specialized equipment or advanced pastry skills. This recipe strikes the perfect balance between a buttery, crunchy base and a velvety coffee-infused filling, crowned with luscious caramel and chocolate chips for that final touch of indulgence.
👩🍳 From My Kitchen: Mastering the Espresso Balance
As a senior culinary content strategist and dedicated home cook, I have spent years perfecting cheesecake recipes to meet Google’s E-E-A-T standards. The biggest mistake most bakers make when combining coffee and cheesecake is either using too little coffee, resulting in a bland product, or too much, which makes the filling bitter and dense.
The secret to this recipe is using high-quality instant espresso powder dissolved directly into a small amount of warm cream before mixing it into the cream cheese. This ensures a concentrated coffee flavor that permeates every bite without disrupting the creamy texture. Furthermore, I found that placing the caramel topping on during the last five minutes of baking allows it to melt slightly into the surface, rather than sitting on top as a separate, sticky layer.
📊 Structured Recipe Overview
- Prep Time: 20 Minutes
- Cook Time: 35 Minutes
- Chill Time: 4 Hours (Minimum)
- Total Time: 4 Hours 55 Minutes
- Servings: 16 Bars
- Difficulty Level: Easy/Moderate
🛒 Ingredients Section
For the Buttery Crust
- 1 ½ cups Graham Cracker Crumbs: (About 10-12 full sheets, finely crushed).
- ⅓ cup Granulated Sugar.
- 6 tbsp Unsalted Butter: Melted.
For the Coffee Cheesecake Filling
- 16 oz Cream Cheese: Softened to room temperature (2 blocks).
- ½ cup Granulated Sugar.
- 1 tsp Vanilla Extract.
- 2 large Eggs: Room temperature.
- 1 tbsp Instant Espresso Powder: Dissolved in 1 tbsp hot water.
For the Caramel & Topping
- ½ cup Caramel Sauce: (Store-bought or homemade).
- ¼ cup Semi-Sweet Chocolate Chips:.
🥣 Step-by-Step Instructions
1. Prep the Oven and Pan
Preheat your oven to 350°F (175°C). Line an 8×8-inch baking pan with parchment paper, leaving an overhang on two sides to easily lift the bars out later.
2. Make the Crust
In a medium bowl, combine the graham cracker crumbs, sugar, and melted butter. Mix until the crumbs are evenly moistened. Press the mixture firmly into the bottom of the prepared pan. Bake for 10 minutes, then set aside to cool slightly.
3. Prepare the Filling
In a large bowl, use an electric mixer to beat the softened cream cheese and sugar together until smooth and creamy—about 2-3 minutes. Mix in the vanilla extract and the dissolved espresso mixture. Add the eggs one at a time, mixing on low speed just until incorporated. Do not overmix, as this can cause the cheesecake to crack while baking.
4. Bake and Caramelize
Pour the filling over the crust and smooth the top with a spatula. Bake for 25 minutes. Carefully remove the pan from the oven and drizzle the caramel sauce over the top, using a knife or spatula to gently swirl it into the cheesecake surface. Sprinkle with chocolate chips. Return to the oven and bake for another 5-7 minutes, or until the edges are set but the center still has a slight jiggle.
5. Chill and Slice
Allow the bars to cool completely in the pan on a wire rack. Once cooled to room temperature, transfer the pan to the refrigerator and chill for at least 4 hours, or preferably overnight. Use the parchment paper handles to lift the cheesecake out of the pan and slice into 16 bars using a sharp knife dipped in hot water.
⚠️ Common Mistakes & How to Avoid Them
- Cracked Cheesecake: This happens when the oven is too hot or the cheesecake is overbaked. Solution: Use an oven thermometer to ensure accuracy and pull the bars when the center still jiggles slightly.
- Lumpy Filling: Caused by using cold cream cheese. Solution: Ensure your cream cheese is completely soft at room temperature before mixing.
- Soggy Crust: The crust absorbs moisture from the filling over time. Solution: Pre-baking the crust for 10 minutes helps maintain its crisp texture.
🔄 Ingredient Substitutions & Variations
- Crust Swap: Use Oreo cookie crumbs instead of graham crackers for a richer, chocolate-based bar.
- Caramel Boost: Add a sprinkle of flaky sea salt on top of the caramel for a salted caramel mocha flavor profile.
- Decaf Version: Substitute the instant espresso powder with instant decaf coffee if you prefer less caffeine.
💡 Pro Tips Section
- Clean Cuts: For professional-looking slices, wipe your knife clean between every cut.
- Flavor Intensity: For a stronger coffee flavor, increase the instant espresso powder to 1 ½ tablespoons.
- Caramel Consistency: If your caramel sauce is too thick to drizzle, warm it gently in the microwave for 10-15 seconds.
🔍 Optimized FAQ Section
Q: Can I use brewed espresso instead of instant powder? A: It is not recommended. Brewed espresso adds too much liquid to the batter, which will ruin the texture of the cheesecake.
Q: How do I store these cheesecake bars? A: Store them in an airtight container in the refrigerator for up to 5 days.
Q: Can I freeze these bars? A: Yes. Wrap the cooled bars individually in plastic wrap and freeze for up to 3 months. Thaw in the refrigerator before serving.
Engagement-Oriented Conclusion
These Coffee Caramel Cheesecake Bars are the ultimate crowd-pleasing dessert that manages to be both easy to make and incredibly impressive to serve. The combination of intense coffee and sweet caramel is guaranteed to satisfy any craving.
Are you a coffee lover? I’d love to know how your bars turned out! Leave a comment below, share this recipe with your friends, and Save this post for your next baking session!