Ingredients
Basic Dough
- 3 ½ cups (450g) all-purpose flour or bread flour
- 1 ½ teaspoons salt
- 1 teaspoon sugar
- 2 teaspoons instant yeast
- 1 ¼ cups (300ml) warm water
Step-by-Step Instructions
Step 1: Activate the Yeast
If using instant yeast, you can mix it directly with flour.
If using active dry yeast:
- Mix yeast with warm water and sugar
- Let sit for 5–10 minutes until foamy
This ensures your yeast is alive and active.
Step 2: Mix the Dough
In a large bowl:
- Combine flour and salt
- Add yeast mixture (or dry yeast + water)
Mix until a rough dough forms.
The dough should be:
- Slightly sticky
- Soft but not too wet
Step 3: Kneading
Transfer dough to a floured surface.
Knead for 8–10 minutes:
- Push, fold, rotate
- Continue until smooth and elastic
You’ll know it’s ready when:
- It springs back when pressed
- It feels soft and stretchy
Step 4: First Rise (Proofing)
Place dough in a lightly oiled bowl.
Cover and let it rise in a warm place for 1–1.5 hours until doubled in size.
Tips:
- Avoid cold areas
- Ideal temperature: 24–27°C
Step 5: Shape the Loaves
Punch down the dough gently.
Divide into 2–3 portions.
Shape each into an oval or baguette-style loaf:
- Roll gently
- Tuck edges underneath
Place on a baking tray lined with parchment paper.
Step 6: Second Rise
Cover loosely and let rise again for 30–45 minutes.
This step gives the bread its light texture.
Step 7: Scoring
Before baking:
- Use a sharp knife or blade
- Make diagonal cuts on top
This allows the bread to expand and creates the classic look.
Step 8: Create Steam (Important)
Place a small oven-safe dish with hot water in the oven.
Steam helps:
- Create crispy crust
- Improve rise
Step 9: Bake
Preheat oven to 220°C (430°F).
Bake for 20–25 minutes until:
- Deep golden brown
- Hollow sound when tapped
Step 10: Cool
Let bread cool on a rack for at least 20 minutes.
This step is crucial:
- It finishes cooking inside
- Prevents soggy texture
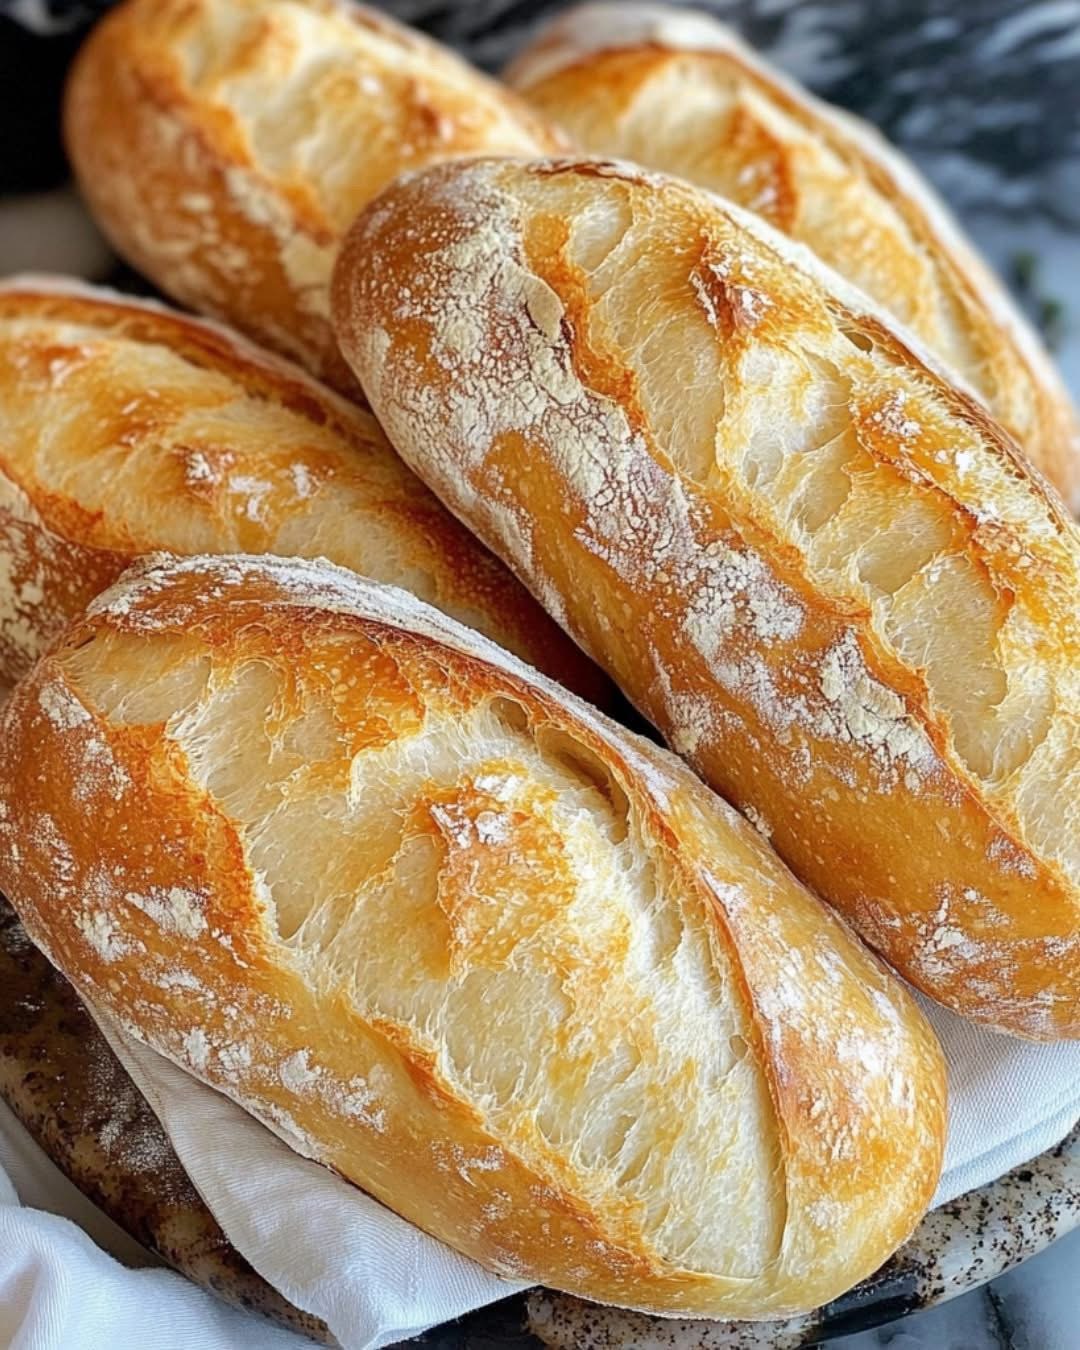
Texture and Flavor
This bread gives you:
- Crispy, crackling crust
- Soft, airy interior
- Light chewy texture
- Mild, slightly sweet flavor
Perfect for sandwiches, dipping, or eating warm with butter.
Tips for Perfect Bread
1. Use Bread Flour if Possible
It gives better structure and chew.
2. Don’t Skip Steam
This is the secret to crispy crust.
3. Don’t Overload Flour
Too much flour = dense bread.
4. Proper Kneading Matters
It develops gluten for structure.
Variations
1. Garlic Bread
Brush with garlic butter after baking.
2. Herb Bread
Add dried herbs like rosemary or thyme.
3. Cheese Bread
Add cheese inside or on top before baking.
4. Whole Wheat Version
Replace part of flour with whole wheat.
Storage
- Room temperature: 2 days
- Freeze: up to 2 months
Wrap in cloth or paper (not plastic for crust).
Reheating
- Oven: best method (restores crust)
- Sprinkle water and reheat for crispiness
Common Mistakes
- ❌ Skipping second rise → dense bread
- ❌ Too much flour → dry texture
- ❌ No steam → soft crust
- ❌ Cutting hot bread → gummy inside
Why This Recipe Works
- Yeast fermentation creates air pockets
- Kneading builds structure
- Steam forms crust
- Proper baking locks texture
Final Thoughts
This homemade crusty bread is one of the most rewarding recipes you can make. The smell, the texture, and the taste are all unbeatable.
With just a few ingredients, you can create bakery-quality bread that looks exactly like the one in the image—golden, rustic, and full of character.