Why You’ll Love Homemade Pickles
Homemade pickles are better than store-bought because:
- Fresher taste
- Adjustable sweetness and acidity
- No unnecessary additives
- Very easy to prepare
- Long shelf life
- Perfect for meal prep
Once you try homemade pickles, it’s hard to go back to commercial ones.
Ingredients
Main Ingredients
- 1 kg small cucumbers or sliced cucumbers
- 4 cups water
- 2 cups white vinegar (5% acidity)
- 2 tablespoons salt (pickling or sea salt)
- 2 tablespoons sugar (optional)
Flavor Additions (Per Jar)
- 2–3 cloves garlic
- 1 teaspoon mustard seeds
- 1 teaspoon black peppercorns
- Fresh dill (or dried dill)
- Chili flakes (optional for spice)
Tools Needed
- Glass jars with lids
- Large pot
- Knife or slicer
- Funnel (optional)
- Clean towel
Step 1: Preparing the Cucumbers
Wash cucumbers very well under cold water.
If using whole cucumbers:
- Trim the ends slightly (this helps keep them crisp).
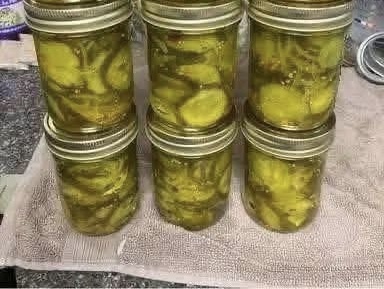
If slicing:
- Cut into medium-thick rounds like in the picture.
Fresh, firm cucumbers give the best crunch.
Step 2: Sterilizing the Jars
Clean jars thoroughly with hot soapy water.
To sterilize:
- Boil jars in water for 5–10 minutes
- Or heat them in the oven at low temperature
Let them dry upside down on a clean towel.
This step is important for safe storage.
Step 3: Preparing the Brine
In a large pot, combine:
- Water
- Vinegar
- Salt
- Sugar
Bring to a gentle boil while stirring until salt dissolves completely.
Remove from heat.
The smell should be sharp and tangy — that’s normal.
Step 4: Filling the Jars
Place garlic, dill, mustard seeds, and peppercorns at the bottom of each jar.
Pack cucumber slices tightly but without crushing.
Pour hot brine over the cucumbers until fully covered, leaving about 1 cm space at the top.
Remove air bubbles by gently tapping the jar.
Close lids tightly.
Step 5: Cooling and Storing
Let jars cool completely at room temperature.
Then refrigerate.
Pickles start tasting good after:
- 24 hours (light flavor)
- 3–5 days (balanced flavor)
- 1–2 weeks (full flavor)
The longer they sit, the better they taste.
Tips for Extra Crunchy Pickles
- Use very fresh cucumbers.
- Avoid overcooking the brine.
- Add grape leaf or bay leaf (optional trick for crunch).
- Keep slices thick enough.
Crisp texture depends mainly on freshness.
Common Mistakes to Avoid
Pickles too soft
- Old cucumbers
- Brine too hot for too long
Too salty
- Incorrect salt measurement
Cloudy brine
- Non-clean jars or iodized salt
Using pickling salt helps keep the liquid clear.
Flavor Variations
Sweet Pickles
Add more sugar to the brine.
Spicy Pickles
Add chili peppers or hot flakes.
Garlic Lovers
Increase garlic quantity.
Herb Style
Add thyme, rosemary, or coriander seeds.
Serving Ideas
Homemade pickles go perfectly with:
- Burgers
- Sandwiches
- Grilled meats
- Rice dishes
- Salads
- Cheese boards
They also add freshness to heavy meals.
Storage Duration
- Refrigerator pickles: up to 2–3 months
- Keep jars sealed and cold
- Always use clean utensils to remove pickles
If you notice unusual smell or bubbles, discard.
Why Homemade Pickles Are Special
Pickling is one of the oldest food-preservation techniques. Besides extending shelf life, it enhances flavor and creates a perfect balance between sour, salty, and slightly sweet notes.
Homemade versions taste fresher and more natural because you control every ingredient.
Pro Tips for Perfect Pickles
- Taste your brine before pouring (adjust salt or sugar).
- Pack cucumbers tightly for even pickling.
- Store in coldest part of fridge.
- Let flavors develop patiently.
These small details make a big difference.
Final Thoughts
Homemade pickles are simple, satisfying, and incredibly rewarding to make. With crunchy cucumbers, a tangy vinegar brine, and fragrant spices, you’ll create jars full of flavor that improve every meal. The process is easy, beginner-friendly, and perfect for preserving fresh produce.