Why You’ll Love This Recipe
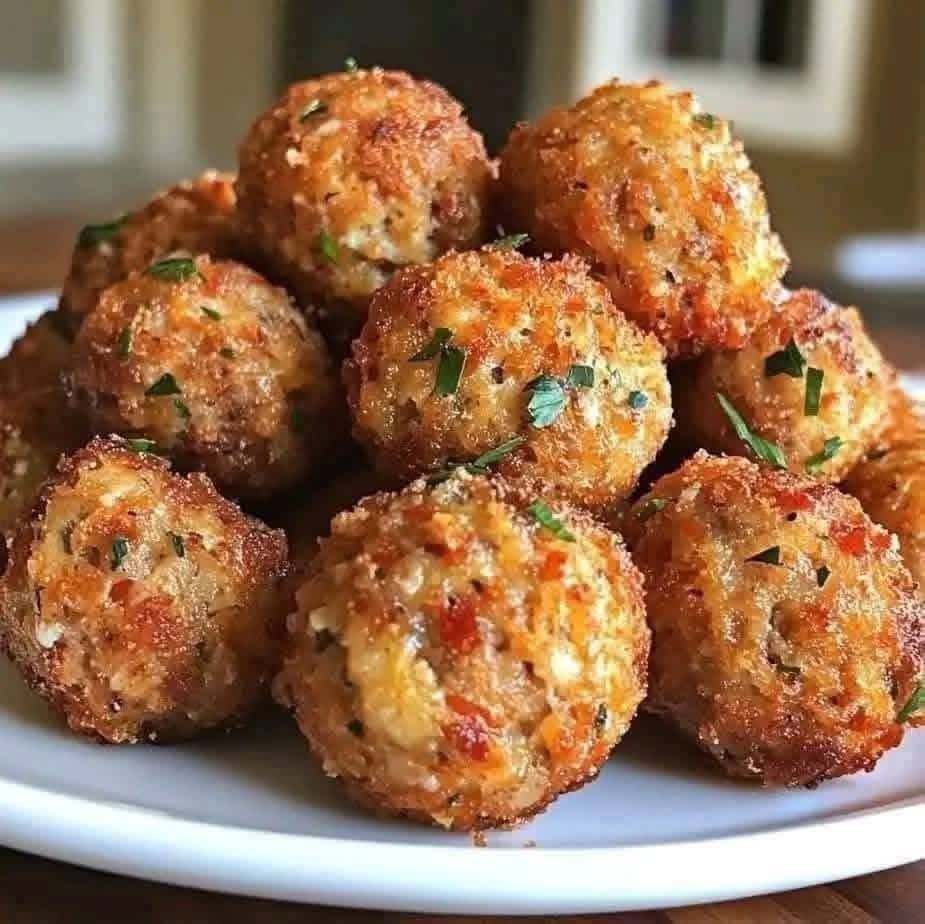
This recipe is simple but delivers big flavor. The texture contrast is what makes it special: a crispy outer shell and a juicy, cheesy center. They’re also very versatile — you can fry, bake, or air fry them depending on your preference.
These bites are perfect for:
- Family snacks
- Party appetizers
- Game nights
- Lunchbox additions
- Quick protein-rich treats
Once you make them, they usually disappear quickly because they are easy to eat and incredibly addictive.
Ingredients You’ll Need
Main Ingredients
- 500 g chicken breast (finely chopped or minced)
- 1 cup shredded mozzarella cheese
- ½ cup grated parmesan cheese
- ½ cup breadcrumbs (plus extra for coating)
- 1 small onion (finely diced)
- 2 garlic cloves (minced)
- 1 egg
- 2 tablespoons chopped parsley
- 1 teaspoon salt
- ½ teaspoon black pepper
- ½ teaspoon paprika
- ½ teaspoon chili flakes (optional)
For Coating
- 2 eggs (beaten)
- 1 cup breadcrumbs or panko
- ½ cup flour
For Frying
- Vegetable oil or sunflower oil
Choosing the Right Chicken
Fresh chicken breast works best because it gives a tender texture. You can either:
- Mince it using a food processor
- Chop it very finely with a knife
- Use store-bought ground chicken
Avoid very watery chicken mixtures, as they make shaping difficult. If the mixture feels too wet, simply add extra breadcrumbs.
Preparing the Flavor Base
The key to tasty chicken balls is seasoning. Start by combining:
- Chicken
- Onion
- Garlic
- Parsley
- Salt and spices
Mix everything well so the flavors distribute evenly. The onions add moisture and sweetness, while garlic brings depth.
If you want extra flavor, you can add:
- A pinch of oregano
- A little grated lemon zest
- A teaspoon of mustard
Adding Cheese for Creamy Texture
Cheese is what makes these balls irresistible. Mozzarella melts beautifully and creates a soft interior, while parmesan adds a salty, nutty note.
Tips:
- Use freshly shredded cheese for better melting
- Avoid very wet cheese
- Mix gently so the cheese doesn’t clump
You can also stuff each ball with a small cube of cheese for a gooey center surprise.
Mixing the Perfect Filling
In a large bowl combine:
- Chicken mixture
- Egg
- Breadcrumbs
- Cheese
Mix with clean hands or a spoon until everything holds together. The texture should be:
- Soft but not sticky
- Firm enough to roll
If it sticks too much, add a little more breadcrumbs.
Let the mixture rest for 10 minutes — this helps it firm up and improves shaping.
Shaping the Balls
Take about one tablespoon of mixture and roll it between your palms to create small balls.
Tips for even shaping:
- Lightly oil your hands
- Keep all balls similar size for even cooking
- Do not press too tightly
Place shaped balls on a tray while you prepare the coating station.
The Three-Step Coating Method
For that golden crispy exterior, follow this order:
- Roll balls in flour
- Dip in beaten eggs
- Coat with breadcrumbs or panko
Press lightly so breadcrumbs stick well.
For EXTRA crunch, repeat egg + breadcrumb coating twice.
Frying to Golden Perfection
Heat oil in a deep pan over medium heat. The oil should be hot but not smoking.
Test with a breadcrumb — if it sizzles immediately, it’s ready.
Frying tips:
- Cook in small batches
- Avoid overcrowding
- Fry 3–4 minutes until golden brown
- Turn occasionally for even color
Remove and place on paper towels to absorb excess oil.
Baking Option (Healthier Version)
If you prefer less oil:
- Preheat oven to 200°C (390°F)
- Place balls on parchment paper
- Lightly spray with oil
- Bake 20–25 minutes
Turn halfway for even browning.
They will be slightly less crispy than fried but still delicious.
Air Fryer Method
Air fryers are perfect for this recipe:
- Preheat to 190°C (375°F)
- Lightly spray balls with oil
- Cook 12–15 minutes
- Shake basket halfway
Result: crunchy outside with less oil.
Best Dipping Sauces
These crispy chicken balls pair well with many sauces:
- Garlic mayo
- Spicy ketchup
- Honey mustard
- Ranch dressing
- Sweet chili sauce
For a homemade quick dip:
Mix mayonnaise + garlic powder + lemon juice + paprika.
Serving Ideas
Serve them:
- As party appetizers
- With salad for a light meal
- Inside wraps or sandwiches
- With fries or roasted vegetables
Add fresh parsley on top for a restaurant-style presentation.
Storage and Reheating
These balls store very well.
Refrigerator
- Keep in airtight container
- Lasts 3–4 days
Freezer
- Freeze before frying or after cooking
- Store up to 2 months
Reheat
Best ways:
- Oven: 180°C for 8–10 minutes
- Air fryer: 5 minutes
- Avoid microwave if you want crispiness.
Common Mistakes to Avoid
- Mixture too wet → add breadcrumbs
- Oil too hot → outside burns, inside raw
- Balls too big → uneven cooking
- Not seasoning enough → bland flavor
Always taste a small cooked piece before frying all batches.
Easy Variations to Try
You can customize this recipe easily:
Spicy version: add chili powder and hot sauce.
Herb version: add basil and oregano.
Cheese lovers: fill center with cheddar cubes.
Vegetable boost: add grated carrot or zucchini (squeeze water out first).
Tips for Extra Crispiness
- Use panko breadcrumbs instead of regular
- Double coat with crumbs
- Chill coated balls for 15 minutes before frying
- Fry at steady medium heat
These small steps make a big difference.
Final Thoughts
These crispy cheese and chicken balls are the perfect mix of crunchy, juicy, and comforting. They look impressive but are actually very easy to make at home. Whether you fry them for maximum crispiness or bake them for a lighter option, they always come out satisfying and full of flavor.