Why You’ll Love These Chocolate Oat Bars
These bars are:
- No-bake and beginner-friendly
- Made with simple ingredients
- Customizable with your favorite nuts and dried fruits
- Perfect for meal prep
- Freezer-friendly
- Great for kids and adults
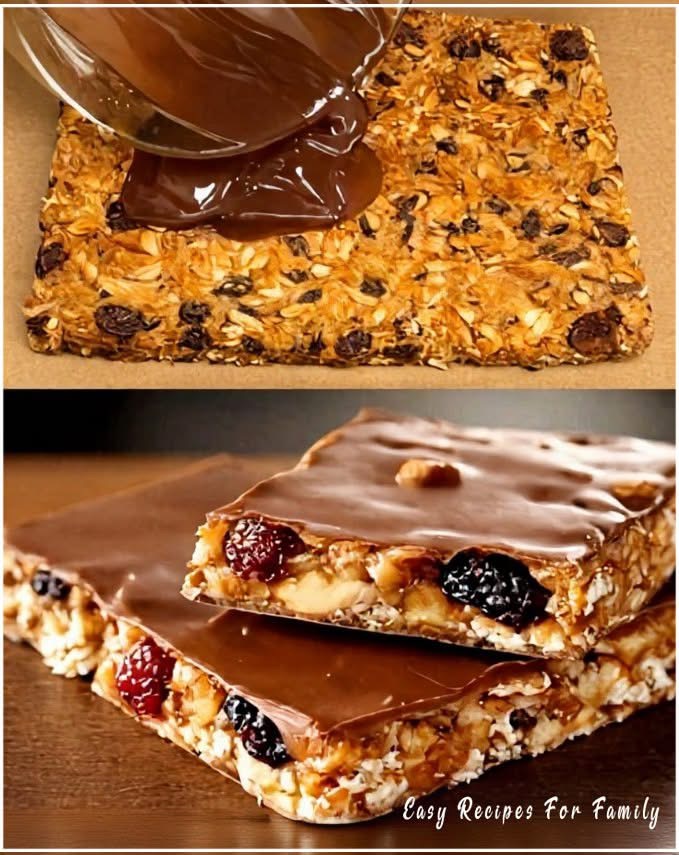
The texture is soft yet firm, chewy from the oats, slightly crunchy from the nuts, and perfectly balanced with a smooth chocolate topping.
Ingredients You’ll Need
For the Base Layer
- 3 cups rolled oats
- 1 cup mixed nuts (almonds, peanuts, walnuts, or cashews), roughly chopped
- ½ cup seeds (optional – sunflower or pumpkin seeds)
- ¾ cup dried fruit (raisins, cranberries, chopped dates, or mixed berries)
- ½ cup honey or maple syrup
- ½ cup peanut butter or almond butter
- 2 tablespoons coconut oil or butter
- 1 teaspoon vanilla extract
- Pinch of salt
For the Chocolate Topping
- 1½ cups dark or milk chocolate chips
- 1 tablespoon coconut oil (for shine and smooth texture)
Step-by-Step Instructions
Step 1: Prepare the Pan
Line a square baking dish (8×8 or 9×9 inch) with parchment paper, leaving extra paper on the sides for easy removal. Set aside.
Step 2: Toast the Oats (Optional but Recommended)
For deeper flavor, lightly toast the oats and nuts in a dry pan over medium heat for 3–5 minutes until fragrant. Stir frequently to avoid burning. Let cool slightly.
This step enhances the nutty flavor and adds a subtle crunch.
Step 3: Make the Binding Syrup
In a saucepan over low heat, combine:
- Honey (or maple syrup)
- Peanut butter
- Coconut oil
- Salt
Stir continuously until everything melts together into a smooth mixture. Remove from heat and stir in vanilla extract.
Do not overheat. You only need everything melted and combined.
Step 4: Combine Everything
In a large mixing bowl, combine:
- Oats
- Chopped nuts
- Seeds
- Dried fruit
Pour the warm syrup mixture over the dry ingredients. Mix thoroughly until everything is evenly coated. The mixture should be sticky and hold together when pressed.
Step 5: Press Into the Pan
Transfer the mixture into the prepared baking dish. Using the back of a spoon or your hands (slightly greased), press the mixture down firmly and evenly.
Pressing firmly is important to ensure the bars hold together after chilling.
Step 6: Add the Chocolate Layer
Melt the chocolate chips and coconut oil together:
- Use a microwave in 20-second intervals, stirring between each round
OR - Melt gently in a double boiler over simmering water
Once smooth and glossy, pour the melted chocolate over the oat mixture. Spread evenly using a spatula.
For extra texture, sprinkle chopped nuts or a few whole dried berries on top before the chocolate sets.
Step 7: Chill Until Firm
Refrigerate for at least 2 hours or until completely firm.
Once set, lift the bars out using the parchment paper and cut into squares or rectangles.
Tips for Perfect No-Bake Oat Bars
- Press firmly: This prevents crumbly bars.
- Chill completely before slicing.
- Use natural peanut butter for a healthier option.
- For firmer bars, store in the fridge.
- For softer bars, let sit at room temperature for 5–10 minutes before serving.
Variations You Can Try
Healthy Version
- Use maple syrup instead of honey
- Add chia seeds or flaxseeds
- Use 70% dark chocolate
High-Protein Version
- Add 2 tablespoons protein powder
- Replace some oats with crushed almonds
Kid-Friendly Version
- Use milk chocolate
- Add mini chocolate chips inside the base
- Replace nuts with extra seeds if allergies are a concern
Storage Instructions
- Refrigerator: Store in an airtight container for up to 1 week.
- Freezer: Freeze for up to 2 months. Separate layers with parchment paper.
- Room temperature: Keep in a cool place for up to 2 days.
Nutrition Benefits
These bars provide:
- Fiber from oats
- Healthy fats from nuts
- Natural sweetness from dried fruit
- Antioxidants from dark chocolate
They are a much better alternative to store-bought granola bars loaded with preservatives and artificial flavors.
Serving Ideas
- Breakfast on the go
- After-school snack
- Post-workout energy boost
- Coffee-time treat
- Healthy dessert
Cut them into small squares for party platters or wrap individually for lunchboxes.
Final Thoughts
These no-bake chocolate oat bars are the perfect combination of chewy, crunchy, sweet, and chocolatey. They are easy to make, require minimal equipment, and can be customized endlessly.