Why You’ll Love These Chocolate Balls
This recipe is:
✅ No oven
✅ 10–15 minutes prep
✅ Only a few ingredients
✅ Budget friendly
✅ Stays fresh for days
✅ Totally customizable
And they taste like a mix of:
👉 chocolate truffles
👉 biscuit cake
👉 fudge bites
Soft + crunchy + chocolatey = perfection.
## Ingredients You’ll Need
Base
- 2 cups crushed tea biscuits or digestive biscuits
- ½ cup crushed nuts (optional – peanuts, almonds, or walnuts)
- 2 tablespoons cocoa powder
- ½ cup condensed milk
- ¼ cup melted butter
- 1 teaspoon vanilla
Chocolate Coating
- 200–250 g milk or dark chocolate
- 1 teaspoon oil or butter (for shine)
Optional add-ins:
- coconut flakes
- peanut butter
- chocolate chips
- caramel
- dates
- raisins
## Step 1 – Crush the Biscuits
First, make crumbs.
Put biscuits in:
- blender OR
- zip bag and crush with rolling pin
Texture should be:
not powder, not big chunks → small crumbs.
Some tiny chunks are GOOD (gives crunch).
## Step 2 – Mix the Filling
In a bowl add:
- crushed biscuits
- cocoa powder
- nuts
- melted butter
- condensed milk
- vanilla
Mix everything.
It should form a thick sticky dough.
If too dry → add little milk
If too wet → add more biscuits
You want soft but shapeable.
## Step 3 – Shape the Balls
Scoop small portions (1 tablespoon).
Roll between hands into balls.
Place on tray with parchment paper.
Size tip:
Smaller = cuter + easier to eat 😄
Put tray in fridge 15–20 minutes to firm up.
Makes dipping easier later.
## Step 4 – Melt the Chocolate
Melt chocolate:
Microwave:
30 seconds → stir → repeat
OR double boiler.
Add 1 tsp oil/butter for smooth shiny finish.
Chocolate should be silky, not thick.
## Step 5 – Dip & Coat
Now the fun part 🍫
- Drop ball in chocolate
- Roll with fork
- Lift and tap excess
- Place back on tray
Repeat for all.
Work fast before chocolate sets.
Optional:
Sprinkle coconut or nuts on top before hardening.
## Step 6 – Chill to Set
Refrigerate 20–30 minutes until chocolate hardens.
Then… DONE.
Snack time 😍
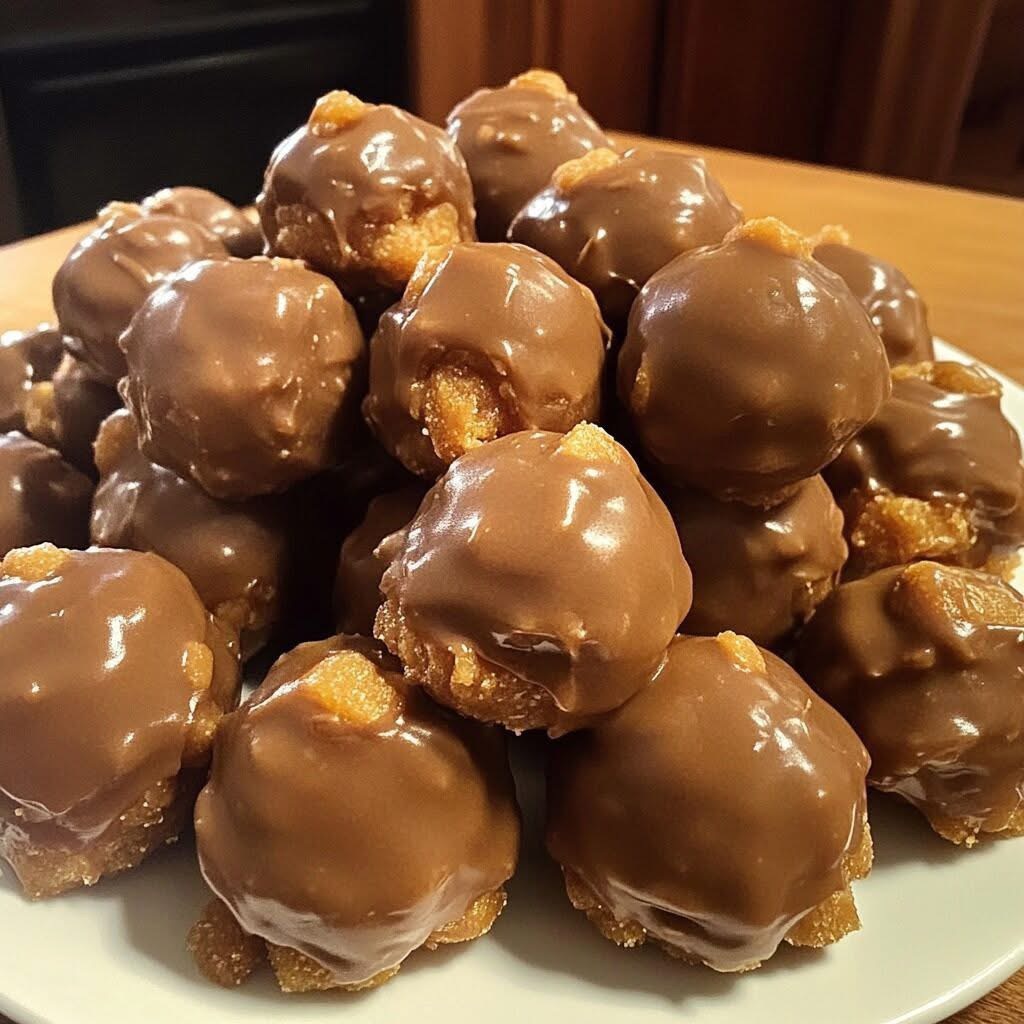
## Texture & Taste (What to Expect)
Let me describe:
Outside:
smooth chocolate shell
Inside:
soft fudgy + slight biscuit crunch
Taste:
rich chocolate
light sweetness
buttery
nutty
Not too heavy. Super addictive.
## Pro Tips for Perfect Results
Use good chocolate
Cheap chocolate tastes waxy
Chill balls first
Makes coating cleaner
Don’t overheat chocolate
Becomes thick
Add pinch salt
Enhances chocolate flavor
Use gloves for rolling
Cleaner hands 😄
## Fun Flavor Variations
Coconut version
Add coconut inside + outside
Peanut butter
Add 2 tbsp peanut butter to mix
Oreo style
Use crushed Oreos instead of biscuits
Date energy bites
Mix dates + nuts (healthier)
White chocolate
Coat with white chocolate
Stuffed center
Add caramel or Nutella inside
So many combos!
## Storage Tips
Fridge
Keep airtight → 1 week
Freezer
Up to 2 months
Serve
Cold or room temp
They taste even better chilled.
## Serving Ideas
Perfect with:
- coffee
- tea
- milk
- dessert platters
- gift boxes
- Ramadan trays
Or just eat straight from the fridge at 2AM (no judgment 😂)
## Common Mistakes to Avoid
❌ Too much liquid → sticky mess
❌ Not chilling → messy dipping
❌ Thick chocolate → uneven coating
❌ Huge balls → too heavy
Keep them small and cute.
## Final Thoughts
These chocolate biscuit balls are one of those “5 ingredients, zero stress” desserts everyone should know.