There’s something magical about pulling a golden, crackly loaf of bread straight out of your oven. The crust sings as it cools, the aroma fills the kitchen, and one slice with butter feels like pure comfort. This rustic artisan bread loaf gives you that authentic bakery-style texture at home — crispy outside, soft and airy inside — with surprisingly simple steps.
If you’ve ever thought homemade bread was complicated, this recipe will change your mind. No fancy equipment. No complicated shaping. Just flour, yeast, water, salt, and time.
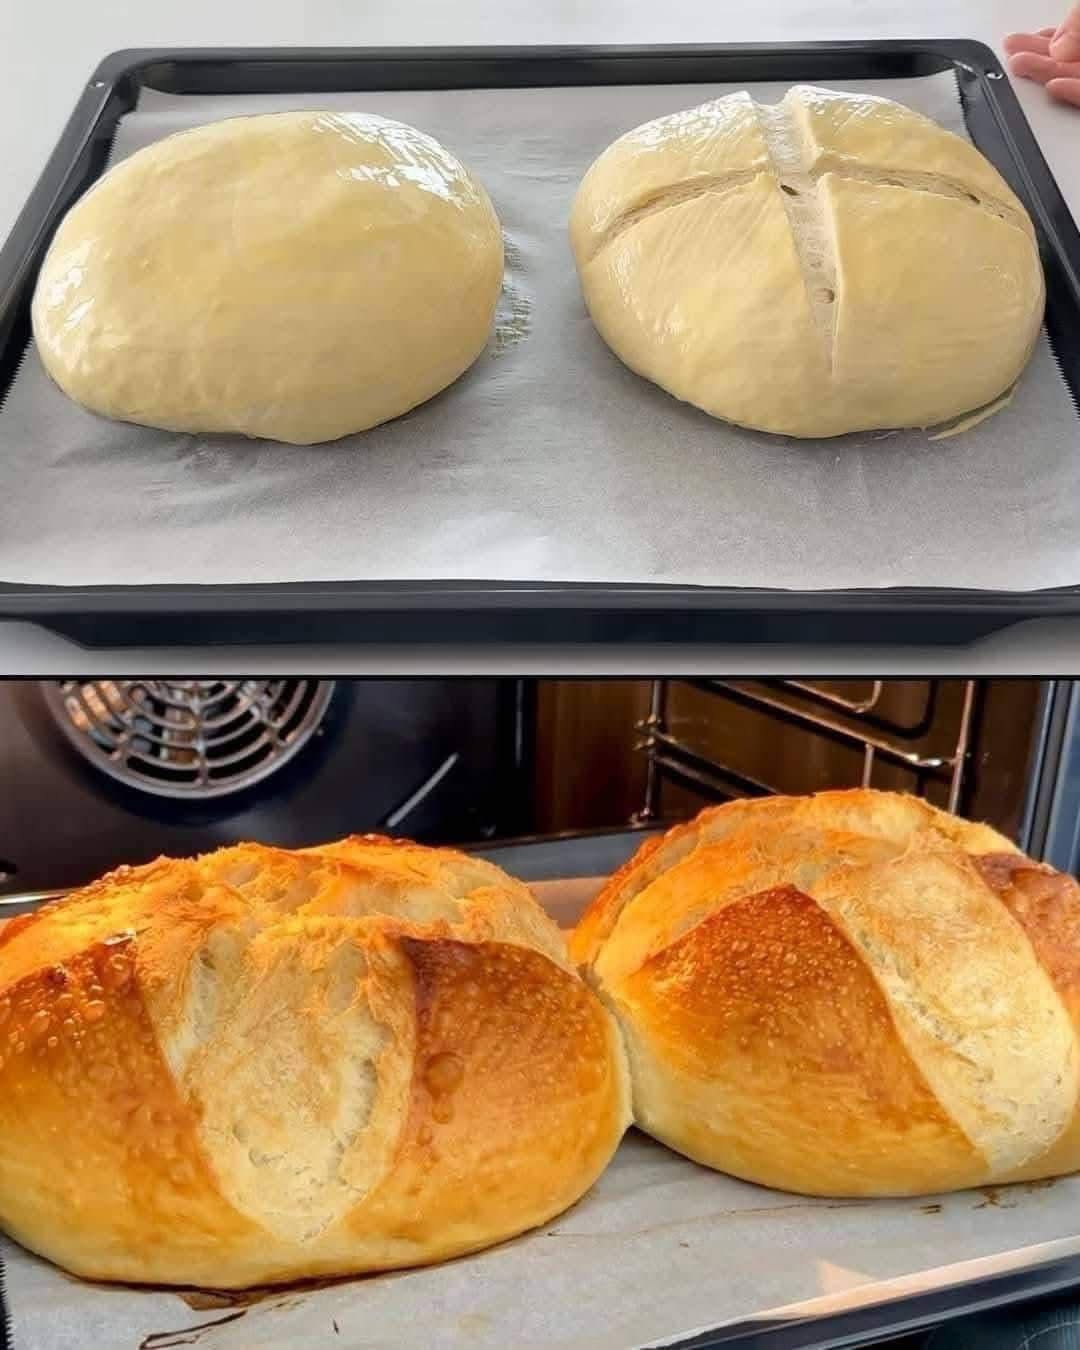
The result? Two beautiful round loaves with deep golden crusts and soft, fluffy centers that taste better than store-bought bread every single time.
Perfect for sandwiches, soups, toast, or simply tearing apart warm with olive oil.
Why You’ll Love This Bread
This artisan loaf is:
Beginner-friendly
Made with basic pantry ingredients
Crispy bakery-style crust
Light and airy crumb
Budget-friendly
Perfect for freezing
No mixer required
Ideal for daily bread or special dinners
Once you try it, you’ll never want packaged bread again.
Ingredients
- 4 cups all-purpose flour or bread flour
- 1 ½ teaspoons salt
- 1 tablespoon sugar (optional but helps browning)
- 2 teaspoons instant yeast
- 1 ½ cups warm water
- 1 tablespoon olive oil (optional)
That’s it. Five simple ingredients create magic.
Step-by-Step Instructions
Step 1 – Mix the Dough
In a large bowl, combine flour, yeast, salt, and sugar.
Add warm water gradually.
Mix with a spoon or hand until a rough dough forms.
No need to overthink it. Just combine until everything sticks together.
Step 2 – Knead
Place dough on a floured surface.
Knead for 8–10 minutes until smooth and elastic.
If sticky, add a little flour.
If dry, add a few drops of water.
You want soft but not wet dough.
When you press it, it should bounce back.
Step 3 – First Rise
Place dough in a lightly oiled bowl.
Cover with plastic wrap or a towel.
Let rise for 1–1.5 hours until doubled in size.
This is where the texture develops.
Don’t rush it.
Step 4 – Shape the Loaves
Punch down dough gently.
Divide into two equal pieces.
Shape into round balls.
Place on a lined baking tray.
Cover loosely and rest 30–40 minutes.
Step 5 – Score the Dough
Using a sharp knife or blade, make deep cuts or a cross on top.
This helps the bread expand beautifully in the oven.
It also gives that classic artisan look.
Step 6 – Bake
Preheat oven to 220°C (430°F).
Place a small pan of water in the oven for steam.
Bake for 25–30 minutes until:
Deep golden brown
Hollow sound when tapped
Crispy crust
Steam gives that professional bakery crust.
Step 7 – Cool Before Slicing
Let cool at least 20 minutes.
Cutting too early makes the crumb gummy.
Patience = perfect texture.
Pro Baking Tips
Use bread flour for chewier texture
Add steam for crispy crust
Don’t skip scoring
Weigh ingredients for accuracy
Let cool completely for clean slices
Small details make big improvements.
Delicious Ways to Enjoy
This bread is perfect with:
Butter or jam
Sandwiches
Soups and stews
Grilled cheese
Bruschetta
Garlic bread
Olive oil and herbs
It works for breakfast, lunch, or dinner.
Storage Tips
Room temperature: 2 days wrapped in cloth
Fridge: not recommended (dries bread)
Freezer: up to 2 months sliced or whole
Toast or warm to refresh.
Why This Recipe Works
Yeast creates airy pockets
Steam forms crisp crust
Slow rising develops flavor
Simple shaping keeps it easy
High heat gives bakery-style color
Making your own crusty artisan bread is easier than you think — and incredibly rewarding. The smell alone makes your home feel warm and cozy. Once you taste that crunchy crust and soft interior, you’ll understand why homemade bread is unbeatable.
It’s traditional bread made simple.
Final Thoughts