Ingredients You’ll Need
Super simple. Only a few things.
Base
- 1 cup fresh orange juice (or bottled)
- ¼ cup lemon juice (adds brightness)
- ½–¾ cup sugar (adjust to taste)
- 3 tablespoons honey or corn syrup
Setting Agent
- 4 tablespoons unflavored gelatin powder (about 4 packets)
Optional
- Orange zest (extra flavor)
- Food coloring (brighter orange)
- Extra sugar for coating
That’s it. No complicated stuff.
## Tools You’ll Need
Nothing fancy.
Just:
- Small saucepan
- Whisk
- Silicone molds or small tray
- Measuring cups
- Refrigerator
If you don’t have molds, no worries.
You can pour into a flat pan and cut slices.
Super easy.
## Step 1 – Bloom the Gelatin
This step is VERY important.
In a bowl:
Pour orange juice.
Sprinkle gelatin on top.
Let sit 5 minutes.
Don’t stir yet.
It will thicken and absorb liquid.
This is called “blooming”.
It helps gelatin dissolve smoothly later.
Skipping this causes lumps.
We don’t want lumpy candy 😄
## Step 2 – Heat the Mixture
Pour the bloomed gelatin + juice into saucepan.
Add:
- Sugar
- Lemon juice
- Honey or syrup
Heat on LOW.
Do NOT boil.
Stir constantly.
After 3–5 minutes:
Gelatin melts completely.
Sugar dissolves.
Texture becomes smooth and glossy.
Smells like orange candy heaven 🍊
## Step 3 – Add Flavor Boosters
Now add:
- Orange zest (optional)
- Tiny drop food coloring if desired
Taste it.
Want sweeter?
Add sugar.
Want tangier?
Add lemon.
This is the fun part — adjust to your taste.
Homemade = total control.
## Step 4 – Pour into Molds
Carefully pour mixture into:
- Silicone candy molds
OR - Lightly greased small tray
If using tray:
Pour thin layer about 1–1.5 cm thick.
Tap gently to remove bubbles.
Looks shiny and pretty already.
## Step 5 – Chill to Set
Place in fridge.
Chill:
2–3 hours minimum
Until completely firm.
Don’t rush.
Fully set gummies have perfect chew.
Half-set = sticky mess.
Patience pays off here.
## Step 6 – Remove & Cut
If using molds:
Pop them out gently.
So satisfying.
If using tray:
Lift out and cut into:
Squares
Strips
Or half-moon shapes
Use small cookie cutter if you want fancy shapes.
Kids love fun shapes.
Adults too honestly 😂
## Step 7 – Coat with Sugar
Toss gummies in sugar.
This gives:
Classic look
Prevents sticking
Extra sweetness
That nostalgic candy texture
You can also use:
- Powdered sugar
- Citric sugar mix (sweet + sour)
- Or leave plain
Totally your choice.
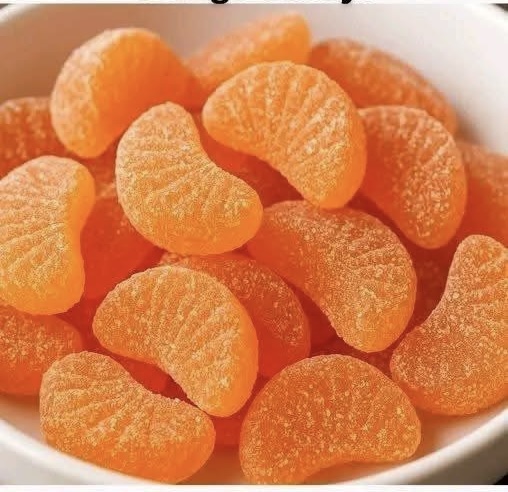
## Texture & Taste Breakdown
Let me describe the bite:
Outside → light sugar crunch
Inside → soft chewy jelly
Flavor → bright orange, sweet, slightly tangy
Not rubbery.
Not hard.
Perfect soft chew like store candy… but fresher.
Honestly addictive.
You’ll keep grabbing “just one more”.
## Flavor Variations You Can Try
Once you learn this base recipe, you can make ANY flavor.
Strawberry
Use strawberry juice or puree
Mango
Fresh mango juice
Lemon
Extra tangy lemon version
Mixed Fruit
Blend multiple juices
Cola
Cola + lemon gummies (fun!)
Sour Candy
Add citric acid coating
Same method. Endless flavors.
## Pro Candy-Making Tips
These little tricks make perfect gummies:
Tip 1
Never boil gelatin (ruins texture)
Tip 2
Use silicone molds (easier removal)
Tip 3
Chill fully before removing
Tip 4
Store with sugar coating
Tip 5
Use fresh juice for best flavor
Simple but powerful.
## Storage Tips
Room temp:
2–3 days airtight
Fridge:
Up to 2 weeks
Freezer:
Not recommended (texture changes)
Keep in sealed container so they don’t dry out.
They actually taste even better next day.
## When to Make These Gummies
Perfect for:
- Kids snacks
- Parties
- Gifts
- Lunchboxes
- Holidays
- Movie nights
- Candy cravings without chemicals
Way cheaper than store candy too.
And way more fun to make.
## Final Thoughts
Homemade orange gummies are one of those recipes that surprise you