Ingredients
Chicken
- 2 lbs chicken tenders (or sliced chicken breasts)
- 12–16 strips bacon (thin or regular cut)
- 2 tbsp olive oil
Dry Seasoning (flavor bomb mix)
- 1 tsp salt
- 1 tsp black pepper
- 1 tsp paprika
- 1 tsp smoked paprika
- 1 tsp garlic powder
- 1 tsp onion powder
- 1/2 tsp chili powder (optional heat)
- 1 tbsp brown sugar
Sticky Glaze (optional but AMAZING)
- 1/2 cup BBQ sauce
- 2 tbsp honey or maple syrup
- 1 tbsp Dijon mustard
- 1 tsp Worcestershire sauce
- 1 tsp apple cider vinegar
🔪 Step 1 – Prep the Chicken
Pat chicken dry with paper towels.
This step matters a lot:
Dry surface = better seasoning + crispier bacon.
If using chicken breasts, slice into strips about the size of tenders.
🧂 Step 2 – Season Generously
In a bowl mix all dry spices.
Drizzle olive oil over chicken.
Rub seasoning all over every piece.
Don’t be shy — bacon loves bold seasoning.
Let sit for 10–15 minutes (or 2 hours in fridge for deeper flavor).
🥓 Step 3 – Wrap the Bacon
Take 1 strip bacon and wrap tightly around each tender.
Slightly overlap edges.
If bacon is short, stretch gently — it will shrink while cooking anyway.
Optional: secure with toothpicks.
Place seam side down on baking tray.
Tip: Use a wire rack on top of tray so fat drips away → crispier bacon.
🔥 Step 4 – Bake
Preheat oven to 400°F (200°C)
Bake for:
25–30 minutes
Flip halfway through.
Then broil 3–5 minutes at the end for extra crispy bacon.
You want:
✔ Bacon dark golden
✔ Edges caramelized
✔ Chicken internal temp 165°F (74°C)
🍯 Step 5 – Make the Glaze
While baking, whisk together:
- BBQ sauce
- honey
- mustard
- Worcestershire
- vinegar
Simmer 2–3 minutes until slightly thick.
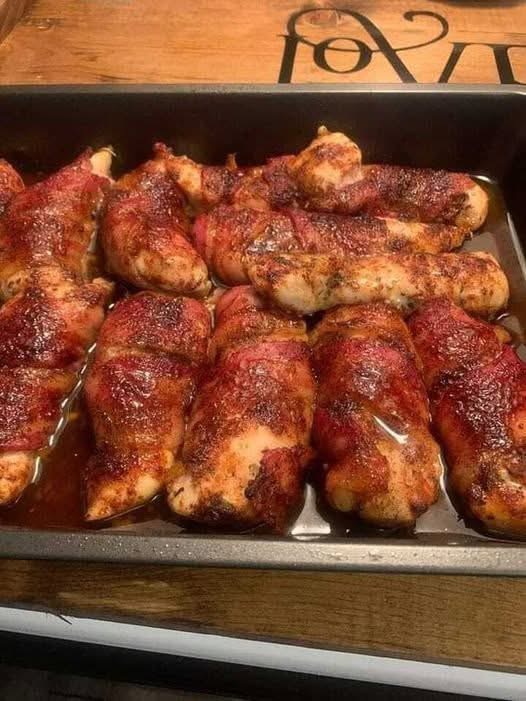
Brush over chicken during last 5 minutes of baking.
This creates that sticky glossy finish like in the photo 🤤
🍽️ Step 6 – Rest & Serve
Let rest 5 minutes.
This keeps juices inside instead of running out.
Serve hot.
Watch them disappear in seconds.
🔥 Flavor Profile
These bites are:
Crispy outside
Juicy inside
Sweet
Smoky
Salty
Sticky
Slightly spicy
Basically everything your brain loves in one bite.
💡 Pro Tips (Game Changers)
1. Use thin bacon for extra crisp
Thick bacon takes longer and can stay chewy.
2. Don’t overcrowd pan
Space = crisp
Crowded = soggy
3. Add brown sugar to seasoning
Creates caramelized crust.
4. Broil at the end
This is THE trick for crispy bacon.
5. Try air fryer
400°F for 14–16 minutes (flip once)
🧀 Flavor Variations
Want to level up? Try these:
Cheesy Stuffed
Add small strip of mozzarella inside before wrapping.
Spicy
Add cayenne or hot sauce to glaze.
Honey Garlic
Swap BBQ for honey garlic sauce.
Maple Bacon
Brush maple syrup + butter at end.
Ranch Style
Add ranch seasoning to spice mix.
🥗 What to Serve With
Perfect sides:
- Mashed potatoes
- Coleslaw
- Cornbread
- Roasted veggies
- Mac and cheese
- Rice
- Salad
- Fries
- Garlic bread
Or just eat straight from tray (no judgment 😂)
🥡 Storage
Fridge:
4 days airtight
Freezer:
2 months
Reheat:
Oven or air fryer only (microwave makes bacon soft)
🍗 Meal Prep Hack
Make big batch.
Slice into bite-size pieces.
Use for:
- wraps
- salads
- sandwiches
- pasta
- pizza topping
- rice bowls
Super versatile.
❤️ Why You’ll Love This Recipe
This is one of those “minimum effort, maximum reward” meals.
No complicated steps.
No rare ingredients.
Just classic comfort food that tastes like you ordered from a BBQ restaurant.