Ingredients
For the Chicken
- 1.5 lbs chicken tenders or chicken breast strips
- Salt
- Black pepper
- 1 tsp paprika
- 1 tsp garlic powder
- 1 tsp onion powder
For the Coating
- 2 cups crushed cornflakes (or panko or coconut flakes)
- 1/2 cup flour
- 2 eggs
- 2 tbsp milk
- 1/2 cup grated parmesan (optional)
- 2 tbsp olive oil or melted butter
Optional:
- Chili powder
- Italian seasoning
- Cayenne
- Ranch seasoning
Choose the Right Chicken
You can use:
- Chicken tenders (easiest)
- Chicken breasts cut into strips
- Boneless thighs for juicier option
Tenders cook evenly and stay juicy, so they’re ideal for beginners.
Pat chicken dry before coating — this helps everything stick better.
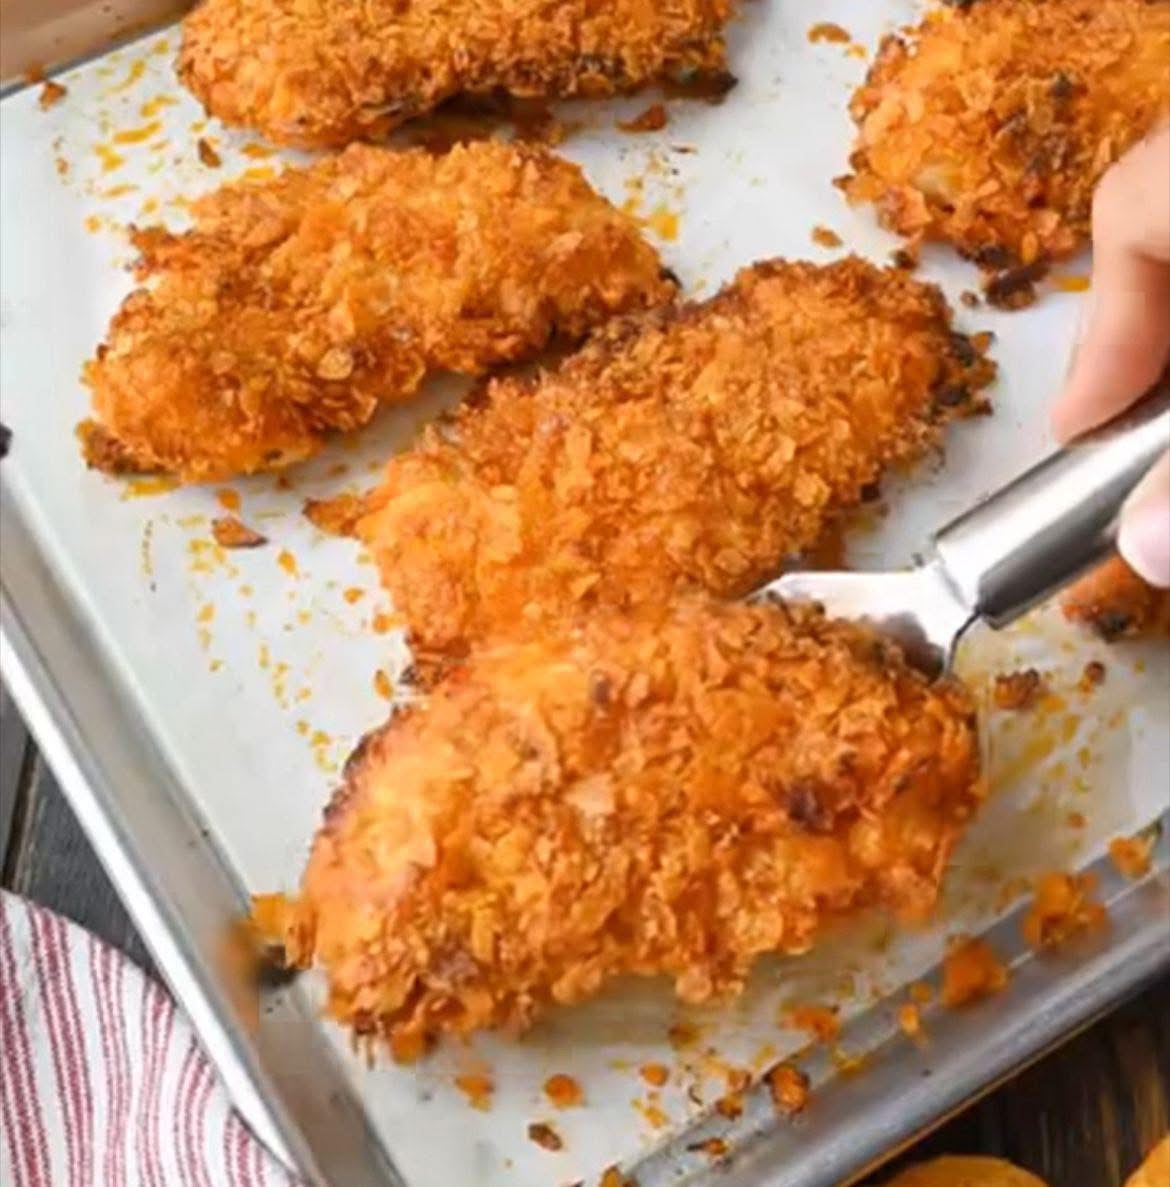
Crush the Cornflakes Properly
This is the secret to that huge crunch.
Place cornflakes in a zip bag and crush lightly with a rolling pin.
Don’t turn them into powder.
You want small flakes and chunks — these create that crispy, textured crust you see in the picture.
Too fine = less crunch
Chunky = mega crunch
Set Up the Breading Station
Make three bowls:
Bowl 1 – Flour mix
Flour + salt + pepper
Bowl 2 – Egg wash
Eggs + milk (whisked)
Bowl 3 – Crunch mix
Crushed cornflakes + parmesan + seasonings
This 3-step system gives maximum crispiness.
Season the Chicken First
Before coating, season the chicken strips directly with:
- Salt
- Pepper
- Paprika
- Garlic powder
Seasoning the meat itself makes a big flavor difference.
Not just the crust.
Bread the Chicken
Now coat like this:
- Dip in flour
- Dip in egg
- Press into cornflakes
Press firmly so flakes stick well.
Place on baking tray.
Repeat for all pieces.
Don’t rush — proper coating = crispier result.
Add Oil for Extra Crunch
This step changes everything.
Lightly drizzle or spray olive oil (or melted butter) over the coated chicken.
This helps the coating brown and crisp like fried chicken.
Without oil → pale
With oil → golden crunchy perfection
Small trick, huge difference.
Bake to Golden Perfection
Preheat oven to 400°F (200°C).
Line tray with parchment or rack.
Bake 18–25 minutes depending on thickness.
Flip halfway through for even browning.
They’re ready when:
- Deep golden color
- Internal temp 165°F
- Super crispy outside
You’ll hear the crunch when you tap them.
Music to your ears 😄
Texture Tips for Maximum Crunch
Use a rack
Air circulates → crispier bottom
Don’t overcrowd
Steam makes them soft
Flip halfway
Even browning
Spray oil
Extra crisp finish
Bake hot
Lower temp = soggy coating
High heat is key.
Flavor Variations
You can easily change flavors.
Spicy Version
Add cayenne + chili flakes
Parmesan Garlic
Extra parmesan + garlic powder
Ranch Style
Add ranch seasoning
Coconut Crunch
Use coconut flakes instead of cornflakes
BBQ Style
Brush with BBQ sauce at the end
Endless options.
Dipping Sauces Ideas
These chicken tenders love sauce.
Try:
- Honey mustard
- BBQ sauce
- Garlic mayo
- Ranch
- Sweet chili sauce
- Ketchup
- Buffalo sauce
Or mix sauces for fun combos.
What to Serve With
Make it a full meal with:
- French fries
- Coleslaw
- Mashed potatoes
- Salad
- Mac and cheese
- Rice
- Roasted veggies
Or slice into wraps and sandwiches.
Super versatile.
Storage Tips
Fridge: 3–4 days
Freezer: up to 2 months
Reheat in oven or air fryer to keep crispy.
Avoid microwave — it softens coating.
Common Mistakes to Avoid
Skipping oil
Less crispy
Crushing flakes too fine
No texture
Overcrowding tray
Steams instead of bakes
Low temperature
Soggy crust
Not flipping
Uneven browning
Follow the method and they turn out perfect every time.
Make-Ahead & Meal Prep
These are great for meal prep.
Bake, cool, store, then reheat in air fryer.
Still crispy like fresh.
Perfect for:
- Lunch boxes
- Kids meals
- Quick dinners
- Parties
Everyone loves them.
Final Thoughts
These ultra crispy oven-baked chicken tenders give you everything you want from fried chicken without the mess or heaviness. Big crunch, juicy inside, bold flavor — all from your oven.