Why You’ll Love This Recipe
This cake is a total winner because it’s:
- no oven needed
- super easy
- light and fresh
- not overly sweet
- full of real fruit
- beautiful layers
- make-ahead friendly
- perfect for beginners
Plus, it tastes even better the next day after chilling.
Honestly… it’s almost impossible to stop at one slice.
🧺 Ingredients You’ll Need
Base Layers
- 250–300 g tea biscuits, ladyfingers, or sponge cake slices
- 1/2 cup milk or fruit juice (for soaking)
Cream Filling
- 2 cups heavy whipping cream (cold)
- 1 cup mascarpone or cream cheese
- 1/2 cup powdered sugar
- 1 teaspoon vanilla extract
Fruit Layers
- 2 cups fresh raspberries
- 2 cups sliced peaches (fresh or canned, drained)
- extra raspberries for topping
Optional extras:
- strawberry slices
- blueberries
- lemon zest
- honey
- white chocolate shavings
- coconut flakes
🥄 Step 1 – Make the Cream Filling
This is the heart of the dessert — thick, fluffy, and cloud-like.
In a large bowl:
Whip cold heavy cream until soft peaks form.
In another bowl, mix:
- mascarpone (or cream cheese)
- powdered sugar
- vanilla
Beat until smooth.
Now gently fold the whipped cream into the mascarpone mixture.
Do this slowly so you keep it light and airy.
The texture should be thick, creamy, and spreadable.
Taste and adjust sweetness if needed.
Try not to eat it all with a spoon 😂
🍪 Step 2 – Prepare the Base
Your base can be:
- tea biscuits
- graham crackers
- ladyfingers
- sponge cake slices
Lightly dip each piece into milk or juice.
Don’t soak too long — just quick dip.
You want them soft but not soggy.
This helps create that soft cake-like texture after chilling.
🧁 Step 3 – First Layer Assembly
In a rectangular dish, start layering.
First:
Arrange soaked biscuits or cake in a single layer.
Then:
Spread a thick layer of cream mixture.
Then:
Add peaches and raspberries evenly.
Press fruit slightly into cream.
Already looking beautiful 😍
🔄 Step 4 – Repeat the Layers
Repeat:
- biscuits
- cream
- fruit
Keep layering until ingredients finish.
Usually 2–3 layers work perfectly.
Finish with cream on top.
Spread smooth with a spatula.
🍓 Step 5 – Decorate the Top
Now the fun part.
Cover the top with:
- fresh raspberries
- powdered sugar
- extra fruit
- or white chocolate
You can make it simple or fancy.
The bright red raspberries look stunning against the white cream.
Very bakery-style.
❄️ Step 6 – Chill & Set
Cover and refrigerate at least 4 hours.
Overnight is even better.
This step is important.
Chilling allows:
- biscuits to soften
- flavors to blend
- layers to hold shape
- cream to set
The texture becomes perfectly sliceable.
🔪 Step 7 – Slice & Serve
Use a sharp knife to cut clean squares.
Wipe the knife between cuts.
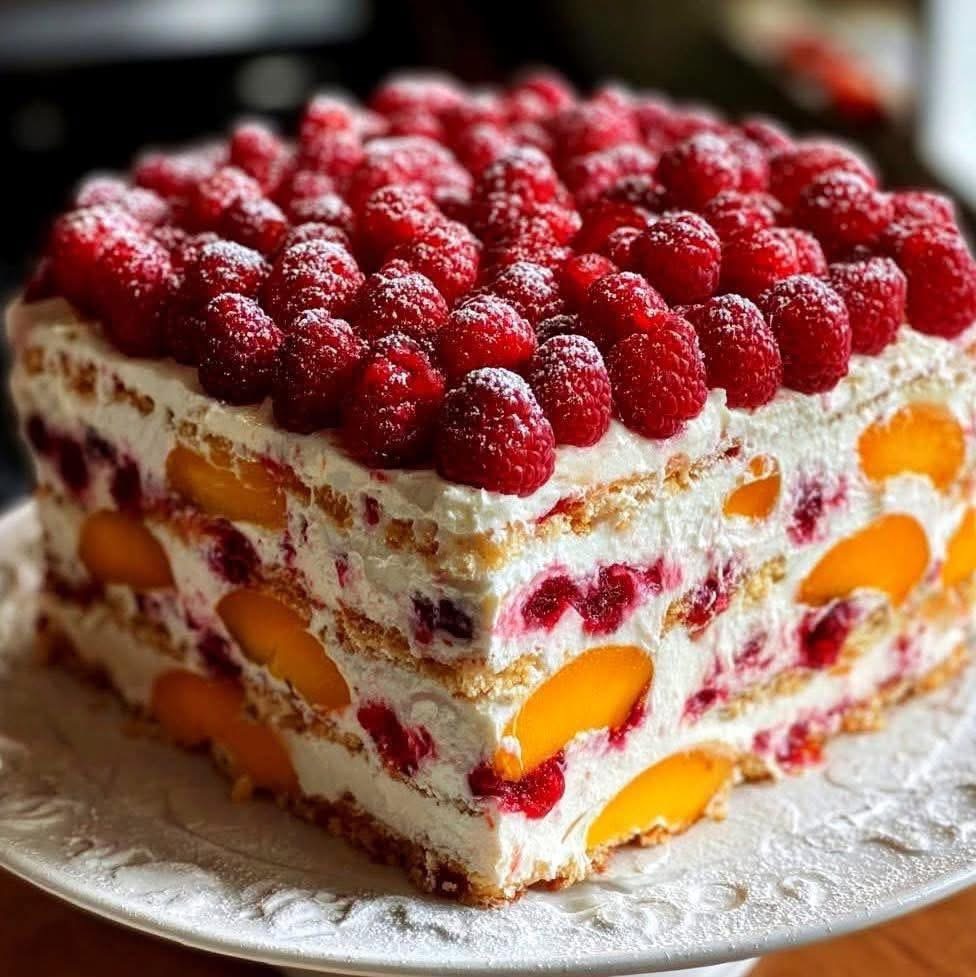
You’ll see those beautiful layers:
Cream
Fruit
Cake
Cream
Fruit
It looks incredible on the plate.
Serve cold for best taste.
😍 Texture & Flavor
This dessert is pure heaven:
Cream → light and fluffy
Fruit → juicy and fresh
Base → soft and cake-like
Top → slightly tangy raspberries
It’s sweet but balanced with fruit acidity.
Super refreshing and not heavy at all.
Perfect after a big meal.
🍽 Serving Ideas
Serve with:
- coffee
- tea
- iced drinks
- lemonade
- fruit coulis
- vanilla ice cream
Great for parties because it slices easily.
Kids and adults both love it.
🧠 Pro Tips for Best Results
Use cold cream
Whips better
Don’t over-soak biscuits
Prevents mushy texture
Chill overnight
Best structure
Use fresh fruit
Better flavor
Slice with hot knife
Cleaner cuts
🔄 Delicious Variations
Try fun twists:
Strawberry version
Swap peaches for strawberries
Tropical
Add mango + pineapple
Chocolate
Add cocoa to cream or chocolate drizzle
Lemon
Add lemon zest to cream
No dairy
Use coconut cream
Extra creamy
Add condensed milk
❄️ Storage Tips
Fridge:
Up to 3 days covered
Not freezer-friendly (cream texture changes)
Best eaten cold and fresh.
❤️ Final Thoughts
This raspberry peach cream cake is one of those desserts that looks impressive but is secretly super easy.
Light. Fresh. Creamy. Fruity.
It’s basically summer in cake form.
If you want a dessert that makes everyone say “WOW”… this is it.
Danger level: you will go back for seconds 😄🍑🍓