Why You’ll Love This Cake
This recipe checks every box.
It’s:
- Super moist
- Rich and creamy
- No complicated frosting
- Budget ingredients
- Easy for beginners
- Perfect make-ahead dessert
- Tastes better overnight
And honestly… it looks homemade in the best possible way.
Ingredients
For the Cake Base
- 3 cups all-purpose flour
- 1 cup sugar
- 1/2 cup oil or melted butter
- 3 eggs
- 1 cup milk
- 2 tsp baking powder
- 1 tsp vanilla
- Pinch salt
For the Caramel Coconut Cream
- 2 cups sweetened condensed milk
- 1 cup evaporated milk or cream
- 1 cup shredded coconut
- 3 tbsp butter
- 1/2 cup brown sugar
- 1 tsp vanilla
- Pinch salt
Optional Extras
- Toasted coconut
- Crushed biscuits
- Chopped nuts
- Caramel drizzle
Make the Soft Cake Layers
Start by preparing the cake base.
Preheat your oven to 180°C (350°F). Grease two round cake pans or one large pan.
In a bowl, whisk eggs and sugar until light and slightly fluffy. Add oil (or butter), milk, and vanilla. Mix well.
In another bowl, combine flour, baking powder, and salt.
Gradually add dry ingredients to wet ingredients, mixing gently until smooth. Don’t overmix or the cake will become dense.
Pour batter evenly into pans.
Bake for 25–30 minutes until golden and a toothpick comes out clean.
Let cool completely before assembling.
Prepare the Caramel Coconut Cream
This is the magic part of the cake.
In a saucepan over medium heat, melt butter and brown sugar together until bubbly and slightly caramelized.
Add condensed milk and evaporated milk. Stir continuously.
The mixture will slowly thicken.
Add shredded coconut and cook for 5–7 minutes until creamy and thick like pudding.
Finish with vanilla and a pinch of salt.
Let cool slightly — it should be thick but still spreadable.
This cream is rich, sweet, and full of coconut texture.
Assemble the Cake
Once everything is cooled, it’s time to build your layers.
Place the first cake layer on a plate.
Spread a thick layer of caramel coconut cream generously.
Add the second layer on top.
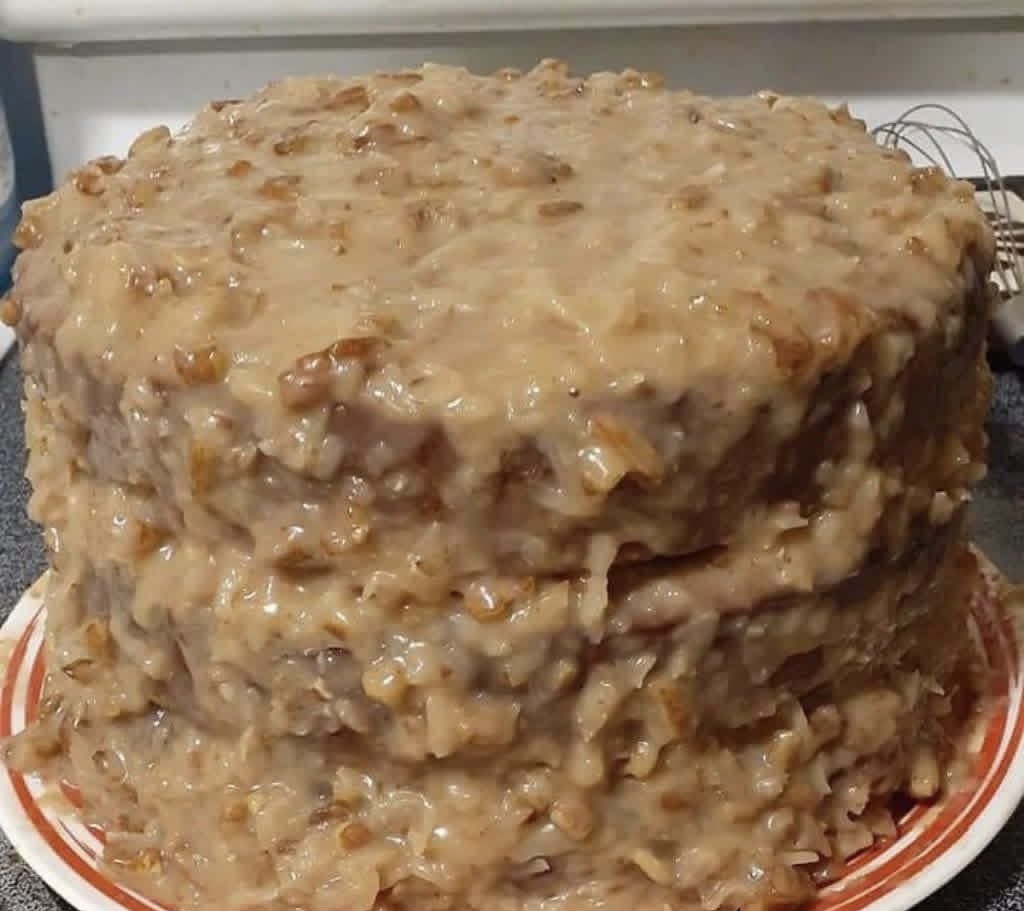
Cover the entire cake — top and sides — with the remaining cream.
Don’t worry about perfection. The rustic messy look is part of the charm.
The cream will slowly drip and coat the cake beautifully.
Chill for Best Texture
This step is important.
Refrigerate the cake for at least 2–3 hours, preferably overnight.
Why?
Because:
- Cream soaks into cake
- Layers become ultra moist
- Flavors blend perfectly
- Texture becomes soft and fudgy
Next day it tastes even better.
Texture Tips
For extra soft cake
Brush layers lightly with milk before adding cream.
For thicker cream
Cook caramel mixture longer.
For more coconut flavor
Toast coconut first.
For firmer cake slices
Chill longer before serving.
Flavor Variations
Want to customize? Try these ideas.
Chocolate Coconut
Add cocoa powder to cake batter.
Biscuit Layer Version
Replace cake with tea biscuits dipped in milk.
Nutty Crunch
Add walnuts or almonds.
Coffee Caramel
Add 1 tsp instant coffee to cream.
Extra Caramel
Drizzle caramel sauce on top.
Each version tastes unique but keeps the same creamy base.
Storage Tips
This cake stores very well.
Fridge: 4–5 days
Freezer: up to 2 months
Always keep covered so it doesn’t dry out.
Serve chilled or slightly room temp.
Serving Ideas
This cake pairs beautifully with:
- Coffee
- Tea
- Milk
- Hot chocolate
Slice thick pieces because it’s rich and satisfying.
Perfect for parties or family desserts.
Common Mistakes to Avoid
Overbaking cake
Makes it dry
Thin caramel cream
Cook longer to thicken
Assembling while hot
Cream will melt too much
Skipping chill time
Texture won’t set properly
Take your time and it turns out perfect.
Final Thoughts
This creamy caramel coconut layer cake proves you don’t need complicated baking skills to make something incredible. It’s simple, cozy, and full of homemade love.
The soft cake layers, thick caramel cream, and chewy coconut bits create the ultimate comfort dessert. It’s the type of cake that disappears fast because everyone goes back for “just one more slice.”