Ingredients You’ll Need
Serves 4–5 people.
Main
- 4–5 large bell peppers (any color)
- 500 g ground beef (or turkey/chicken)
- 1 small onion, diced
- 1 green pepper or jalapeño, diced
- 2 cloves garlic, minced
- Salt to taste
- Black pepper
- 1 teaspoon paprika
- 1 teaspoon garlic powder
- 1 teaspoon Worcestershire sauce
Sauce (optional but delicious)
- 1/4 cup ketchup
- 1 tablespoon mustard
- 1 tablespoon BBQ sauce
Cheese Topping
- 1 ½–2 cups shredded cheddar or mozzarella
OR - cheese slices for classic burger look
Garnish
- Pickles
- Parsley
- Extra sauce for dipping
Simple ingredients → huge flavor.
Why This Recipe Works
This dish hits all the cheeseburger flavors:
Ground beef → juicy protein
Onions/peppers → sweetness & crunch
Cheese → gooey richness
Sauce → classic burger taste
Bell pepper → replaces bun
So you get burger flavor but with:
Less carbs
More veggies
More filling
More cheese per bite 😄
Total win.
Preparing the Peppers
Cut peppers in half lengthwise.
Remove seeds and membranes.
Lightly brush with oil.
Place on baking tray.
Bake at 180°C (350°F) for 10 minutes.
This softens them slightly.
Pre-baking prevents crunchy raw peppers.
You want tender but still firm.
Cooking the Beef Filling
Heat pan with little oil.
Add:
- Onion
- Garlic
- Peppers/jalapeños
Cook until soft.
Then add ground beef.
Break into small pieces.
Cook until browned.
Drain excess fat if needed.
Now add:
- Salt
- Pepper
- Paprika
- Garlic powder
- Worcestershire sauce
This seasoning gives classic burger flavor.
Smells exactly like a burger joint 😍
Adding the Sauce
Mix ketchup + mustard + BBQ.
Stir into beef mixture.
This adds:
Sweetness
Tang
Moisture
Totally optional but highly recommended.
It makes it taste 100% like cheeseburger filling.
Stuffing the Peppers
Take pre-baked peppers.
Fill each with generous beef mixture.
Pack tightly.
Don’t be shy.
More filling = better.
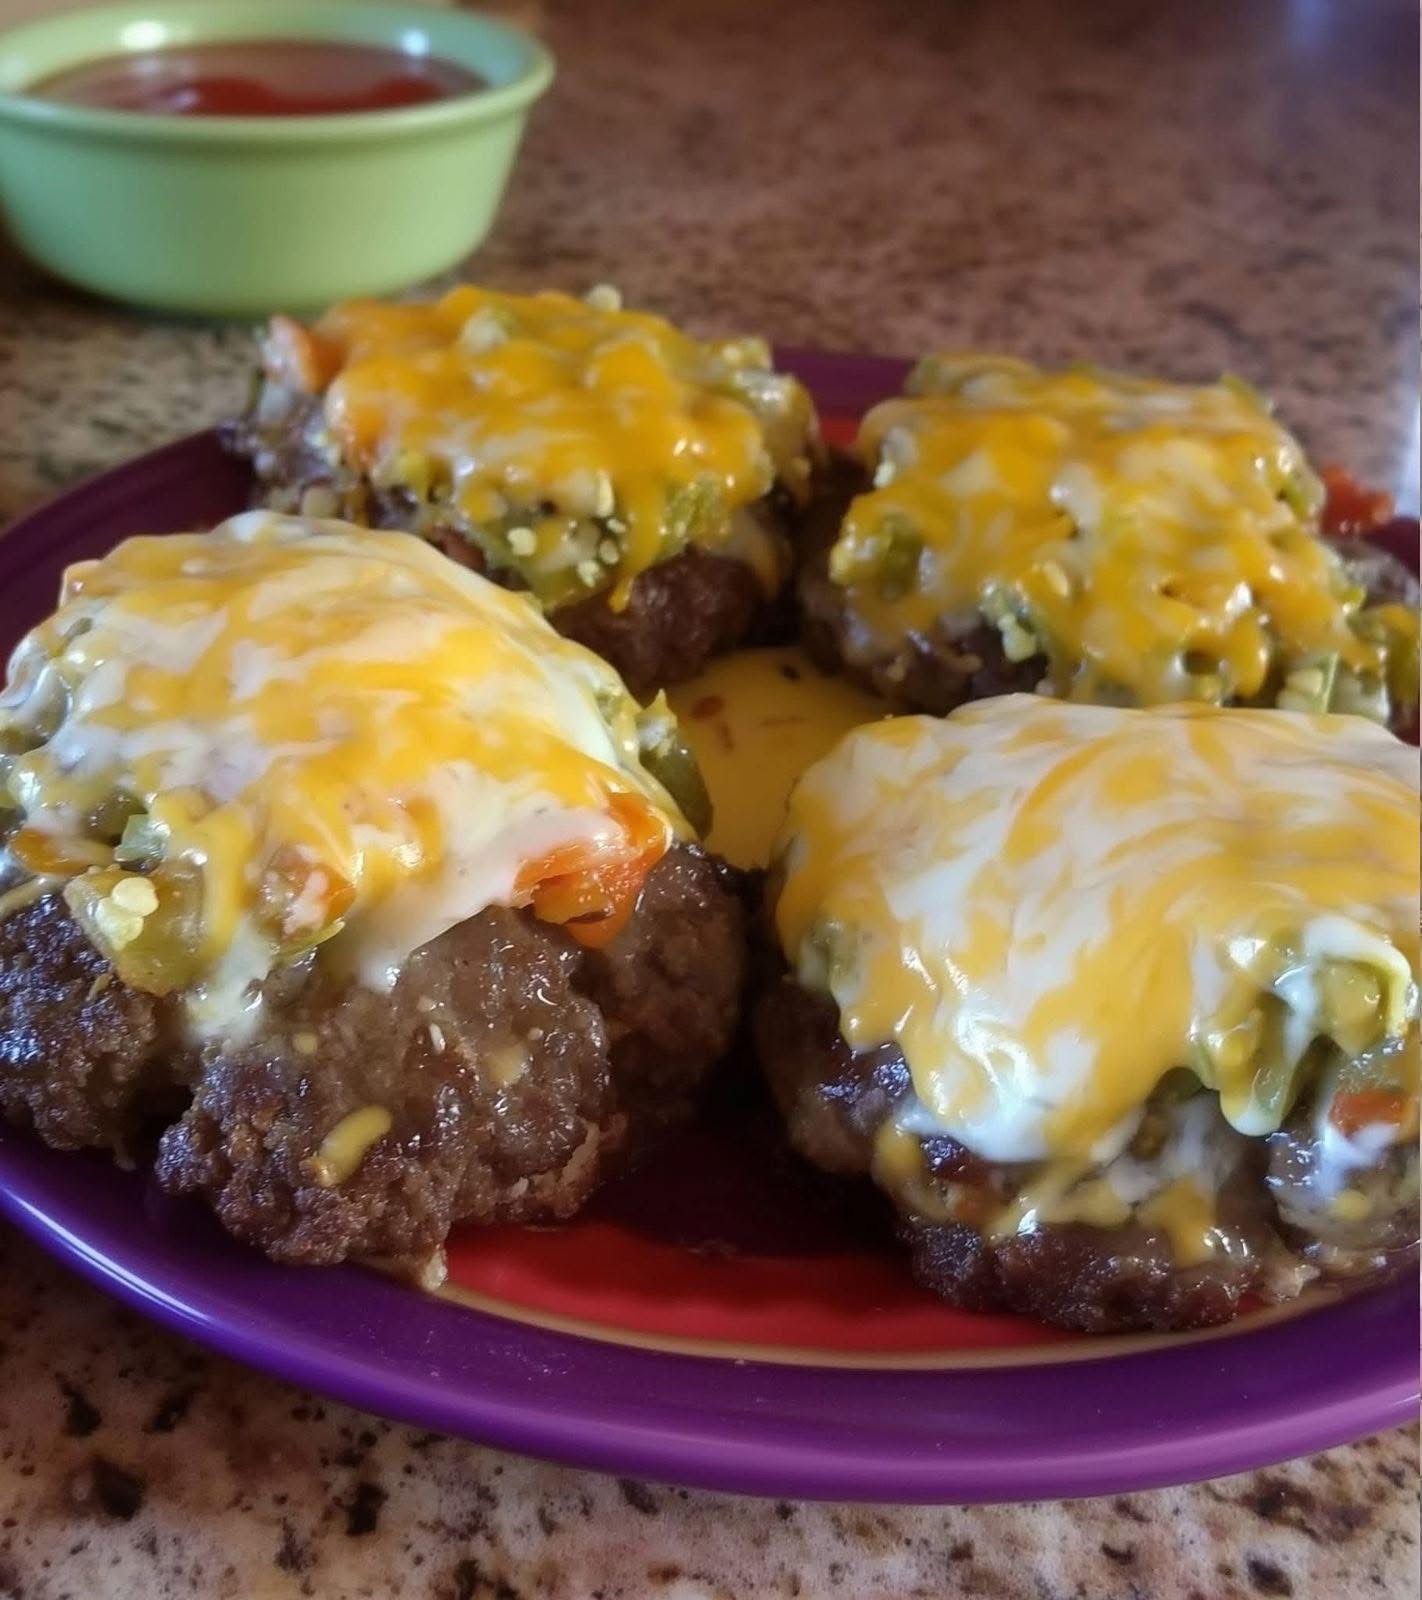
Top with lots of shredded cheese or cheese slices.
Cover completely.
Because cheese is the star.
Baking to Cheesy Perfection
Return to oven.
Bake 10–15 minutes until cheese melts.
Then broil 2–3 minutes for golden top.
Look for:
Bubbling cheese
Slight browning
Juicy filling
This is when it becomes irresistible 🤤
Rest Before Serving
Let rest 5 minutes.
Cheese sets slightly.
Juices settle.
Makes serving easier.
Plus less mouth burning 😂
Texture and Taste
Every bite gives you:
Top:
Stretchy melted cheese
Middle:
Savory juicy beef
Bottom:
Tender roasted pepper
Flavor:
Cheesy, beefy, slightly smoky, tangy
Literally tastes like cheeseburger without bun.
So satisfying.
Serving Ideas
Serve with:
- Fries
- Potato wedges
- Rice
- Salad
- Coleslaw
- Pickles
- Garlic bread
Or eat alone for low-carb meal.
Also great for meal prep bowls.
Flavor Variations
Want to customize? Try:
Bacon cheeseburger
Add crispy bacon
Mushroom Swiss
Add mushrooms + Swiss cheese
Mexican style
Add taco seasoning + salsa
Spicy
Add jalapeños + hot sauce
Pizza style
Add pizza sauce + mozzarella
BBQ burger
Extra BBQ sauce + onions
Same base recipe, endless fun.
Storage Tips
Fridge:
Up to 4 days
Freezer:
Up to 2 months
Reheat:
Oven or microwave
Still tastes amazing next day.
Great meal prep option.
Common Mistakes to Avoid
Overbaking peppers
Too soft/mushy
Underseasoning beef
Bland filling
Too little cheese
Less gooeyness
Skipping pre-bake
Peppers stay crunchy
Too much sauce
Watery filling
Balance is key.
Why This Recipe Works
Here’s the simple science:
Roasted peppers → sweetness
Beef → umami flavor
Cheese → richness
Sauce → burger taste
All combined → cheeseburger comfort in every bite.
Easy technique, big reward.
Final Thoughts
These loaded cheeseburger stuffed peppers are one of those meals that feel indulgent but are actually simple and wholesome. They’re cheesy, juicy, and packed with flavor — everything you want in comfort food without the heaviness of buns.