Why These Truffles Are So Addictive
What makes these truffles special is the balance:
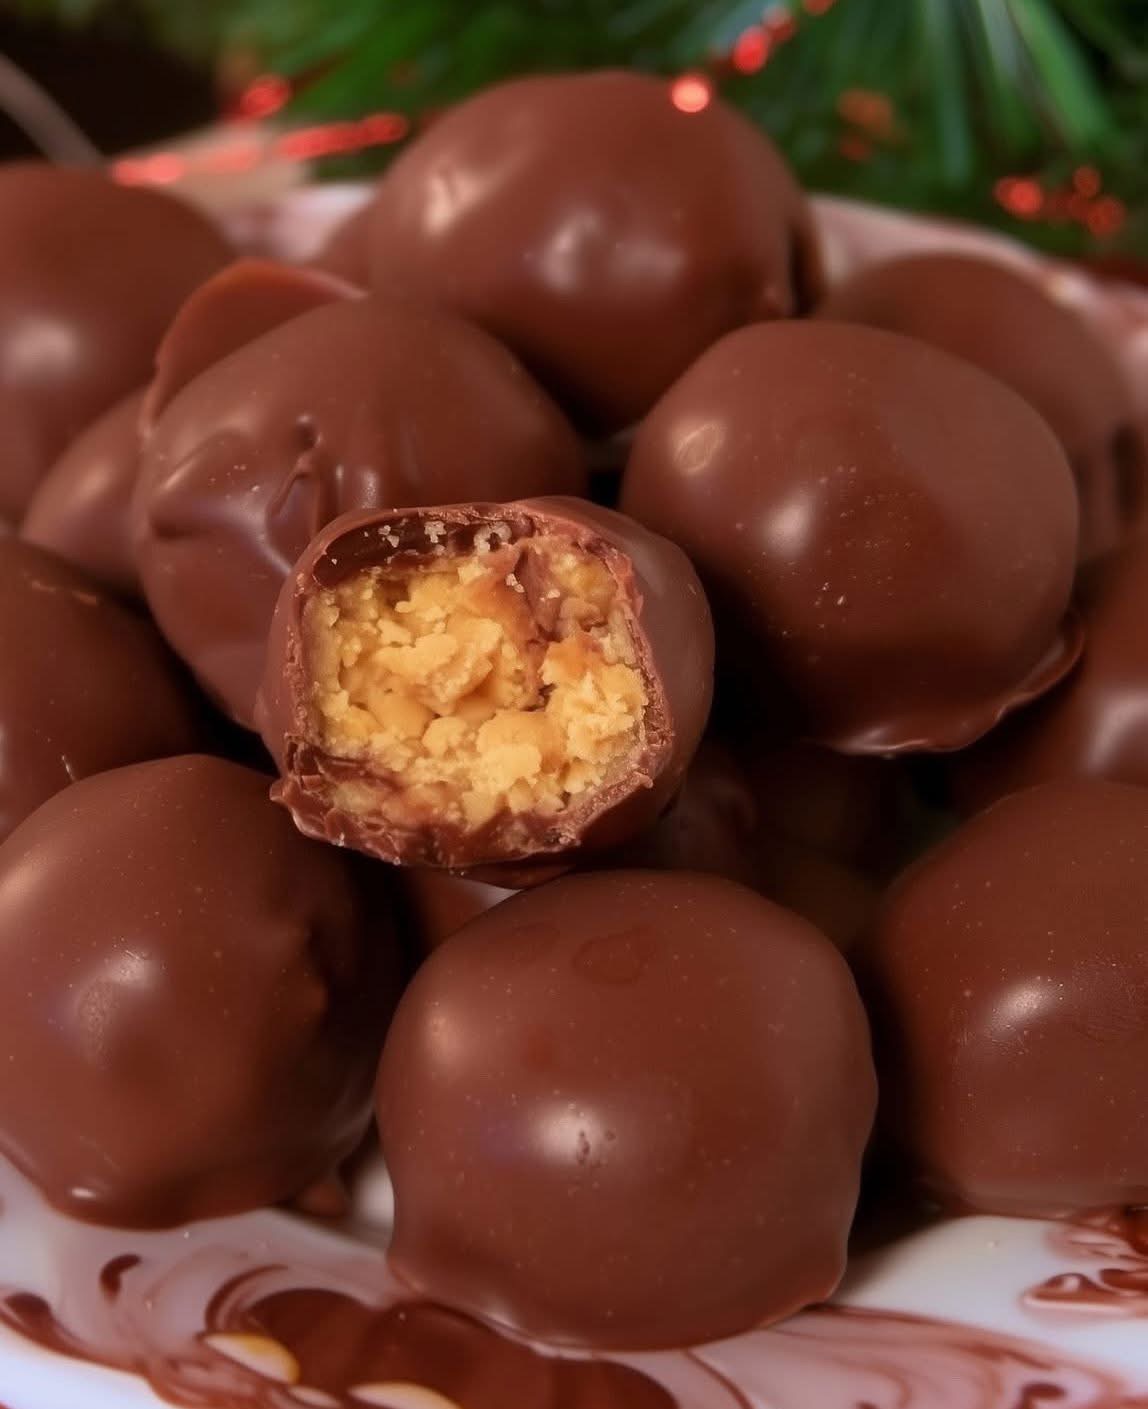
- A soft, creamy peanut butter center
- A smooth chocolate coating that snaps gently when bitten
- Just the right level of sweetness
- No baking required
They are rich without being heavy, and one bite is enough to satisfy a chocolate craving—although stopping at one is very difficult.
Understanding the Texture
The inside of these truffles is not hard or crumbly. It’s:
- Smooth
- Slightly fudgy
- Creamy but stable
The secret is the correct ratio of peanut butter to powdered sugar and fat. The chocolate shell seals everything in, creating a perfect contrast between soft and firm.
Ingredients List
For the Peanut Butter Filling
- 1½ cups creamy peanut butter
- ½ cup unsalted butter, softened
- 1 teaspoon vanilla extract
- 2 cups powdered sugar
- ¼ teaspoon salt
For the Chocolate Coating
- 3 cups milk chocolate or dark chocolate (chopped or chips)
- 1 tablespoon coconut oil or neutral oil (optional, for shine)
Choosing the Right Ingredients
Peanut Butter
Use creamy peanut butter, not natural or oily varieties. The consistency must be smooth and stable. Natural peanut butter tends to separate and can make the filling too soft.
Chocolate
You can use:
- Milk chocolate for a sweeter truffle
- Dark chocolate (50–70%) for a richer, less sweet result
Avoid compound chocolate if possible, but it can be used if tempering is not an option.
Step 1: Making the Peanut Butter Filling
In a large mixing bowl, add the softened butter and peanut butter. Mix until completely smooth and creamy. This step is important—any lumps here will affect the final texture.
Add the vanilla extract and salt. Mix again until fully incorporated.
Gradually add the powdered sugar, about ½ cup at a time, mixing well after each addition. The mixture will slowly thicken.
The final texture should be:
- Soft
- Moldable
- Not sticky
If it feels too soft, add a little more powdered sugar. If too firm, add 1 teaspoon of milk or cream.
Step 2: Shaping the Truffles
Line a baking tray with parchment paper.
Using a small scoop or spoon, portion the mixture into equal-sized balls (about 1 tablespoon each). Roll gently between your palms to create smooth balls.
Place them on the tray, leaving space between each one.
Once all truffles are shaped, place the tray in the refrigerator for 30–45 minutes or in the freezer for 15 minutes. This step firms them up and makes dipping easier.
Step 3: Preparing the Chocolate Coating
Place the chocolate in a heatproof bowl. Add coconut oil if using.
Melt the chocolate using one of these methods:
Microwave Method
- Heat in 30-second intervals
- Stir between each interval
- Stop once fully melted and smooth
Double Boiler Method
- Place the bowl over simmering water
- Stir gently until melted
- Do not let water touch the chocolate
The chocolate should be smooth, glossy, and fluid.
Step 4: Coating the Truffles
Remove the chilled truffles from the refrigerator.
Drop one truffle at a time into the melted chocolate. Use a fork or dipping tool to coat it completely.
Lift it out, tap gently to remove excess chocolate, and place it back onto the parchment paper.
Repeat with all truffles.
Work quickly—cold centers help the chocolate set faster.
Step 5: Setting the Chocolate
Let the truffles sit at room temperature for about 20–30 minutes, or place them in the refrigerator for 10–15 minutes until the chocolate is fully set.
Once set, the chocolate shell should be firm with a smooth finish.
Optional Finishing Touches
Before the chocolate fully sets, you can:
- Sprinkle with flaky sea salt
- Drizzle with white or dark chocolate
- Dust lightly with cocoa powder
These touches add elegance and visual appeal.
Texture and Flavor Notes
When bitten, the chocolate shell breaks cleanly, revealing a soft, creamy peanut butter center that melts on the tongue. The salt enhances the peanut flavor and balances the sweetness of the chocolate.
The result is rich, smooth, and deeply satisfying.
Storage Instructions
Store the truffles in an airtight container:
- In the refrigerator for up to 2 weeks
- In the freezer for up to 2 months
If frozen, let them sit at room temperature for 10 minutes before serving.
Serving Suggestions
These truffles are perfect for:
- Holiday dessert platters
- Gift boxes
- Coffee or tea pairing
- After-dinner treats
Serve slightly chilled or at room temperature depending on preference.
Flavor Variations
Crunchy Peanut Butter Truffles
Use crunchy peanut butter or mix in chopped peanuts.
Dark Chocolate Lovers
Use 70% dark chocolate for a bold, intense flavor.
Chocolate Peanut Butter Cups Style
Press the filling into mini molds and coat with chocolate.
Honey Peanut Butter Version
Replace ¼ cup powdered sugar with honey for a softer, richer center.
Common Mistakes to Avoid
- Using natural peanut butter (too oily)
- Skipping the chilling step
- Overheating chocolate
- Adding liquid to melted chocolate
- Making the filling too soft
Each of these can affect texture and appearance.
Nutritional Notes
These truffles are rich and calorie-dense, but very satisfying in small portions. Peanut butter provides protein and healthy fats, while chocolate adds antioxidants, especially in darker varieties.
Why This Recipe Works
This recipe balances fat, sugar, and temperature. The chilled filling ensures clean dipping, while the chocolate coating seals in flavor and texture. No baking means minimal risk, making this recipe reliable even for beginners.
Final Thoughts
Chocolate peanut butter truffles are a timeless classic for a reason. They’re simple, elegant, and incredibly delicious. With a creamy center and smooth chocolate shell, they feel luxurious without requiring complicated techniques or equipment.