Ingredients
Cream Cheese Base
- 500 g cream cheese (room temperature)
- 1 cup heavy cream (or full-fat liquid cream)
- ¾ cup granulated sugar
- 3 large eggs (room temperature)
- 1 teaspoon vanilla extract
- 2 tablespoons flour (or cornstarch for gluten-free)
- Pinch of salt
Optional Add-Ins
- Lemon zest for brightness
- caramel drizzle for serving
- powdered sugar for dusting
- seasonal fruit
Step-by-Step Instructions
1. Preheat and Prep
Preheat your oven to 200°C / 400°F.
Line a loaf pan with parchment paper, allowing some to hang over the edges—this helps lift the cheesecake out later.
2. Beat the Cream Cheese
Use a whisk, hand mixer, or stand mixer to beat the cream cheese until smooth, creamy, and lump-free.
Room temperature cheese is key—it blends easily and creates a silky texture.
3. Add Sugar and Mix
Pour in the granulated sugar and continue beating until fully incorporated.
The mixture should feel lighter and slightly fluffy.
4. Add Eggs One at a Time
Add eggs one by one, mixing after each addition so your batter stays smooth and glossy.
Scrape down the sides to ensure no streaks are left behind.
5. Pour in the Cream and Flavor
Add the heavy cream, vanilla, and salt.
Whisk until smooth and shiny.
If using lemon zest, add it now.
6. Add Flour
Sprinkle flour (or cornstarch) over the batter and stir gently to combine.
This tiny bit of starch gives the cheesecake structure while keeping it melt-in-your-mouth soft.
7. Pour, Bake, and Let Magic Happen
Pour batter into the lined loaf pan.
Bake 40–50 minutes depending on your oven.
Signs it’s ready:
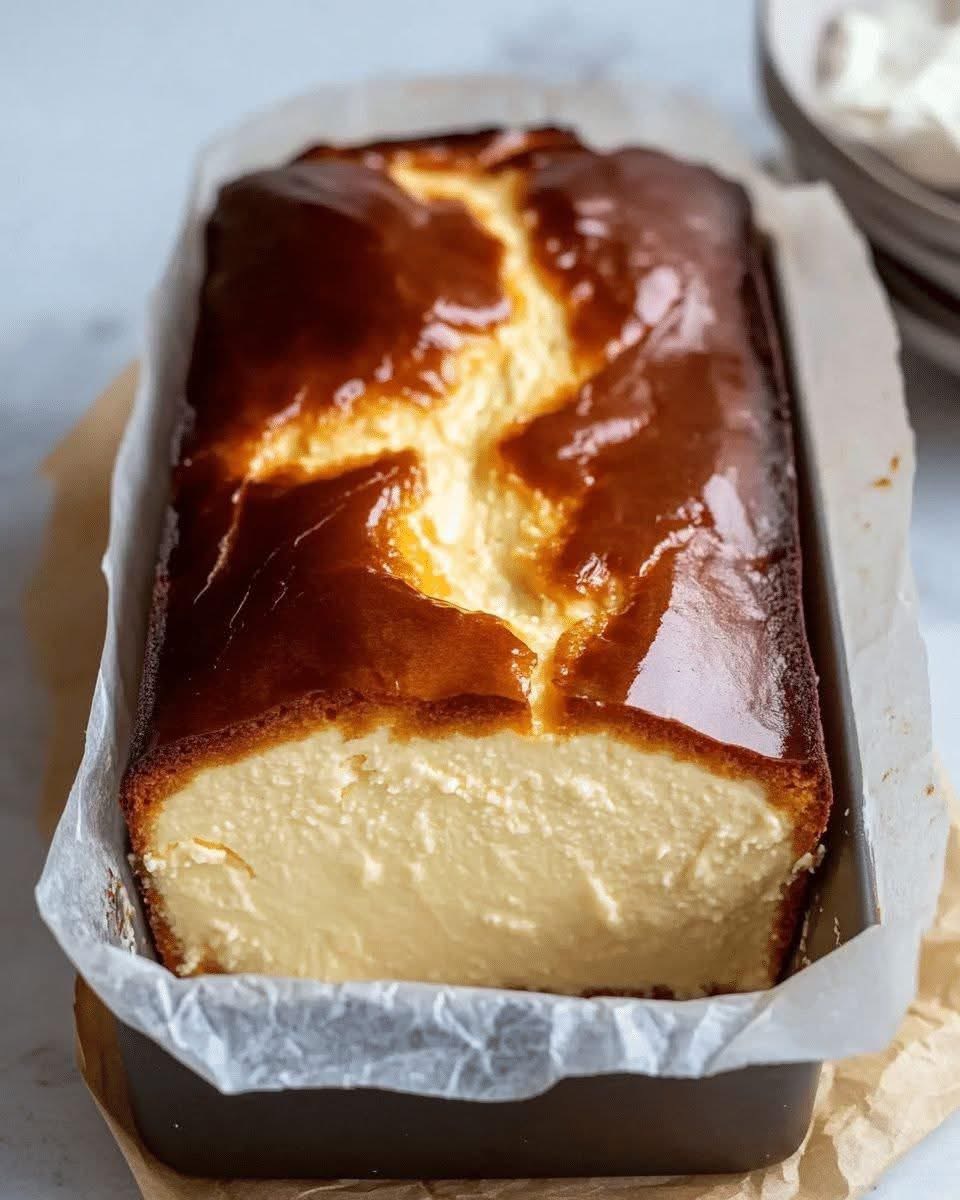
- The top is deeply golden or caramel-brown
- The middle still jiggles slightly
- A dramatic crack forms on top (beautiful!)
8. Cool and Chill
Let the cheesecake cool completely in the pan.
It will sink slightly—that’s normal and part of its charm.
For best texture, refrigerate at least 4 hours, preferably overnight.
Cold resting makes it set into that custard-like slice you see in your photo.
Serving Suggestions
This creamy burnt cheesecake loaf is stunning all by itself, but you can serve it with:
- whipped cream
- fruit compote (berries, mango, cherries)
- honey drizzle
- chocolate ganache
- espresso shot on the side
For extra indulgence, brûlée the top with a kitchen torch for caramel crackle.
Tips for Success
Use Room Temperature Ingredients
Cold eggs or cream can make the batter lumpy.
Take ingredients out 30 minutes before baking.
Don’t Overmix After Flour
Too much stirring makes the texture dense.
Mix just until combined.
Let It Jiggle
It may look underdone when you remove it, but it sets as it cools.
Choose the Right Pan
This loaf format is perfect for slicing, storing, and serving neatly.
Why This Cheesecake Works Every Time
High Heat Baking
Creates caramel color + cracked crown.
Simple Ingredients, Big Flavor
No crust, no water bath, no stress.
Natural Creaminess
Cream cheese + heavy cream = velvet texture.
Flexibility
Serve chilled for firmness or slightly warm for spoonable lava consistency.
This cheesecake is forgiving, beginner-friendly, and dramatic enough for celebrations.
Variations You’ll Love
Chocolate Burnt Cheesecake
Add melted dark chocolate to the batter.
Matcha Version
Stir in 2 tablespoons matcha powder.
Salted Caramel Swirl
Pour caramel ribbons through the batter before baking.
Citrus Burst
Lime or orange zest transforms the flavor.
Sugar-Free
Use erythritol instead of sugar for a keto-friendly twist.
Storage
Refrigerate
Store in an airtight container for up to 5 days.
Freeze
Wrap slices tightly and freeze for 2 months.
Thaw overnight for perfect texture.
Conclusion
If you’ve been searching for a dessert that blends elegance, simplicity, and pure satisfaction, this burnt cheesecake loaf is calling your name. The creamy center, crackled top, and custard-like slices make every bite luxurious yet comforting.
Serve it chilled, share it with someone special, or enjoy a slice with your morning coffee—you deserve it.
With a little heat, a few pantry staples, and a loaf pan, you can create a show-stopping dessert that tastes even better than it looks.