Ingredients You Need
Basic Bread Dough
- 4 cups all-purpose flour (or bread flour)
- 1 tablespoon sugar
- 1 and ½ teaspoons salt
- 1 tablespoon active dry yeast
- 2 cups lukewarm water
Optional Add-ins
- 1 tablespoon olive oil (adds softness)
- Sesame or poppy seeds (for topping)
- Herbs: thyme, oregano, rosemary for flavor
With just these basics, you can make incredible bread with minimal effort.
🥣 Making the Dough Step by Step
Activate the Yeast
Start by stirring sugar into lukewarm water. Add the yeast and let it sit for 5–10 minutes. You’ll know it’s ready when it becomes foamy. This step ensures your bread rises beautifully.
Mix the Dough
In a large bowl, combine flour and salt. Gradually pour in the yeast mixture while mixing with a wooden spoon or your hands. The dough will look sticky — that’s exactly what you want! Sticky dough means moisture, which translates to airy bread.
Rest & Rise
Cover the bowl with plastic wrap or a clean cloth and allow the dough to rise for 1–2 hours. Place it somewhere warm.
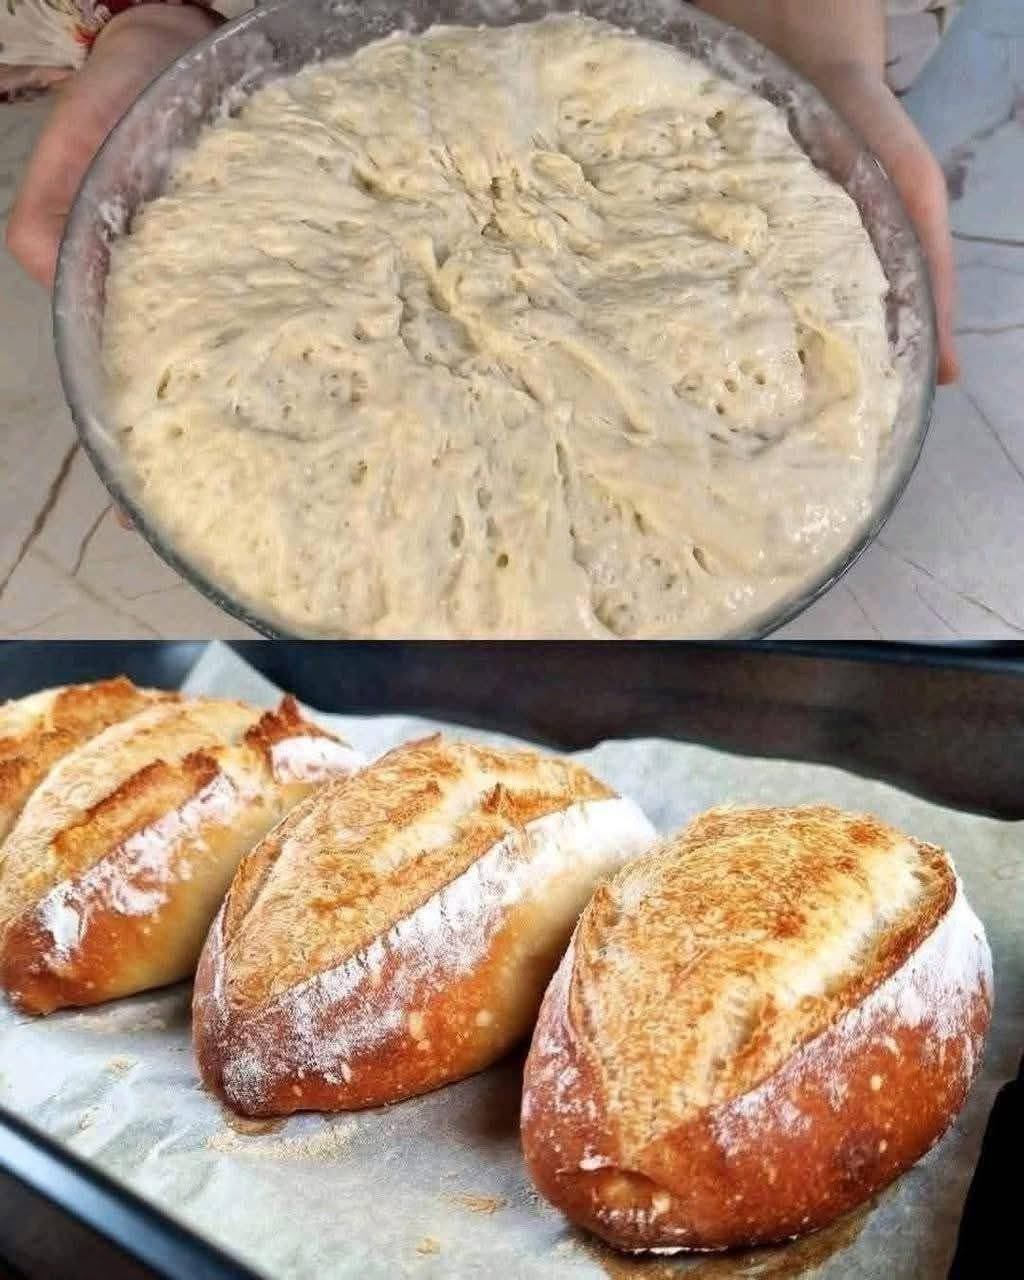
As seen in the first picture, the dough should double in size and develop small bubbles — a sign that the yeast is alive and creating air pockets.
🔁 Folding and Developing Structure
This bread requires no heavy kneading. Instead, use gentle folding.
How to Fold
Dust your hands lightly with flour. Reach under the dough and fold one edge toward the center. Rotate the bowl and repeat 8–10 times. This strengthens gluten without exhausting effort.
Let the dough rest again for 15–20 minutes.
Folding helps trap air and creates a better crumb (the texture inside the bread).
🪵 Shaping Your Loaves
Once the dough is ready, sprinkle flour generously on a countertop.
Divide and Shape
Turn out the dough carefully — do not punch it down. Divide into 4 equal pieces using a scraper or knife.
Gently shape each piece into a smooth oval or round loaf. Do not overwork the dough; you want to preserve the air bubbles inside.
Place each shaped loaf on a parchment-lined baking sheet.
🔪 Score the Bread
Using a sharp blade or razor, make shallow slashes on the tops of the loaves.
This:
✔ Controls expansion
✔ Creates that beautiful crusty pattern
✔ Helps prevent cracking
Dust lightly with flour for a rustic bakery finish.
🔥 Baking for Perfect Crust
Preheat Your Oven
Heat your oven to 230°C (450°F).
For an extra crispy crust, place a small tray of hot water on the bottom rack — this creates steam, just like professional bakeries.
Bake
Bake the loaves for 22–28 minutes, depending on desired color.
You’ll know they’re done when:
- The color is deep golden and caramelized
- The bottom sounds hollow when tapped
- The crust feels firm
Allow the bread to cool slightly before slicing — this helps set the crumb.
😍 The Result
As in your second picture, the bread emerges:
✔ Puffy
✔ Golden brown
✔ Crisp on top
✔ Soft and airy inside
✔ Slightly chewy with beautiful texture
Every loaf feels artisanal, even though the process is simple.
🍽️ Serving Ideas
Homemade bread is irresistible on its own, but here are delicious ways to enjoy it:
- Warm with salted butter
- Dipped in olive oil and herbs
- Served with soups and stews
- Toasted and topped with eggs
- Used for sandwiches
- Spread with jam, cream cheese, or honey
❄️ Storage Tips
- Keep in a bread bag or wrap lightly in cloth
- Best eaten within 2–3 days
- Freeze leftovers up to 3 months
- To refresh stale bread, reheat in oven for 5 minutes
💡 Helpful Baker’s Tips
Use Warm — Not Hot — Water
Hot water kills yeast. Aim for skin-temperature warmth.
Don’t Overflour
Sticky dough leads to soft bread. Resist adding too much flour.
Add Steam
Steam equals shatteringly crisp crust.
Try Different Flours
Bread flour gives more chew
Whole wheat adds depth
Mix flours for fun textures
🏁 Final Thoughts
Making bread at home is more than a recipe — it’s a satisfying ritual. Watching dough rise, shaping loaves with your hands, and inhaling the scent of baking bread brings comfort and joy to any kitchen. And when you pull golden loaves from the oven, you’ll feel proud knowing you created them from simple ingredients