Ingredients You’ll Need
You only need a handful of pantry staples:
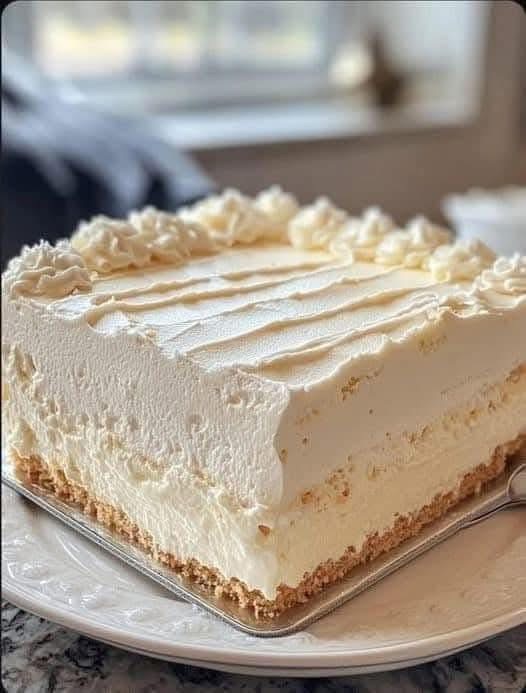
Crust Layer
- 300g digestive biscuits or graham crackers
- ½ cup melted butter
Cream Filling
- 500 ml heavy whipping cream (very cold)
- 250 g cream cheese (softened)
- 1 can sweetened condensed milk (397g)
- 2 tsp vanilla extract
- Pinch of salt
Optional Enhancements
- Lemon zest for brightness
- ½ cup powdered sugar if you prefer sweeter cream
- Whipped topping for decoration
- White chocolate curls
With such simple ingredients, the flavor depends on good quality cream and pure vanilla.
🍪 Preparing the Cookie Crust
This toasted cookie layer creates the perfect base for the cream.
Step 1 — Crush the Cookies
Place digestive biscuits or graham crackers in a food processor and pulse until finely crushed.
No processor? Place them in a sealed bag and crush manually using a rolling pin.
Step 2 — Mix with Butter
Transfer the crumbs to a bowl and mix in the melted butter. Stir until everything is evenly moistened.
Step 3 — Build the Base
Press this mixture firmly into the bottom of a rectangular or square baking dish lined with parchment.
Use a flat glass to compact the crumbs tightly — a firm base gives clean slices later.
Place the dish in the fridge for at least 15 minutes while you prepare the cream layer.
🍨 Making the Fluffy Vanilla Cream
This is where all the magic happens — light, airy, creamy, and silky smooth.
Step 4 — Whip the Cream
In a cold mixing bowl, whip the heavy cream until stiff peaks form.
Tip: Chill your mixing bowl and beaters for 10 minutes first — it helps achieve maximum volume.
Step 5 — Create the Sweet Cheese Mix
In another bowl, beat the softened cream cheese until smooth and creamy.
Add the condensed milk, vanilla extract, and pinch of salt.
Mix on medium speed until perfectly silky with no lumps remaining.
Step 6 — Combine the Two
Using a spatula, gently fold the whipped cream into the cream cheese mixture.
Fold until uniform, fluffy, and airy — avoid vigorous mixing so you don’t deflate the cream.
The result should look like pillowy clouds of sweet vanilla filling.
🎂 Assembling the Layers
Step 7 — Spread the Cream
Pour the whipped filling onto the chilled cookie crust. Smooth the surface using a spatula.
Step 8 — Chill to Set
Place the dish in the refrigerator for at least 4 hours, preferably overnight.
Icebox cakes improve as they rest — the cream firms up and flavors deepen.
If you’re short on time, freeze for 45–60 minutes, but fridge chilling gives the creamiest texture.
🌸 Decorating Your Icebox Cake
Presentation is part of the magic, especially when serving guests.
Step 9 — Add Final Touches
Right before serving, decorate the top with:
- Swirls of whipped cream
- Star-shaped piping
- Dusting of powdered sugar
- White chocolate curls
- Crushed cookies
- Fresh berries for variation
Since the cake is pale and elegant, even the simplest decorations stand out beautifully.
🍽️ How to Serve and Store
Serve the cake cold using a sharp knife dipped in hot water — this helps cut smooth slices.
Because it’s rich and creamy, small portions satisfy quickly, making it perfect for sharing.
Storage Tips
- Keeps in the fridge for 3–4 days
- Can be frozen up to 2 months
- Store tightly covered to protect texture and flavor
Frozen slices taste like vanilla ice cream cheesecake — a two-in-one dessert!
🌟 Recipe Variations You’ll Love
This icebox cake is a blank canvas — customize it endlessly.
Chocolate Lovers
Add cocoa powder or melted chocolate to half your cream mixture for layered swirls.
Oreo Dream
Replace graham crackers with crushed Oreos, filling included.
Fruit Burst
Add diced strawberries, raspberries, or peaches into the cream.
Coffee Kick
Stir in 1 tbsp instant espresso into the cream cheese mix.
The base recipe stays foolproof — just mix, layer, chill, done.
💡 Tips for Perfect Texture
- Use full-fat cream cheese for stability
- Never overbeat whipped cream once peaks form
- Keep ingredients cold to lock in volume
- Double the crust layer if you want more crunch
- Let it rest overnight whenever possible
Icebox cakes reward patience — the longer the chill, the better the slice.
❤️ Why You Will Love This Dessert
This vanilla no-bake cake is:
- Quick to assemble
- Requires no baking or gelatin
- Soft, creamy, and mousse-like
- Crowd-pleasing and elegant
- Beginner-friendly
- Perfect for every season
It tastes like a mix between cheesecake, whipped cream, and frozen pudding — absolute dessert bliss.
✨ Final Thoughts
When you want a dessert that looks impressive but takes minimal effort, nothing beats this No-Bake Vanilla Dream Icebox Cake. With its buttery cookie base, impossibly creamy filling, and rich vanilla aroma, it delivers restaurant-quality flavor with home-kitchen simplicity.