Ingredients You Need
For the Beef Filling
- 500g (1 lb) ground beef
- 1 small onion, finely chopped
- 2 cloves garlic, minced
- ½ tsp cumin
- 1 tsp chili powder
- ½ tsp smoked paprika
- ½ tsp oregano
- Salt & pepper to taste
- ½ cup tomato sauce or salsa
- ½ cup beef broth (optional for moisture)
For the Chimichangas
- 6 large flour tortillas
- 1 ½ cups shredded cheese
(cheddar, Mexican blend, Monterey Jack — any melty cheese works) - Oil for brushing or frying
For Topping
- Sour cream
- Pico de gallo
- Chopped cilantro
- Salsa or hot sauce
- Guacamole (optional but amazing)
Make the Seasoned Beef Filling
This step builds all the flavor — rich, savory and slightly saucy.
- Heat a skillet over medium heat.
- Add the beef and cook until browned, breaking apart with a spoon.
- Drain excess fat if needed.
- Stir in onion and cook until softened.
- Add garlic and cook 1 minute — just until fragrant.
- Sprinkle on cumin, chili powder, paprika, oregano, salt & pepper.
- Stir in tomato sauce (and broth if using).
- Simmer 5–8 minutes until thick and flavorful.
Remove from heat and allow to cool slightly — this helps tortillas stay crisp.
Assemble the Chimichangas
Time to fold up that delicious filling!
- Lay a tortilla flat.
- Spoon a line of beef in the center.
- Add shredded cheese generously (more cheese = better melt 😍).
- Fold both ends inward, then roll tightly like a burrito.
- Place seam-side down.
Repeat for all tortillas.
Cook to Crispy Perfection
You’ve got two options — baked or fried:
Option 1: Oven-Baked (Lighter & Easy)
- Preheat oven to 200°C / 400°F.
- Place chimichangas seam-side down on a baking tray.
- Brush all over with oil or melted butter.
- Bake 18–22 minutes, turning once halfway through.
- Broil last 1–2 minutes for that golden blistered top.
Option 2: Pan-Fried (Ultra Crispy)
- Heat a shallow layer of oil in a skillet.
- Fry chimichangas seam-side down first.
- Turn to crisp all sides.
- Drain briefly on paper towels.
Crispy, flaky, and irresistible either way.
Top, Garnish & Serve
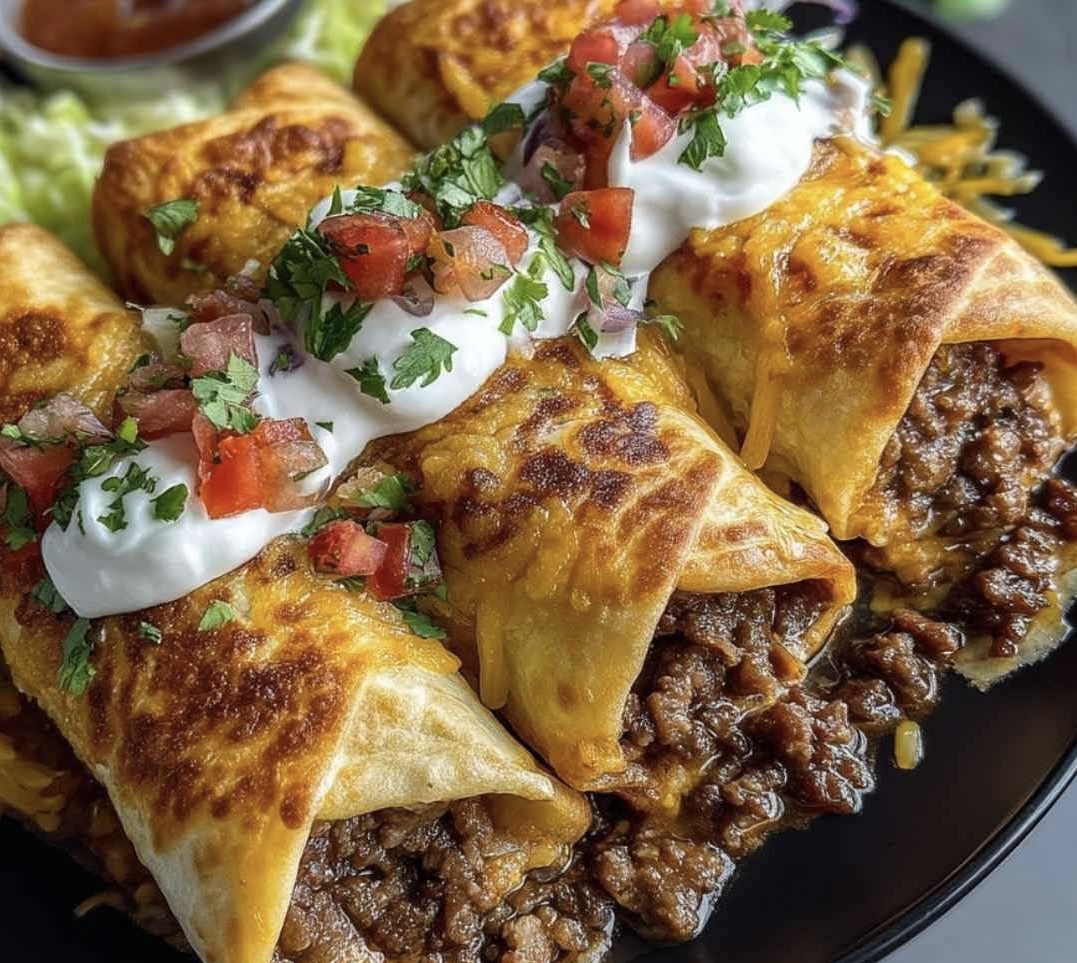
Now load them up just like in the photo 🎉
Top with:
- Sour cream
- Fresh pico de gallo
- Extra cheese
- Cilantro
- Salsa or hot sauce
- Guacamole
Serve with:
- Mexican rice
- Refried beans
- Corn salad
- Tortilla chips
Every bite delivers crunch, beefy goodness, and melty cheese.
Why These Chimichangas Rock
There are SO many reasons you’ll save this recipe:
✔ Crispy outside, juicy inside
✔ Packed with smoky Tex-Mex flavor
✔ Uses budget ingredients
✔ Easy to customize
✔ Kids and adults devour them
✔ Great for parties & weeknights
✔ Freezer-friendly
Restaurant quality without leaving home!
Flavor Variations You Must Try
Switch up the filling — same amazing results!
- Chicken Chimichangas
Use cooked shredded chicken + taco seasoning - Bean & Cheese
Perfect vegetarian version - Steak Strips
Thin-sliced steak + onions + peppers - Cheesy Ranch Beef
Add 2 tbsp ranch to filling - Loaded Veggie
Corn, black beans, peppers + cheese - Spicy Lovers
Add chipotle, jalapeño, cayenne or hot sauce
Endless options = never boring.
Storage & Reheating
Chimichangas are GREAT make-ahead food.
- Fridge: Up to 3 days
- Freezer: Wrap individually and freeze up to 2 months
- Reheat:
- Oven or air fryer: Best results
- Microwave: Works but loses crispiness
Frozen ones can cook straight from freezer — add 5–7 minutes.
Pro Tips for Perfect Chimichangas
- Drain beef well so tortillas stay crisp
- Don’t overfill — they’ll burst
- Seal seam-side down first when cooking
- Add cheese near the edges to glue them closed
- Preheat oven or oil fully before cooking
- Let rest 5 minutes before cutting — heat inside is intense
These small details make a BIG difference.
Final Delicious Word
These Beef and Cheese Chimichangas deliver everything we love about Tex-Mex food — bold spice, melty cheese, crispy tortillas, and toppings that make every bite explode with flavor.